 Nimila

Introduction: The Power of Wall Design Painting
Walls, often overlooked, are the silent storytellers of our homes. They set the stage for our lives, reflecting our personalities, tastes, and aspirations. While furniture and décor play significant roles, it’s the walls that truly define the ambiance of a space. Wall design painting, therefore, is more than just applying color; it’s an art form that can dramatically transform any room, turning it from ordinary to extraordinary.
In this comprehensive guide, we’ll delve into the captivating world of wall design painting, exploring a myriad of ideas, techniques, and inspirations to help you elevate your home. Whether you’re a seasoned DIY enthusiast or a novice looking to add a personal touch, you’ll discover practical tips and creative concepts to unleash your inner artist and create walls that are as unique as you are.
Why Choose Wall Design Painting?
Before we dive into the specifics, let’s understand why wall design painting is such a powerful tool for home improvement.
Personalization and Expression
Wall design painting allows you to express your individuality and create a space that truly reflects your personality. Unlike generic wallpaper or mass-produced art, custom-painted walls are a unique statement that speaks volumes about your taste and style. You have complete control over the colors, patterns, and textures, ensuring that your walls are a perfect representation of who you are.
Enhanced Aesthetics
A well-executed wall design painting can significantly enhance the aesthetics of any room. It can add depth, dimension, and visual interest, making the space feel more inviting and appealing. Whether you opt for bold geometric patterns, subtle ombre effects, or intricate murals, the right wall design can transform a dull room into a vibrant and captivating space.
Cost-Effectiveness
Compared to other home improvement projects, wall design painting is relatively cost-effective. With a few cans of paint, some basic tools, and a little creativity, you can achieve stunning results without breaking the bank. Plus, it’s a DIY-friendly project that you can tackle yourself, saving on professional labor costs.
Increased Home Value
While the primary motivation for wall design painting is often aesthetic, it can also increase the value of your home. A well-designed and well-maintained interior can significantly enhance the appeal of your property to potential buyers. Unique and stylish wall designs can set your home apart from the competition, making it more attractive and desirable.
Exploring Wall Design Painting Ideas
Now that we understand the benefits, let’s explore some exciting wall design painting ideas to inspire your next project.
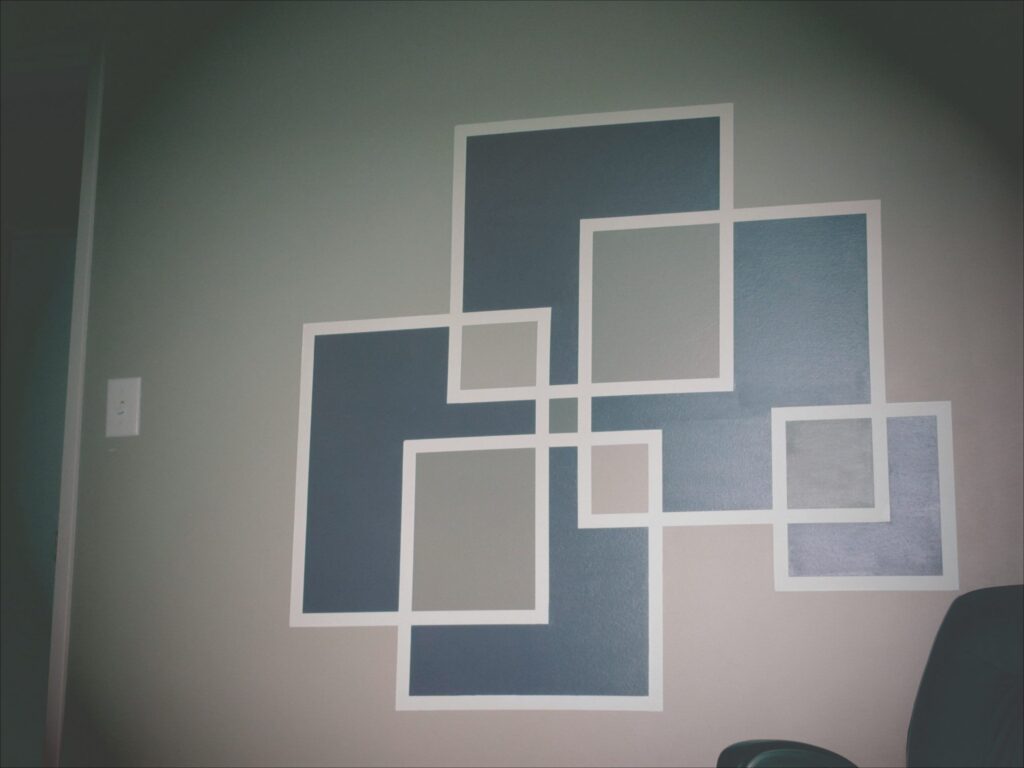
1. Geometric Patterns
Geometric patterns are a timeless and versatile choice for wall design painting. They can add a modern and sophisticated touch to any room, creating a visually stimulating focal point. From simple stripes and chevrons to intricate tessellations and geometric murals, the possibilities are endless.
Tips for Painting Geometric Patterns:
- Plan your design: Before you start painting, sketch out your design on paper or use a digital design tool to visualize the final result.
- Use painter’s tape: Painter’s tape is essential for creating clean, crisp lines. Apply it carefully, ensuring that it’s firmly adhered to the wall.
- Choose contrasting colors: Opt for colors that complement each other and create a visually appealing contrast.
- Work in sections: Divide the wall into sections and work on one section at a time to ensure accuracy and consistency.
2. Ombre Effects
Ombre, derived from the French word for “shaded,” is a technique that involves blending colors gradually, creating a seamless transition from light to dark or vice versa. This effect can add depth and dimension to a wall, creating a soft and dreamy atmosphere.
Tips for Creating Ombre Effects:
- Choose your colors: Select a range of colors that are closely related, such as different shades of the same color.
- Blend the colors: Use a sponge or a brush to blend the colors gradually, creating a smooth transition.
- Work in layers: Apply multiple thin layers of paint to build up the color and create a more subtle effect.
- Practice your technique: Before you start on the wall, practice your ombre technique on a piece of cardboard or paper.
3. Faux Finishes
Faux finishes are painting techniques that mimic the appearance of other materials, such as wood, stone, or fabric. These techniques can add texture and depth to a wall, creating a unique and sophisticated look.
Popular Faux Finish Techniques:
- Rag Rolling: This technique involves rolling a rag over a wet coat of paint, creating a textured effect.
- Sponging: This technique involves dabbing a sponge onto a wet coat of paint, creating a mottled effect.
- Color Washing: This technique involves applying a thin layer of diluted paint over a base coat, creating a soft and textured effect.
- Venetian Plaster: This technique involves applying multiple layers of plaster to create a smooth, marble-like finish.
4. Wall Murals
Wall murals are large-scale paintings that cover an entire wall, creating a dramatic and immersive effect. They can depict anything from landscapes and cityscapes to abstract designs and whimsical scenes. Wall murals are a great way to add a personal touch to your home and create a truly unique space.
Tips for Painting Wall Murals:
- Choose your subject: Select a subject that resonates with you and complements the style of your home.
- Plan your design: Create a detailed sketch of your mural, paying attention to the composition, colors, and details.
- Use a projector: A projector can help you transfer your design onto the wall accurately.
- Work in sections: Divide the wall into sections and work on one section at a time to ensure accuracy and consistency.
5. Stencils and Stamps
Stencils and stamps are a simple and effective way to add patterns and designs to your walls. They are available in a wide variety of styles, from classic motifs to modern geometric shapes. Stencils and stamps are a great option for beginners, as they require minimal skill and effort.
Tips for Using Stencils and Stamps:
- Choose your stencil or stamp: Select a stencil or stamp that complements the style of your home and the overall design of the room.
- Secure the stencil or stamp: Use painter’s tape to secure the stencil or stamp to the wall.
- Apply the paint: Use a stencil brush or a sponge to apply the paint evenly over the stencil or stamp.
- Remove the stencil or stamp: Carefully remove the stencil or stamp, being careful not to smudge the paint.
6. Textured Walls
Adding texture to your walls through painting techniques can create a visually appealing and tactile experience. This goes beyond simply applying a coat of paint; it involves using specific tools and methods to create raised patterns and interesting surfaces. Textured walls can add depth, character, and a unique aesthetic to any room.
Different Texture Painting Techniques:
- Sand Texture: Mixing sand with paint creates a gritty texture that adds a rustic or industrial feel. This is great for accent walls or spaces where you want a natural, earthy vibe.
- Popcorn Texture: While traditionally used to hide imperfections, popcorn texture can be a design choice. It’s best applied by professionals, but can add a retro or quirky touch.
- Orange Peel Texture: This subtle texture resembles the skin of an orange and is achieved by spraying a thin layer of drywall compound onto the wall. It’s a good option for minimizing glare and hiding minor imperfections.
- Knockdown Texture: This technique involves applying a thick layer of drywall compound and then using a trowel to “knock down” the peaks, creating a flattened, textured surface.
7. Color Blocking
Color blocking involves painting large blocks of different colors on a wall to create a bold and modern look. This technique is perfect for adding visual interest and creating a focal point in a room. It’s a great way to play with color and create a dynamic and contemporary space.
Tips for Effective Color Blocking:
- Choose Complementary Colors: Select colors that complement each other or create a striking contrast. Consider using a color wheel to find harmonious combinations.
- Plan Your Layout: Sketch out your design on paper or use a digital tool to visualize the final result. Consider the size and shape of the blocks and how they will interact with the rest of the room.
- Use Painter’s Tape: Apply painter’s tape carefully to create clean, crisp lines. Make sure the tape is firmly adhered to the wall to prevent paint from bleeding.
- Consider the Room’s Purpose: Think about the function of the room when choosing colors. Bold, vibrant colors might be suitable for a living room or playroom, while softer, more muted tones might be better for a bedroom or study.
8. Metallic Accents
Adding metallic accents to your wall design can bring a touch of glamour and sophistication to your space. Metallic paints and finishes can create a luxurious and eye-catching effect, especially when used strategically.
Ways to Incorporate Metallic Accents:
- Metallic Paint: Use metallic paint for an entire wall or to highlight specific areas, such as trim or architectural details.
- Metallic Leafing: Apply gold, silver, or copper leaf to create intricate patterns or accents. This technique adds a rich and opulent look.
- Metallic Stencils: Use stencils with metallic paint to create patterned designs on your walls. This is a great way to add subtle shimmer and visual interest.
- Metallic Wallpaper: Consider using wallpaper with metallic accents to add texture and shine to your walls.
9. Chalkboard Paint
Chalkboard paint is a fun and functional option for creating an interactive wall. It allows you to write, draw, and create temporary designs, making it perfect for kitchens, playrooms, or home offices.
Benefits of Chalkboard Paint:
- Versatility: Use it for writing messages, creating to-do lists, or letting your kids unleash their creativity.
- Easy to Clean: Simply wipe the surface with a damp cloth to erase the chalk.
- Customizable: You can paint an entire wall or just a portion of it, depending on your needs and preferences.
- Fun for All Ages: It’s a great way to engage both kids and adults in creative activities.
10. Sponge Painting
Sponge painting is a simple yet effective technique for adding texture and depth to your walls. It involves using a sponge to apply paint in a random, textured pattern, creating a soft and organic look.
How to Sponge Paint:
- Choose Your Colors: Select two or three colors that complement each other. A lighter base coat and a darker accent color work well.
- Apply the Base Coat: Paint the wall with your base color and let it dry completely.
- Prepare the Sponge: Dampen a natural sea sponge and squeeze out any excess water.
- Apply the Accent Color: Dip the sponge into the accent color and dab it lightly onto the wall. Vary the pressure and angle to create a random pattern.
- Layer the Colors: If using multiple accent colors, apply them in layers, allowing each color to dry slightly before adding the next.
Preparing Your Walls for Painting
Before you start painting, it’s crucial to prepare your walls properly. This will ensure that the paint adheres properly and the final result is smooth and long-lasting.
Cleaning the Walls
Start by cleaning the walls to remove any dirt, dust, or grease. Use a mild detergent and a damp sponge to wipe down the walls, paying attention to areas that are particularly dirty. Rinse the walls with clean water and allow them to dry completely.
Repairing Imperfections
Inspect the walls for any imperfections, such as cracks, holes, or dents. Fill these imperfections with spackle or drywall compound, using a putty knife to smooth the surface. Allow the spackle to dry completely and then sand it smooth with fine-grit sandpaper.
Priming the Walls
Priming the walls is essential for ensuring that the paint adheres properly and the color is uniform. Apply a coat of primer to the walls, using a roller or a brush. Allow the primer to dry completely before you start painting.
Choosing the Right Paint and Tools
Selecting the right paint and tools is crucial for achieving a professional-looking finish.
Types of Paint
There are several types of paint to choose from, each with its own unique properties and characteristics.
- Latex Paint: Latex paint is water-based and easy to clean up. It’s a good choice for most interior walls.
- Oil-Based Paint: Oil-based paint is more durable and provides a smoother finish than latex paint. However, it’s more difficult to clean up and takes longer to dry.
- Acrylic Paint: Acrylic paint is a versatile option that can be used on a variety of surfaces. It’s durable, easy to clean, and available in a wide range of colors.
Paint Finishes
Paint finishes refer to the level of sheen or gloss in the paint.
- Matte Finish: Matte finish has a low sheen and is good for hiding imperfections.
- Eggshell Finish: Eggshell finish has a slightly higher sheen than matte and is more durable.
- Satin Finish: Satin finish has a medium sheen and is easy to clean.
- Semi-Gloss Finish: Semi-gloss finish has a high sheen and is very durable. It’s a good choice for trim and doors.
- Gloss Finish: Gloss finish has the highest sheen and is very durable. It’s a good choice for high-traffic areas.
Essential Tools
Here are some essential tools for wall design painting:
- Paint Rollers: Use paint rollers for applying paint to large surfaces.
- Paint Brushes: Use paint brushes for painting trim, corners, and other small areas.
- Painter’s Tape: Use painter’s tape for creating clean lines and protecting surfaces.
- Paint Trays: Use paint trays for holding paint while you’re working.
- Drop Cloths: Use drop cloths for protecting your floors and furniture.
Tips for Achieving Professional Results
Follow these tips to achieve professional-looking results with your wall design painting project:
- Take Your Time: Don’t rush the process. Take your time to prepare the walls properly and apply the paint evenly.
- Use High-Quality Materials: Invest in high-quality paint and tools. This will make a big difference in the final result.
- Follow the Instructions: Read and follow the instructions on the paint can carefully.
- Work in a Well-Ventilated Area: Make sure the area is well-ventilated to avoid inhaling harmful fumes.
- Clean Up as You Go: Clean up any spills or drips immediately.
Conclusion: Unleash Your Creativity
Wall design painting is a powerful tool for transforming your home and expressing your individuality. With a little creativity and effort, you can create walls that are as unique as you are. So, unleash your inner artist and start exploring the endless possibilities of wall design painting!
From geometric patterns and ombre effects to faux finishes and wall murals, there are countless ways to add personality and style to your walls. By following the tips and techniques outlined in this guide, you can achieve professional-looking results and create a space that you’ll love for years to come. So, gather your supplies, get inspired, and start painting your way to a more beautiful and personalized home!
Remember to consider the overall aesthetic of your home and choose designs and colors that complement your existing décor. Don’t be afraid to experiment and try new things. The most important thing is to have fun and create a space that reflects your unique personality and style.
Whether you’re looking to create a bold statement or a subtle accent, wall design painting offers endless possibilities for transforming your home. So, embrace the opportunity to express your creativity and create walls that are as unique and inspiring as you are.


