Nimila

Introduction: The Allure of Distressed Kitchen Cabinets
In the ever-evolving world of interior design, some trends fade quickly, while others possess an enduring appeal. Distressed kitchen cabinets fall firmly into the latter category. They evoke a sense of history, character, and warmth that perfectly complements a wide range of design styles, from rustic farmhouse to elegant country and even modern industrial. But what exactly does “distressed” mean when it comes to kitchen cabinets, and how can you achieve this sought-after look in your own home?
This comprehensive guide will delve into the nuances of distressed kitchen cabinet finishes, exploring the various techniques, styles, color palettes, and practical considerations involved. Whether you’re planning a full kitchen renovation or simply want to refresh your existing cabinets, you’ll find valuable insights and inspiration to create a space that reflects your unique personality and taste.
Understanding Distressed Finishes: More Than Just Scratches
The term “distressed” encompasses a variety of techniques designed to make new cabinets look aged and worn. It’s about creating the illusion of years of use and exposure to the elements, adding depth and visual interest to the cabinetry. This isn’t simply about haphazardly scratching the surface; it’s a deliberate and artistic process that requires careful planning and execution.
Here’s a breakdown of the key elements that contribute to a successful distressed finish:
- Wear and Tear: Simulating the natural wear that occurs over time, such as worn edges, dents, and scratches.
- Color Variation: Using multiple layers of paint or stain to create a layered and uneven appearance.
- Antiquing Glazes: Applying glazes to highlight details and create a sense of depth and age.
- Dry Brushing: A technique used to add subtle texture and color variation.
- Chipping and Cracking: Creating the appearance of paint that has chipped or cracked over time.
The goal is to create a finish that looks authentic and believable, rather than forced or artificial. A well-executed distressed finish should tell a story, hinting at the history and character of the cabinets.

Exploring Different Distressing Techniques: A Hands-On Approach
Several techniques can be used to achieve a distressed look on kitchen cabinets. Each technique offers a unique aesthetic and level of difficulty, so it’s important to choose the one that best suits your desired style and skill level.
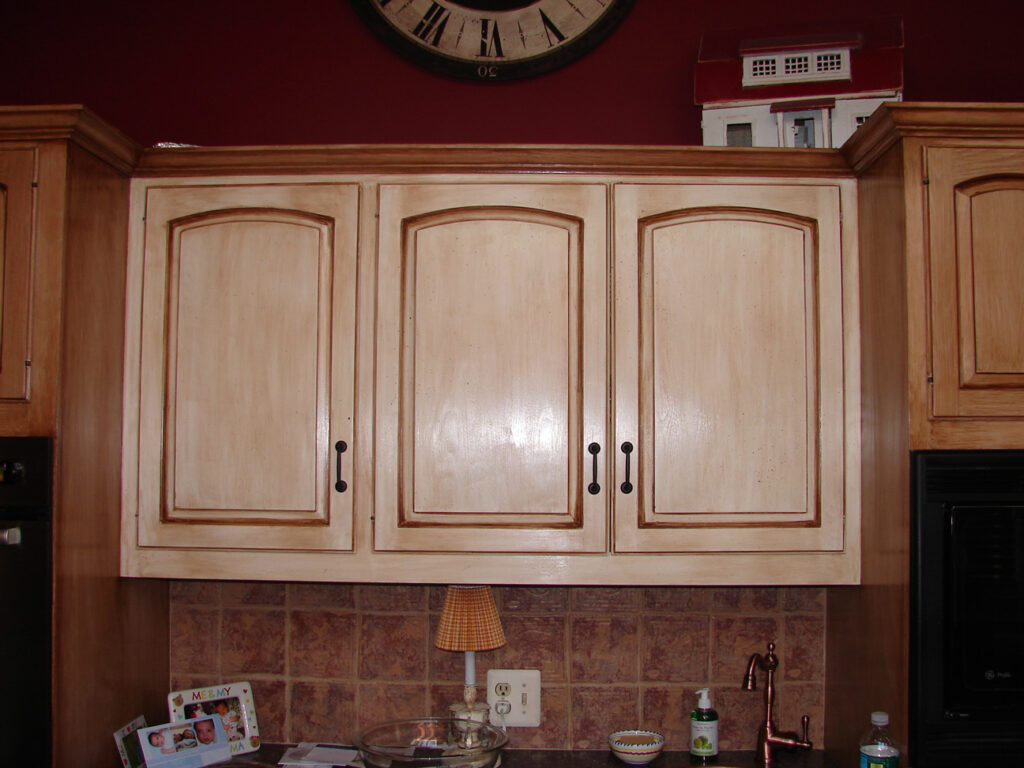
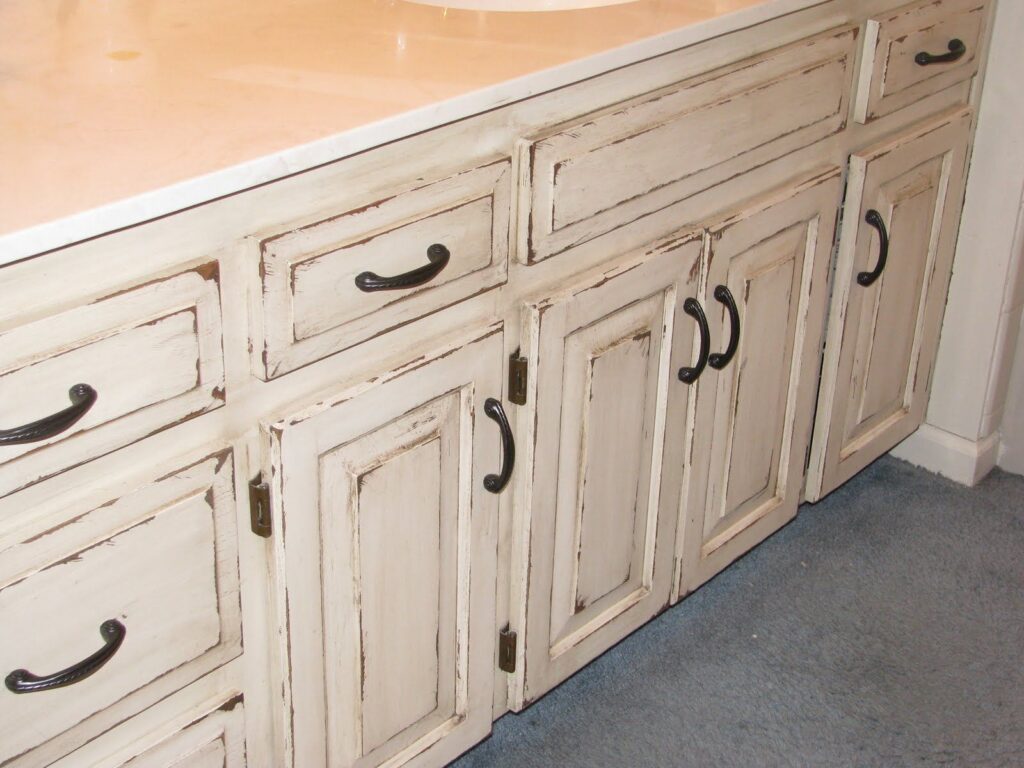
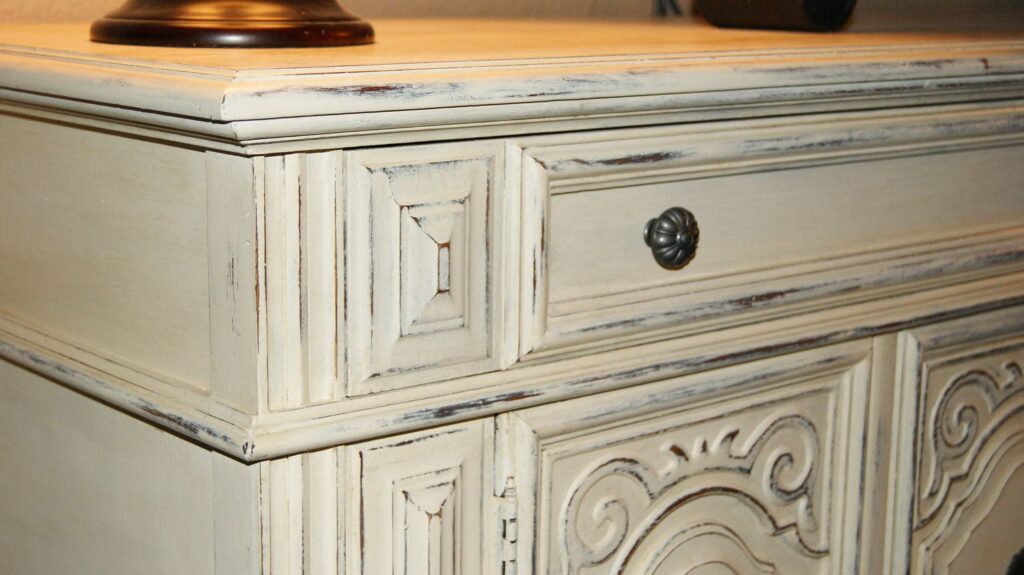
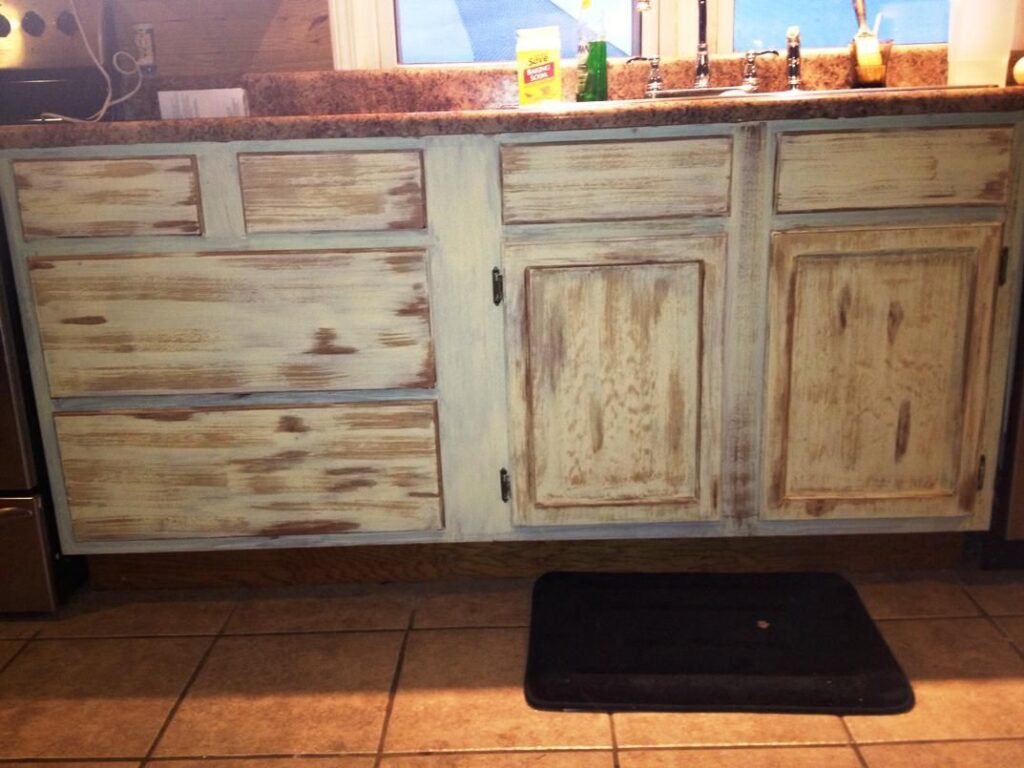
Sanding and Edging: The Foundation of Distressing
This is perhaps the most fundamental distressing technique, involving sanding down the edges and corners of the cabinets to reveal the underlying wood or a contrasting paint color. This creates a worn and aged appearance, as if the cabinets have been rubbed and used over time.
How to do it:
- Prepare the surface: Ensure the cabinets are clean, dry, and free of any loose paint or debris.
- Choose your sandpaper: Start with a medium-grit sandpaper (around 120-grit) and gradually move to a finer grit (around 220-grit) for a smoother finish.
- Sand strategically: Focus on areas that would naturally experience wear and tear, such as edges, corners, and around knobs and handles.
- Control the pressure: Apply even pressure and avoid sanding too aggressively, as this can create an unnatural look.
- Clean up: Remove any sanding dust with a tack cloth or damp rag.
Dry Brushing: Adding Subtle Texture and Color
Dry brushing is a technique that involves applying a small amount of paint to a dry brush and then lightly brushing it across the surface of the cabinets. This creates a subtle texture and adds depth to the finish.
How to do it:
- Choose your paint: Select a paint color that complements the base color of your cabinets.
- Prepare your brush: Use a dry brush with stiff bristles.
- Load the brush: Dip the tip of the brush into the paint and then wipe off the excess on a paper towel. The brush should be almost dry.
- Apply the paint: Lightly brush the paint across the surface of the cabinets, following the grain of the wood.
- Layer the paint: Apply multiple thin layers of paint to build up the desired texture and color.
Glazing: Highlighting Details and Creating Depth
Glazing involves applying a translucent stain or paint to the surface of the cabinets and then wiping it away, leaving the glaze in the crevices and details. This highlights the architectural features of the cabinets and adds depth to the finish.

How to do it:
- Choose your glaze: Select a glaze color that complements the base color of your cabinets.
- Apply the glaze: Apply the glaze to the surface of the cabinets with a brush or rag.
- Wipe away the excess: Use a clean rag to wipe away the excess glaze, leaving it in the crevices and details.
- Control the amount of glaze: Adjust the amount of glaze you wipe away to achieve the desired level of depth and contrast.
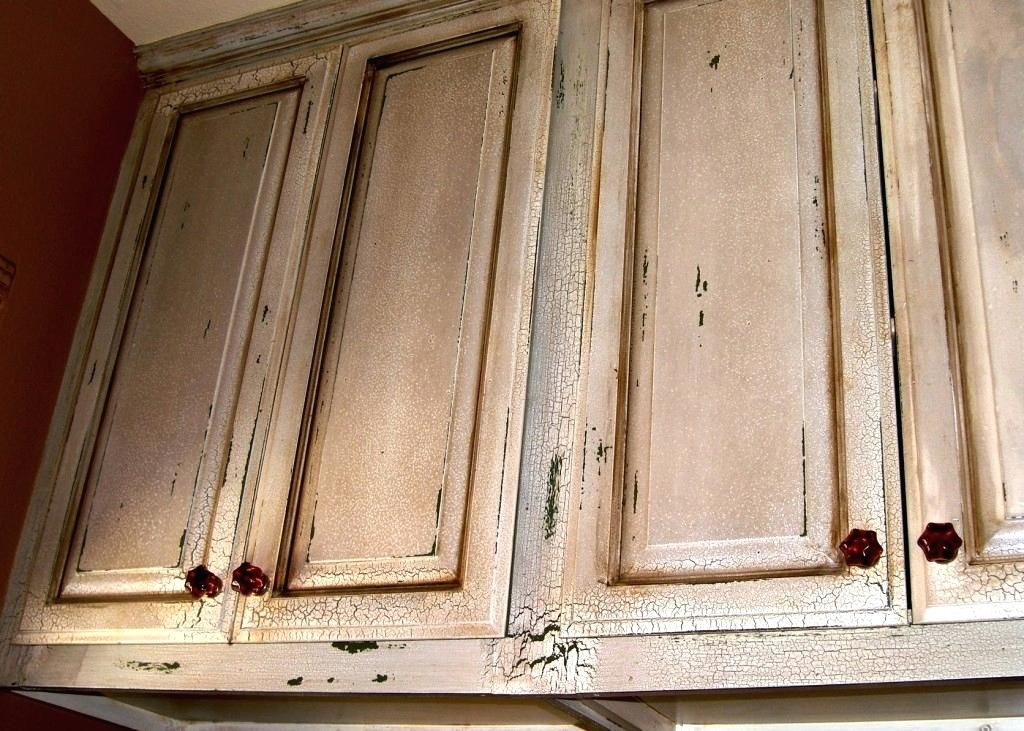
Chipping and Cracking: Creating a Time-Worn Effect
This technique involves creating the appearance of paint that has chipped or cracked over time. This can be achieved using a variety of methods, such as:
- Crackle medium: Apply a crackle medium between two layers of paint. As the top layer of paint dries, it will crack, revealing the underlying layer.
- Hammering: Gently tap the surface of the cabinets with a hammer to create small dents and imperfections.
- Using a putty knife: Scrape the surface of the cabinets with a putty knife to create chips and scratches.
Important Note: This technique should be used sparingly, as too much chipping and cracking can look artificial and detract from the overall aesthetic.
Layering Colors: Building Depth and Character
Layering different paint colors is a great way to create a distressed look with depth and visual interest. This involves applying multiple layers of paint, each with a slightly different color or finish, and then sanding or distressing the layers to reveal the underlying colors.
How to do it:
- Choose your colors: Select a palette of complementary colors that work well together.
- Apply the base coat: Apply a solid base coat of paint to the cabinets.
- Apply the subsequent layers: Apply additional layers of paint, each with a slightly different color or finish.
- Distress the layers: Sand or distress the layers to reveal the underlying colors.
Choosing the Right Color Palette: Setting the Mood
The color palette you choose for your distressed kitchen cabinets will play a significant role in the overall look and feel of your kitchen. Consider the existing décor, the amount of natural light in the room, and your personal preferences when selecting your colors.
Here are some popular color palettes for distressed kitchen cabinets:
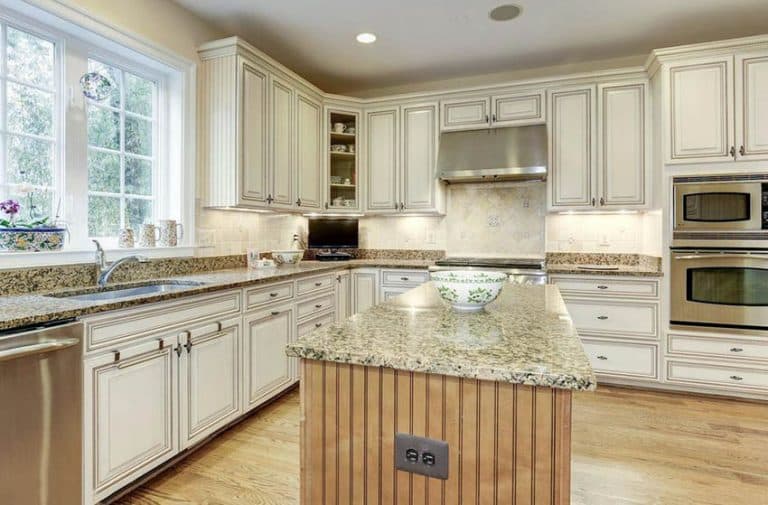
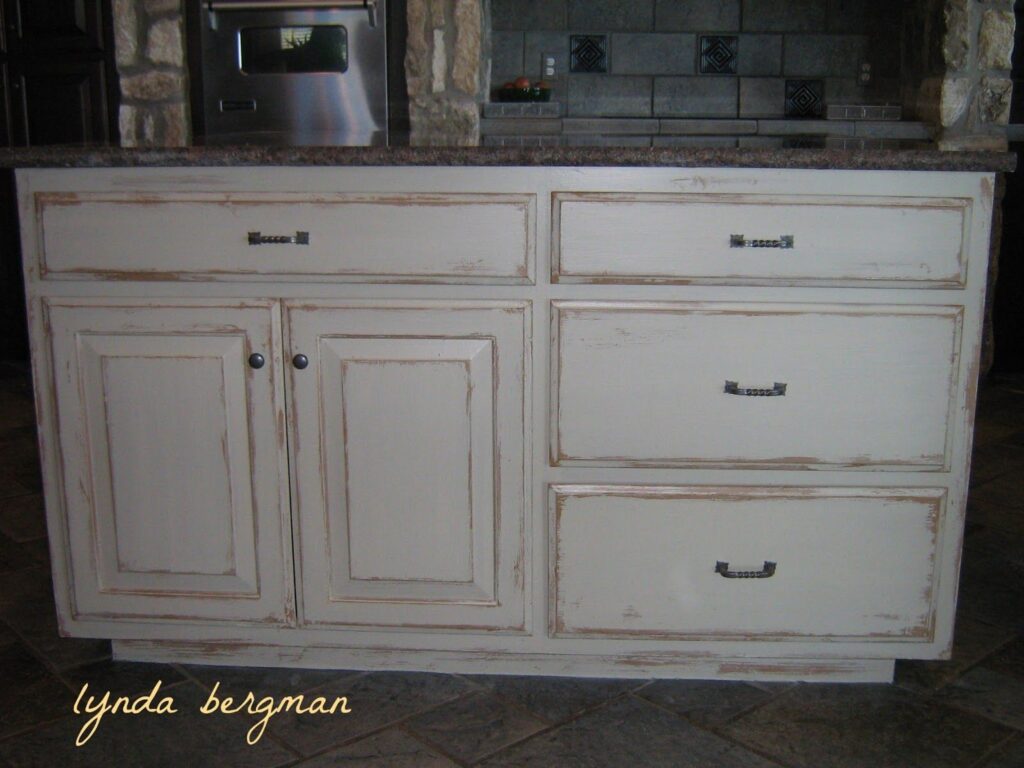
- White and Cream: A classic and versatile choice that creates a bright and airy feel. Distressing white or cream cabinets adds warmth and character to the space.
- Gray and Greige: A sophisticated and modern choice that complements a wide range of design styles. Distressed gray or greige cabinets can create a sense of understated elegance.
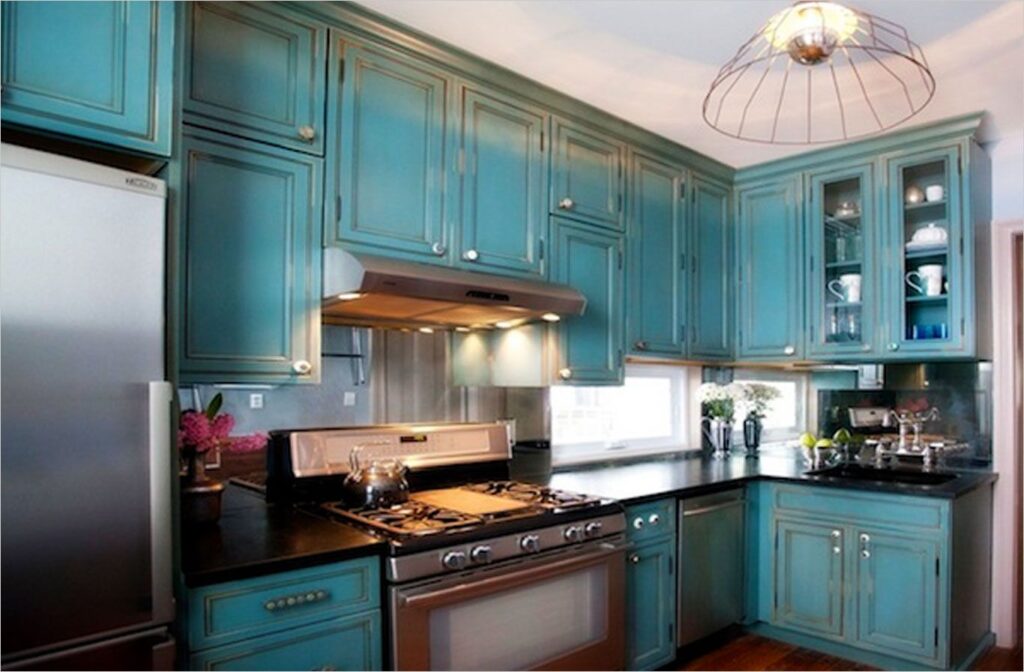
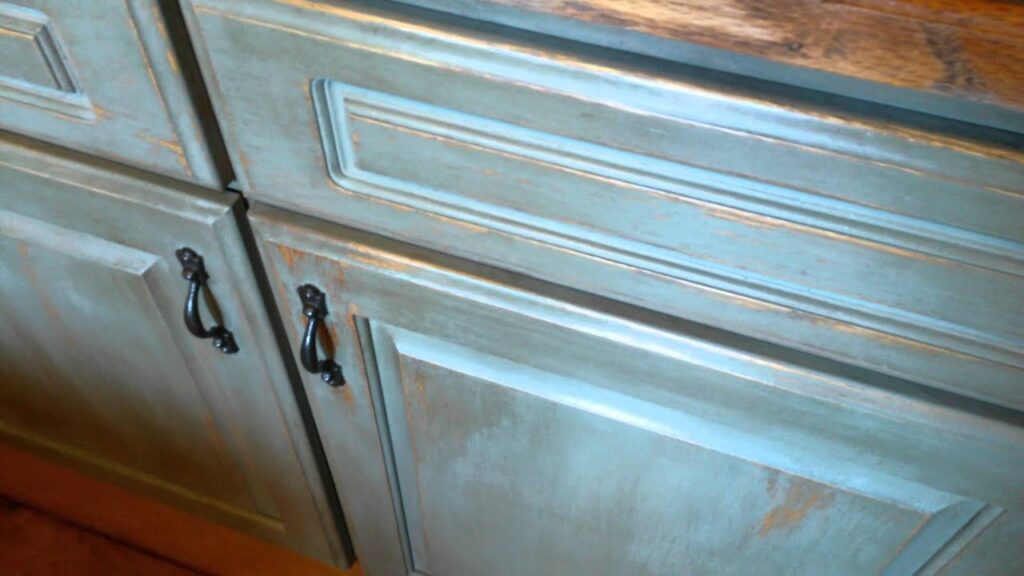
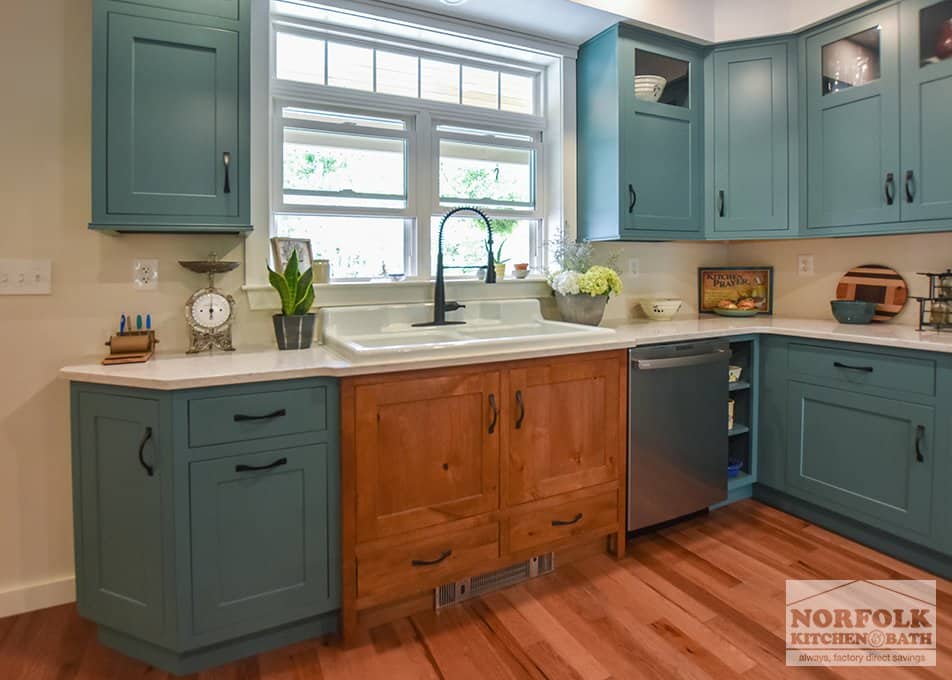
- Blue and Green: A calming and refreshing choice that brings a touch of nature into the kitchen. Distressed blue or green cabinets can evoke a coastal or farmhouse vibe.
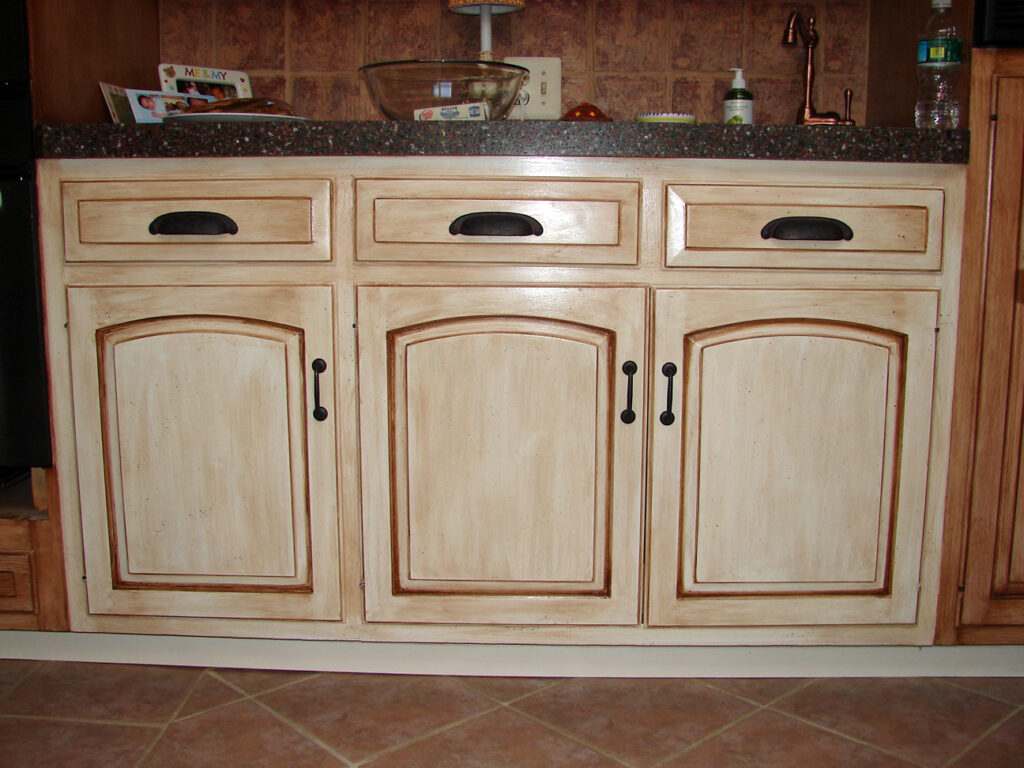
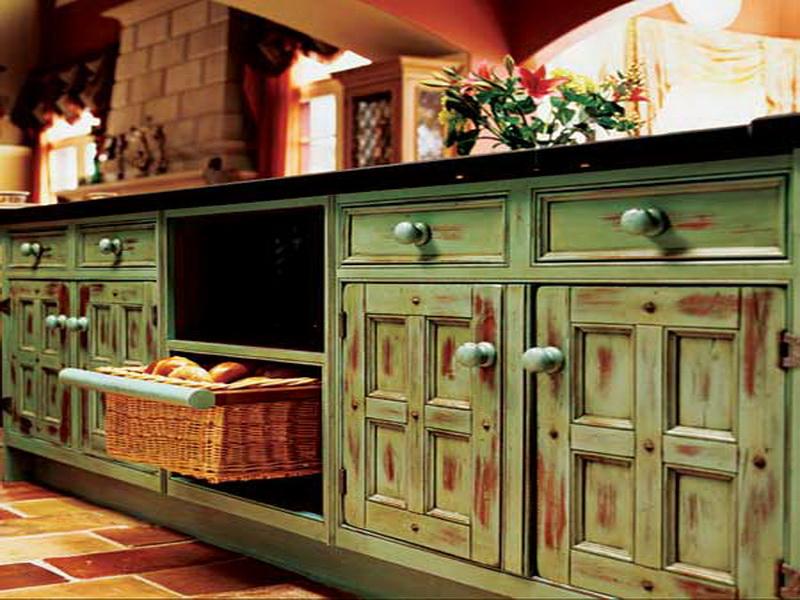
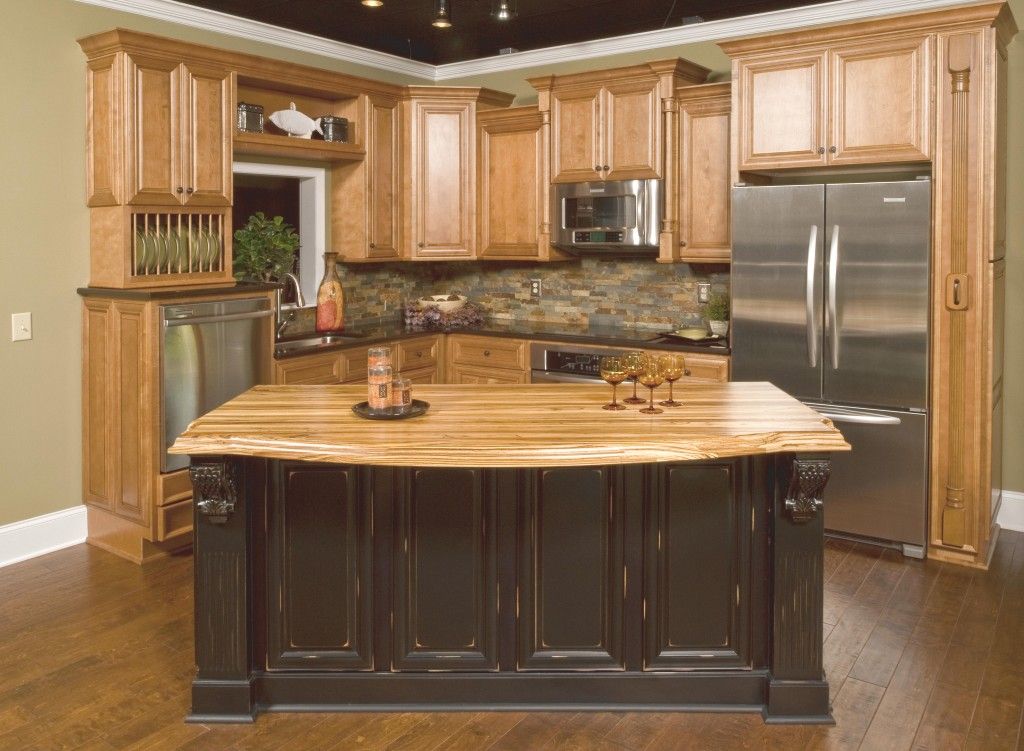
- Warm Neutrals: Earthy tones like beige, taupe, and brown create a cozy and inviting atmosphere. These colors work beautifully with distressed finishes, highlighting the natural wood grain and adding a rustic touch.
- Two-Tone Cabinets: Combining two different colors on your upper and lower cabinets can add visual interest and personality to your kitchen. Consider using a darker color on the bottom cabinets and a lighter color on the top cabinets, or vice versa.
Design Styles That Embrace Distressed Cabinets
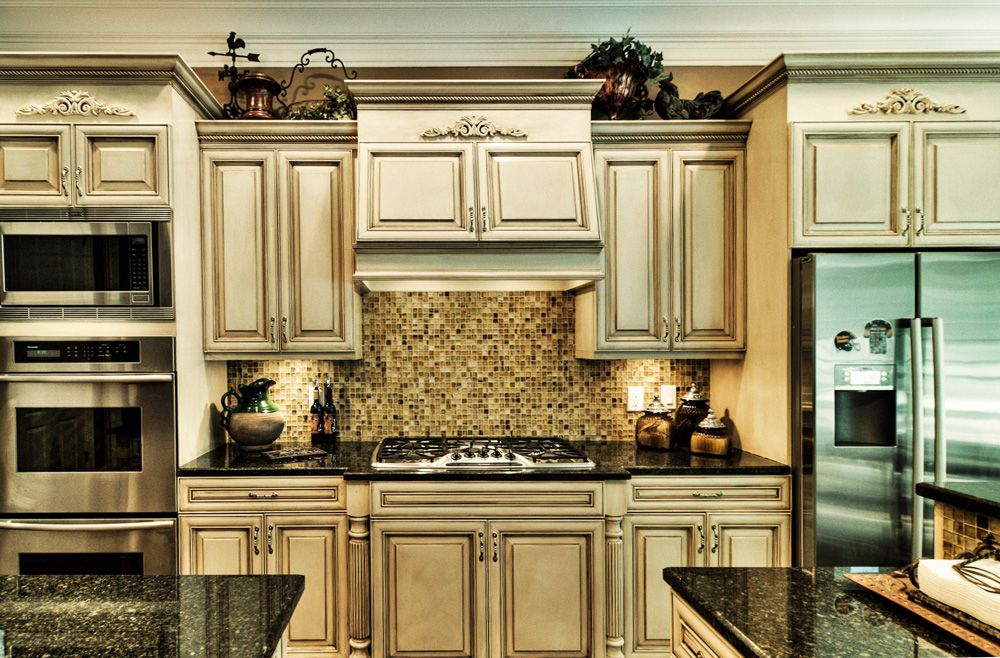
Distressed kitchen cabinets are incredibly versatile and can complement a variety of design styles. Here are a few popular styles that work particularly well with distressed finishes:
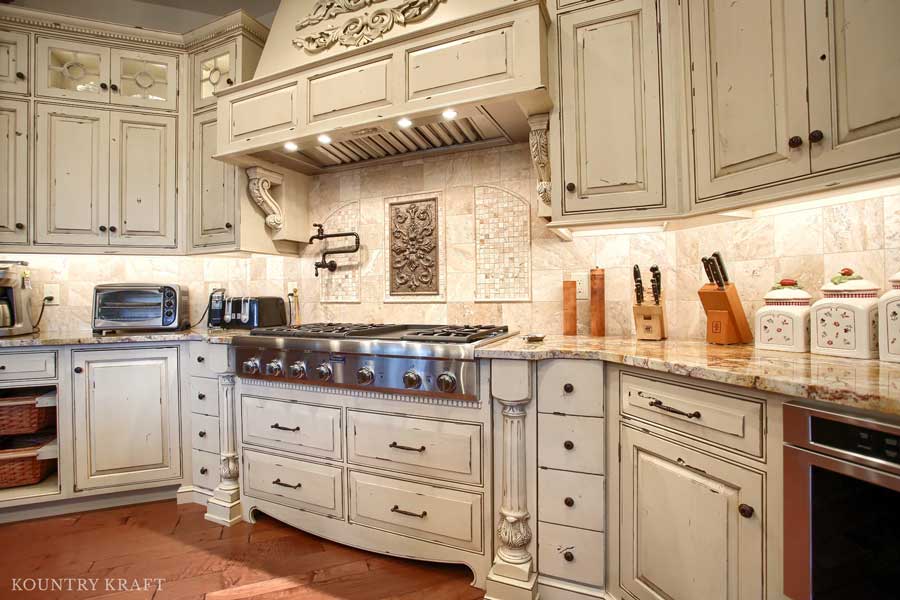
- Farmhouse: Distressed cabinets are a hallmark of farmhouse style, creating a cozy and inviting atmosphere. Pair them with shiplap walls, apron-front sinks, and vintage-inspired hardware.
- Rustic: Distressed cabinets add a sense of authenticity and history to rustic kitchens. Combine them with natural stone countertops, exposed wood beams, and wrought iron accents.
- Country: Distressed cabinets evoke a sense of warmth and charm in country kitchens. Pair them with floral patterns, pastel colors, and antique furniture.
- Shabby Chic: Distressed cabinets are essential to achieving the romantic and whimsical look of shabby chic style. Combine them with soft fabrics, vintage accessories, and plenty of white paint.
- Coastal: Distressed cabinets can create a relaxed and breezy feel in coastal kitchens. Pair them with light colors, natural materials, and nautical-inspired décor.
- Industrial: Distressed cabinets can add a touch of warmth and character to industrial kitchens. Combine them with exposed brick walls, stainless steel appliances, and concrete countertops. The contrast between the raw industrial elements and the aged cabinets creates a unique and stylish look.
Hardware and Accessories: The Finishing Touches
The hardware and accessories you choose for your distressed kitchen cabinets will further enhance the overall aesthetic. Opt for hardware that complements the aged and worn look of the cabinets, such as:
- Antique brass knobs and pulls: These add a touch of vintage charm and complement a wide range of design styles.
- Wrought iron handles: These add a rustic and industrial touch to the cabinets.
- Ceramic knobs: These add a touch of elegance and can be found in a variety of colors and patterns.
- Glass knobs: These add a touch of sparkle and sophistication to the cabinets.
Consider adding other accessories that complement the distressed look, such as:
- Vintage-inspired lighting fixtures: These can add a touch of character and warmth to the kitchen.
- Open shelving: This allows you to display your favorite dishes and accessories.
- A farmhouse sink: This adds a touch of rustic charm to the kitchen.
- Wooden countertops: Butcher block or reclaimed wood countertops complement distressed cabinets beautifully.
DIY vs. Professional Distressing: Weighing Your Options
You have two main options when it comes to distressing your kitchen cabinets: doing it yourself (DIY) or hiring a professional. Each option has its own advantages and disadvantages.
DIY Distressing: The Cost-Effective Approach
Pros:
- Cost-effective: DIY distressing can save you money on labor costs.
- Creative control: You have complete control over the look and feel of the finished product.
- Sense of accomplishment: Completing a DIY project can be very rewarding.
Cons:
- Time-consuming: DIY distressing can be a time-consuming process.
- Requires skill and experience: Achieving a professional-looking distressed finish requires skill and experience.
- Potential for mistakes: It’s easy to make mistakes that can be difficult to fix.
Professional Distressing: The Expert Touch
Pros:
- Professional results: A professional can achieve a high-quality distressed finish that looks authentic and durable.
- Saves time and effort: Hiring a professional frees up your time and energy.
- Guaranteed satisfaction: Most professionals offer a satisfaction guarantee.
Cons:
- More expensive: Hiring a professional is more expensive than doing it yourself.
- Less creative control: You have less control over the look and feel of the finished product.
Ultimately, the best option for you will depend on your budget, skill level, and desired outcome. If you’re on a tight budget and enjoy DIY projects, then distressing your cabinets yourself may be the best choice. However, if you want a professional-looking finish and don’t have the time or skills to do it yourself, then hiring a professional is the way to go.
Protecting Your Distressed Finish: Ensuring Longevity
Once you’ve achieved the perfect distressed finish on your kitchen cabinets, it’s important to protect it to ensure its longevity. Here are a few tips for protecting your distressed finish:
- Apply a clear coat: Applying a clear coat of polyurethane or varnish will protect the finish from scratches, stains, and moisture.
- Clean regularly: Clean your cabinets regularly with a mild soap and water solution. Avoid using harsh chemicals or abrasive cleaners, as these can damage the finish.
- Touch up any damage: If your cabinets get scratched or chipped, touch up the damage as soon as possible to prevent further deterioration.
- Avoid excessive moisture: Wipe up any spills immediately and avoid leaving damp cloths on the surface of the cabinets.
- Use coasters and placemats: Protect your countertops from scratches and stains by using coasters and placemats.
Cost Considerations: Budgeting for Distressed Cabinets
The cost of distressed kitchen cabinets can vary depending on several factors, including:
- The type of wood: Hardwoods like maple and oak are generally more expensive than softwoods like pine.
- The complexity of the distressing technique: More complex techniques, such as layering colors and creating elaborate chipping and cracking, will typically cost more.
- The size of the kitchen: Larger kitchens with more cabinets will naturally cost more.
- Whether you DIY or hire a professional: Hiring a professional will significantly increase the cost.
As a general guideline, expect to pay anywhere from $100 to $500 per linear foot for distressed kitchen cabinets. This cost can vary significantly depending on the factors mentioned above.
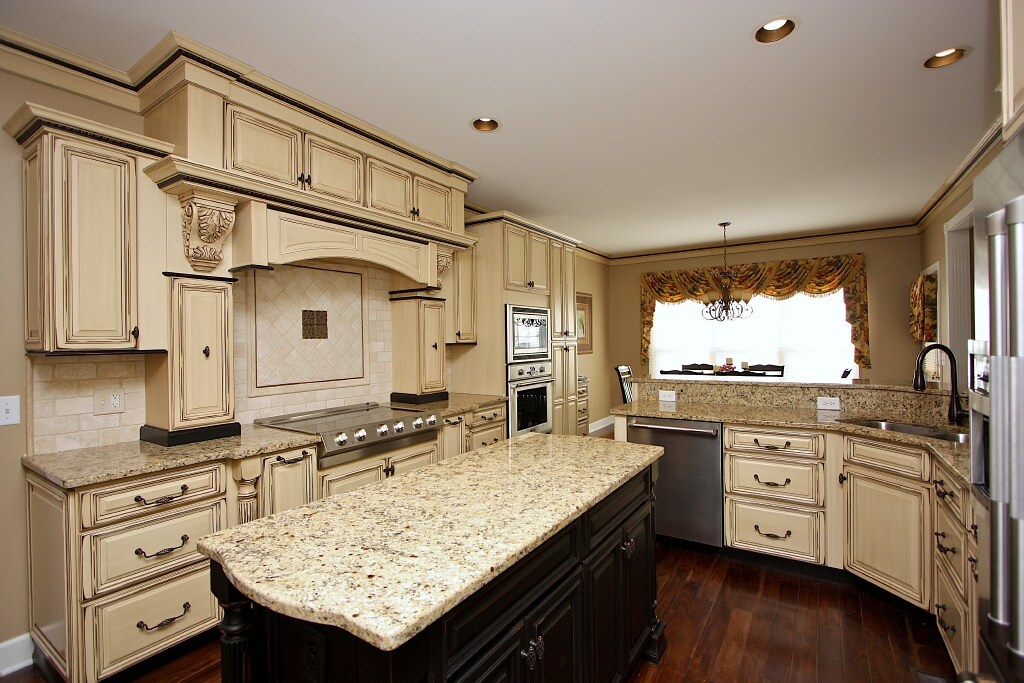
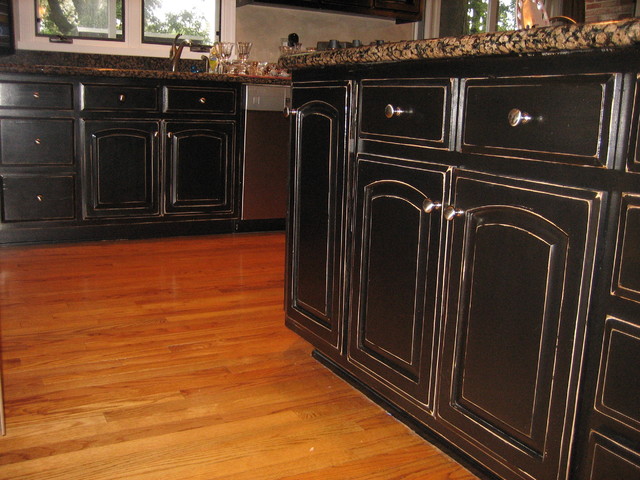
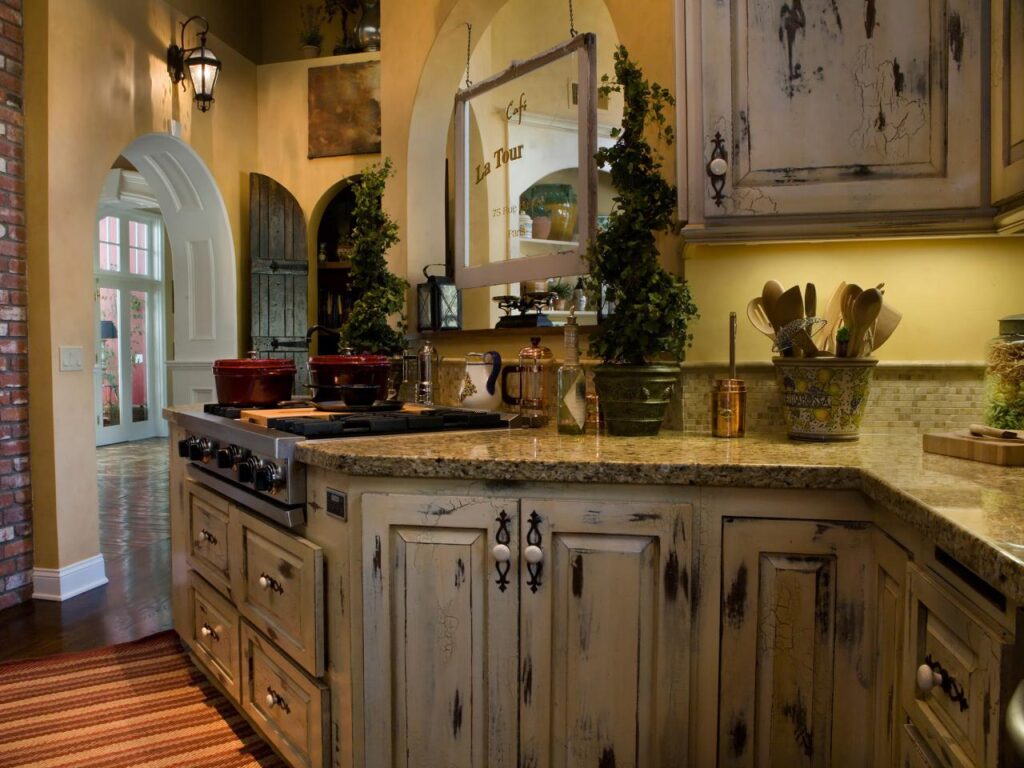
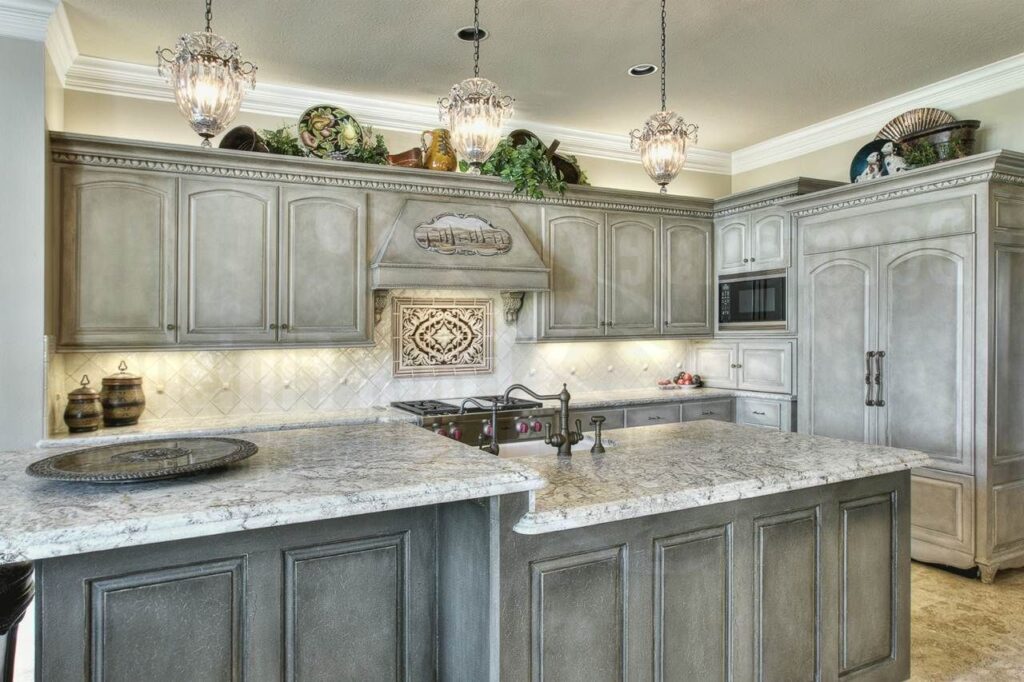
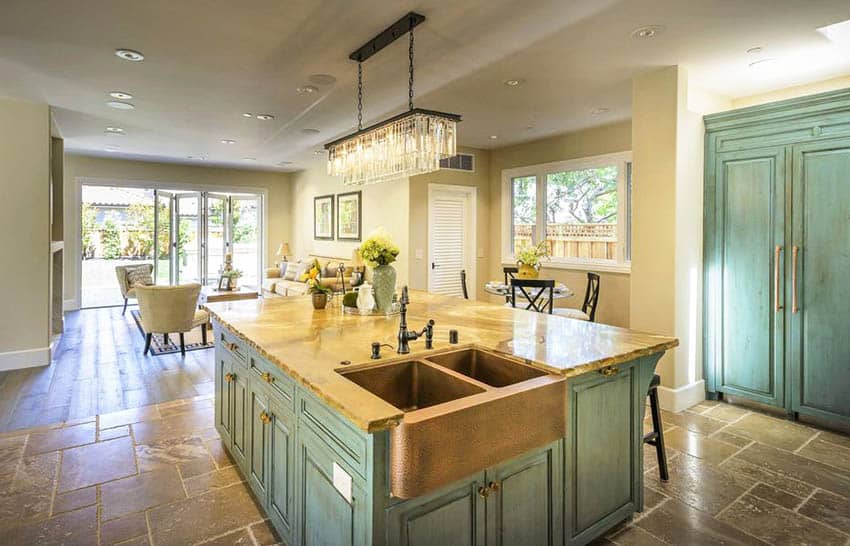
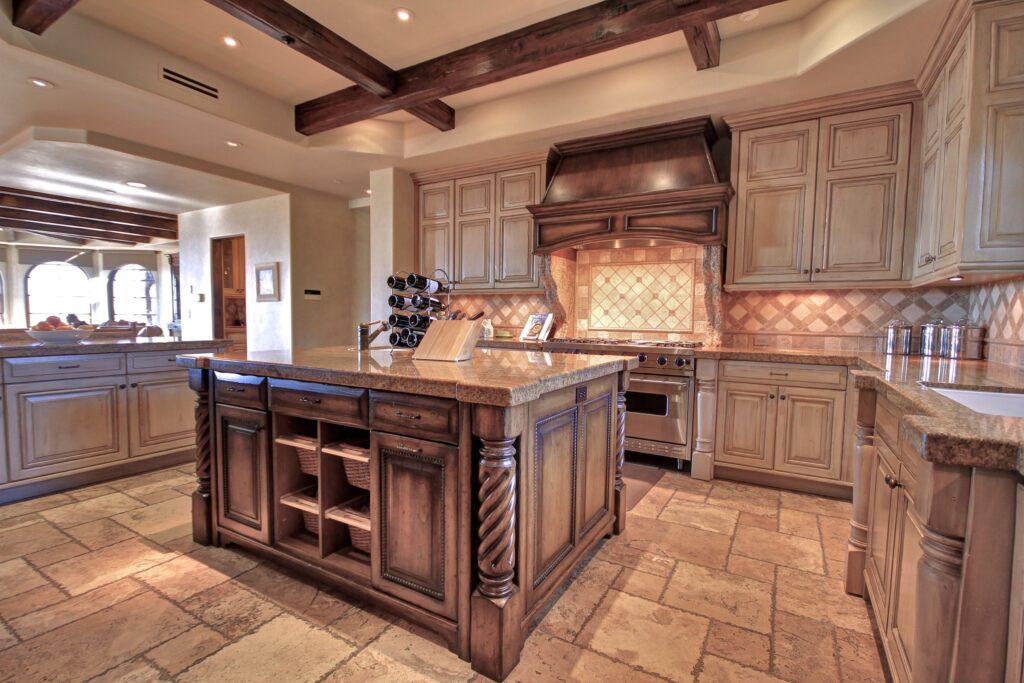
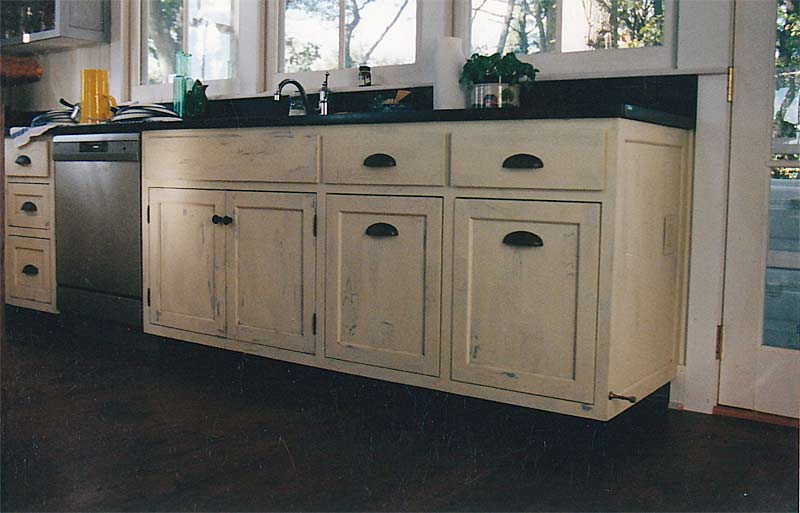
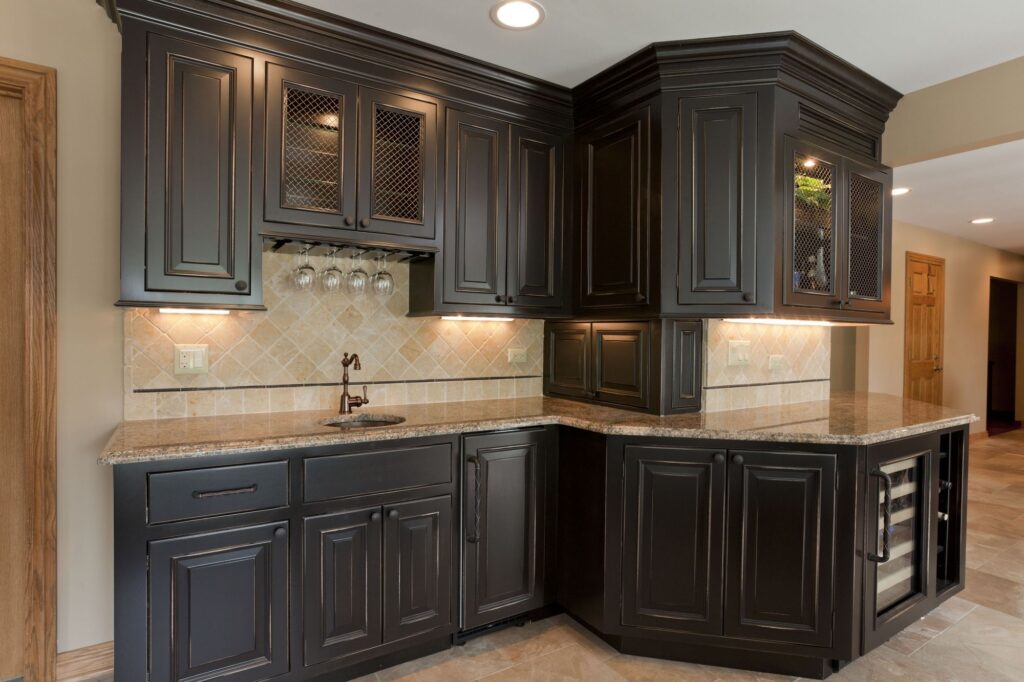
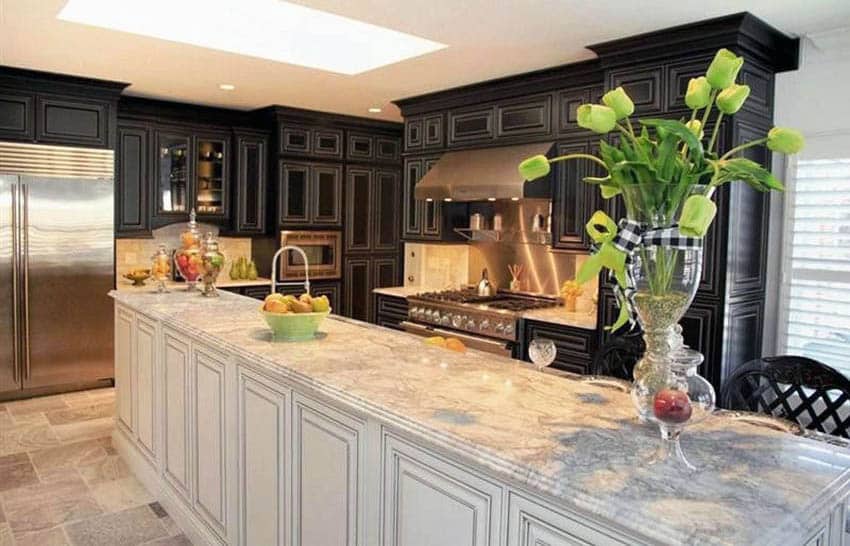
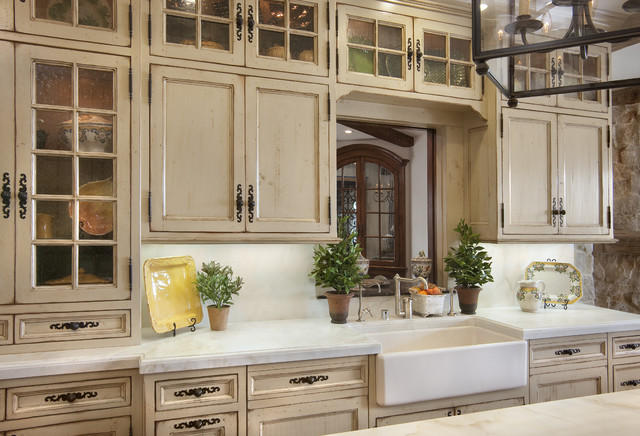
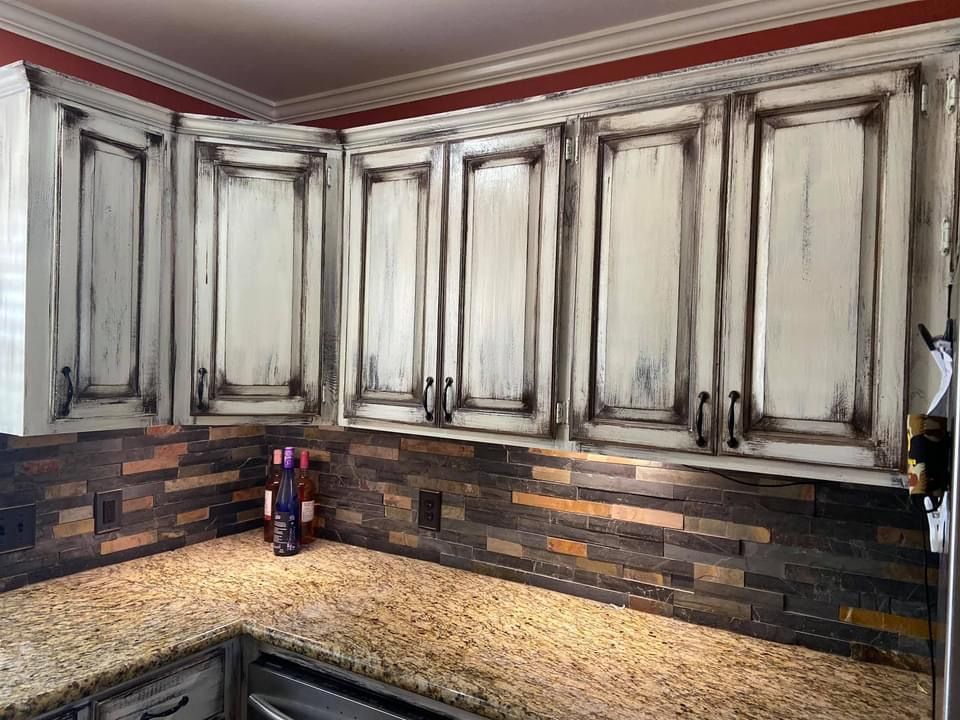
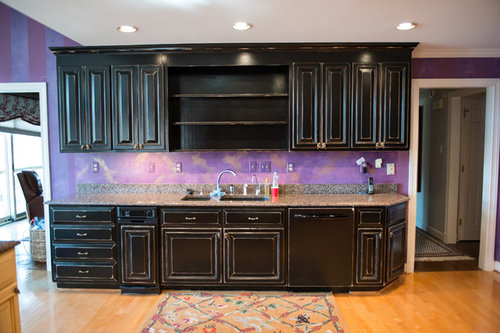
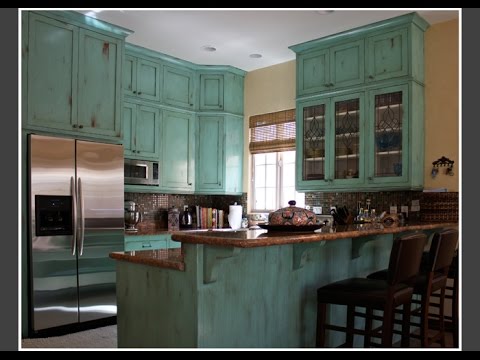
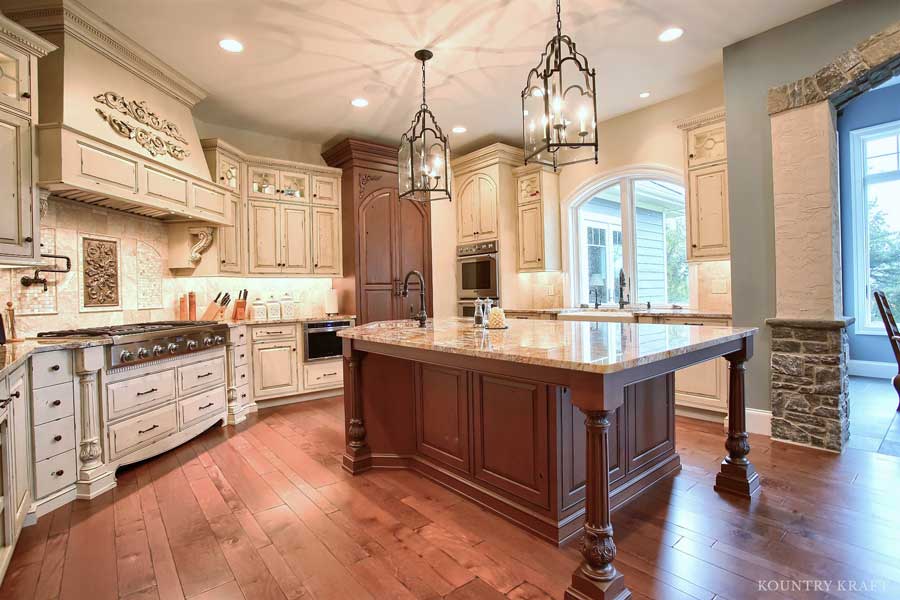
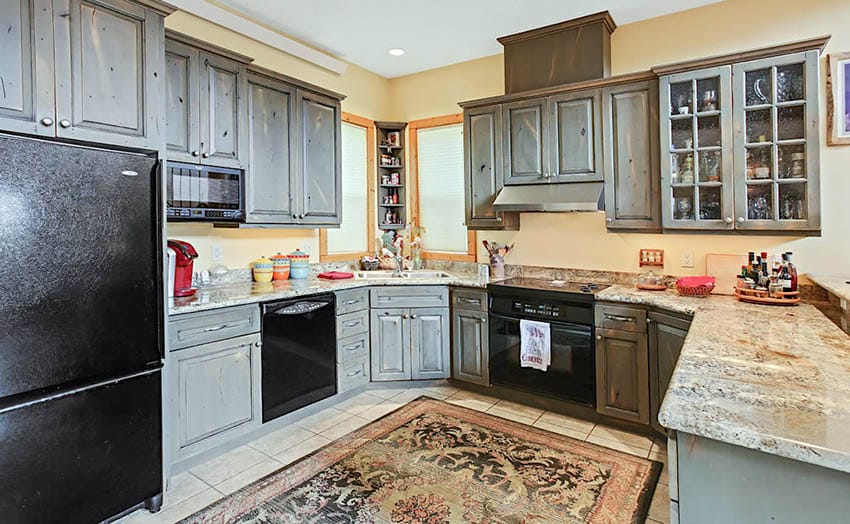
Finding Inspiration: Gallery of Distressed Kitchens
Looking for inspiration? Here are some examples of beautiful kitchens featuring distressed cabinets:
Conclusion: Embracing the Beauty of Imperfection
Distressed kitchen cabinets offer a unique and timeless appeal, adding character, warmth, and history to any kitchen. By understanding the various techniques, styles, and color palettes involved, you can create a space that reflects your personal taste and creates a welcoming atmosphere. Whether you choose to tackle the project yourself or hire a professional, the result will be a kitchen that is both beautiful and functional, a space where you can gather with family and friends for years to come. Embrace the beauty of imperfection and let your distressed kitchen cabinets tell a story!