 Nimila

Introduction: Preserving the Legacy of Your Cast Iron
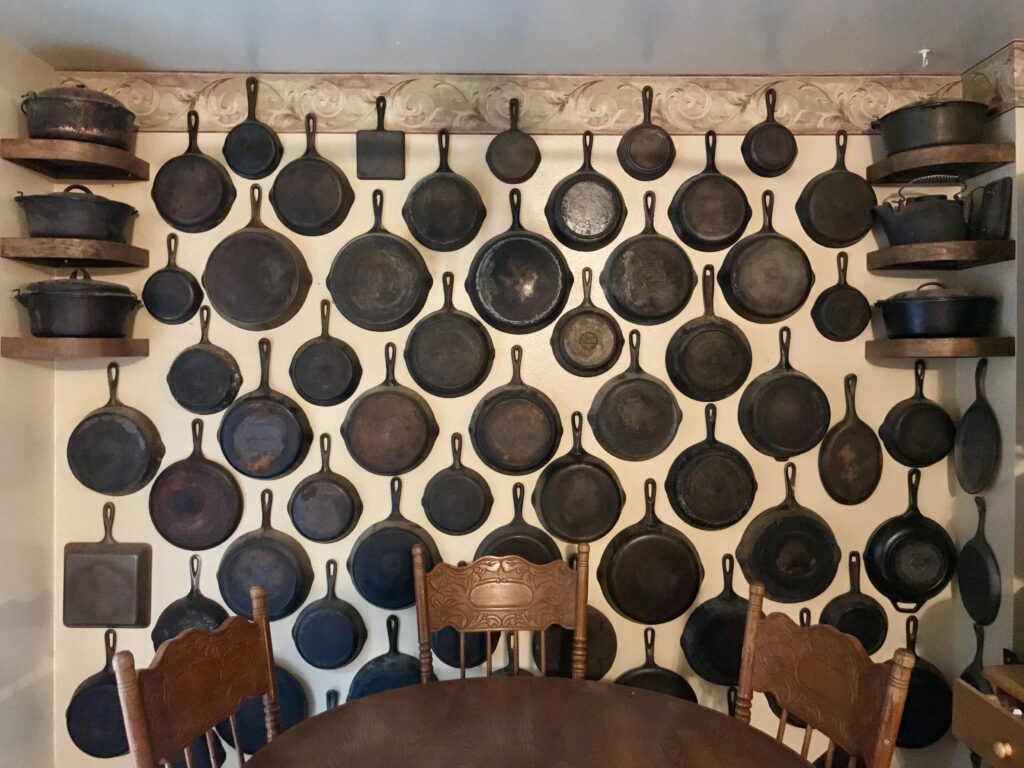
Cast iron cookware. The very words evoke images of hearty meals, crackling fireplaces, and a connection to generations past. These aren’t just pans; they’re heirlooms, vessels that have witnessed countless culinary adventures and, with proper care, will continue to do so for years to come. But unlike your non-stick skillet that you can carelessly toss in a cupboard, cast iron demands a bit more respect, especially when it comes to storage. Improperly stored cast iron can lead to rust, damage to the seasoning, and even cracks, turning your beloved pan into a frustrating eyesore.
This comprehensive guide is designed to be your definitive resource for cast iron cookware storage, ensuring that your investment remains in pristine condition. We’ll cover everything from cleaning and seasoning before storage to various storage methods, dealing with rust, and preventative measures to keep your cast iron ready for its next culinary performance. Think of this as a masterclass in cast iron preservation. Let’s dive in!
Why Proper Cast Iron Storage Matters
Before we get into the ‘how,’ let’s address the ‘why.’ Why is proper storage so critical for cast iron? The answer lies in its unique properties:
- Rust Vulnerability: Cast iron is primarily composed of iron, which, when exposed to moisture and oxygen, forms rust. Rust not only mars the appearance of your cookware but also weakens the metal over time.
- Seasoning Protection: The seasoning, that beautiful, non-stick patina on your cast iron, is a layer of polymerized oil. Improper storage can damage this layer, making your pan sticky and prone to food sticking.
- Preventing Cracks: While cast iron is incredibly durable, sudden temperature changes can cause thermal shock, leading to cracks. Proper storage helps mitigate this risk.
Simply put, neglecting proper storage is like leaving your car out in a hailstorm – preventable damage that will ultimately cost you time and money.
Step 1: Cleaning Your Cast Iron After Use (The Foundation of Good Storage)
The first, and arguably most crucial, step in ensuring proper storage is thorough cleaning. A clean pan is a happy pan. Leaving food residue on your cast iron is an invitation to rust and unwanted odors. Here’s the breakdown:
Immediate Cleaning is Key
Don’t let your cast iron sit dirty overnight! Clean it as soon as it’s cool enough to handle. The longer food sits, the harder it is to remove.
The Gentle Approach: Hot Water and a Scrubber
Often, hot water and a non-abrasive scrubber (like a nylon brush or a chainmail scrubber) are all you need. Avoid harsh soaps, as they can strip away the seasoning. If you must use soap, opt for a mild dish soap and use it sparingly.
Dealing with Stubborn Food Residue
If food is stuck, try these techniques:
- Boiling Water: Add water to the pan and bring it to a boil, scraping gently with a spatula to loosen the debris.
- Salt Scrub: Coarse salt acts as a natural abrasive. Sprinkle salt into the pan and scrub with a paper towel or cloth.
- Baking Soda Paste: Make a paste of baking soda and water and apply it to the affected area. Let it sit for a few minutes before scrubbing.
Avoid the Dishwasher!
We cannot stress this enough: never put your cast iron in the dishwasher. The harsh detergents and high heat will wreak havoc on the seasoning, leaving your pan vulnerable to rust.
Step 2: Drying Your Cast Iron Completely (The Rust Prevention Protocol)
This is perhaps the most important step in preventing rust. Even a tiny bit of moisture left on your cast iron can lead to rust formation. There are two main methods for drying:
Towel Drying: A Good Start, But Not Enough
While drying with a towel seems simple, it often leaves behind residual moisture, especially in the nooks and crannies of the pan. It’s a good starting point, but it needs to be followed by the next method.
Oven Drying: The Gold Standard
This is the most effective way to ensure your cast iron is completely dry:
- Preheat your oven to a low temperature (around 200°F or 93°C).
- Place the cleaned and towel-dried cast iron in the oven, upside down. This allows any remaining moisture to evaporate easily.
- Let it bake for about 15-20 minutes.
- Turn off the oven and let the pan cool completely inside.
Oven drying is particularly crucial in humid climates where air drying takes longer and the risk of rust is higher.
Step 3: Seasoning After Drying (Maintaining the Non-Stick Surface)
After drying, it’s essential to re-season your cast iron. This replenishes the protective layer of polymerized oil and keeps your pan non-stick. Here’s the process:
- Apply a Thin Layer of Oil: Use a high-smoke-point oil like canola oil, vegetable oil, flaxseed oil (though flaxseed oil can be tricky), or shortening. Apply a very thin layer to the entire surface of the pan, inside and out. The key here is *thin*. Too much oil will lead to a sticky, gummy finish. Use a clean cloth or paper towel to wipe away any excess oil. You want the pan to look almost dry.
- Bake It: Place the oiled cast iron in the preheated oven (around 350-400°F or 175-200°C), upside down, with a baking sheet lined with foil on the rack below to catch any drips.
- Bake for an Hour: Let the pan bake for about an hour. This allows the oil to polymerize and create a hard, durable coating.
- Cool Down: Turn off the oven and let the pan cool completely inside.
Regular seasoning, especially after each cleaning, will keep your cast iron in top condition. You can also season your cast iron on the stovetop by heating it over medium heat, applying a thin layer of oil, and then wiping away the excess. Repeat this process several times until the pan is evenly seasoned.
Cast Iron Cookware Storage Methods: Finding the Right Fit for Your Kitchen
Now that your cast iron is clean, dry, and seasoned, it’s time to choose the right storage method. The best method depends on your kitchen space, the number of cast iron pieces you own, and your personal preferences. Here are several options to consider:
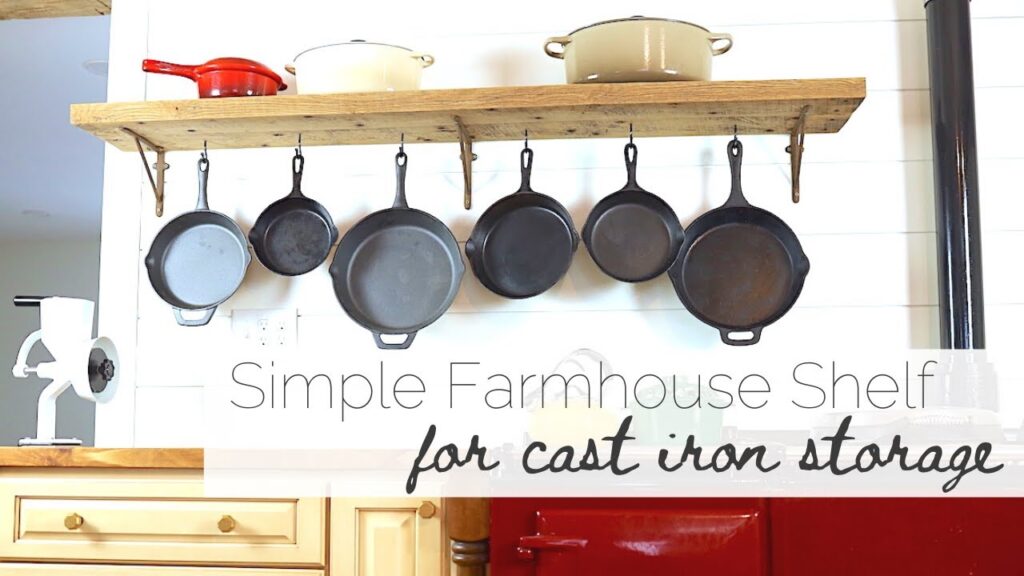
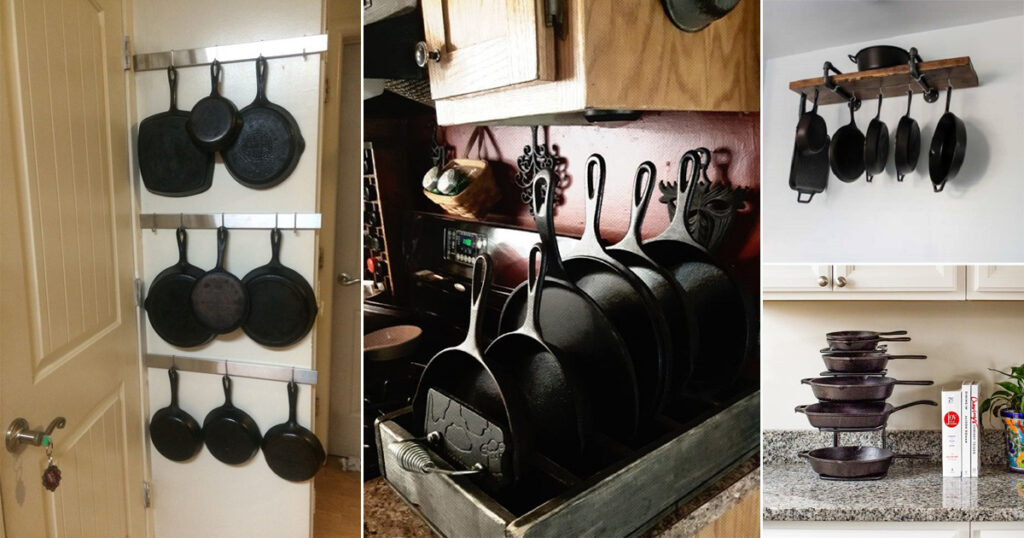
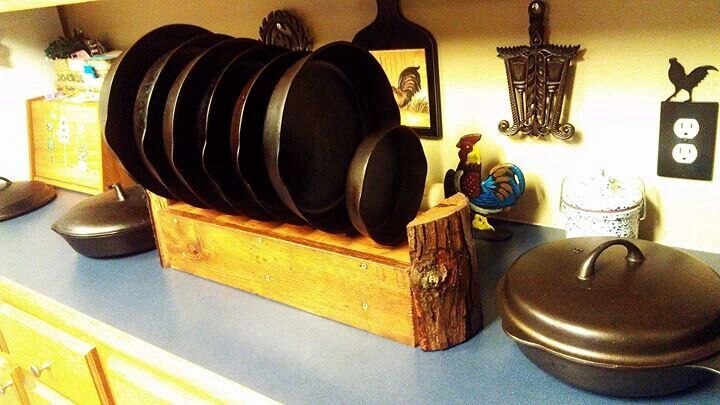
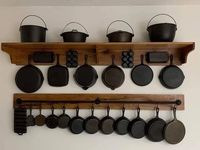
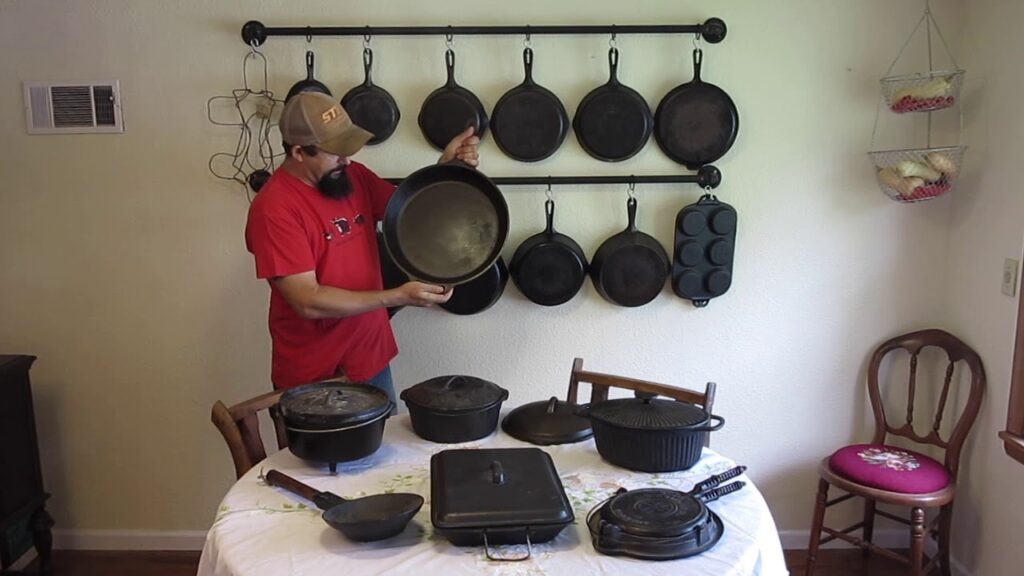
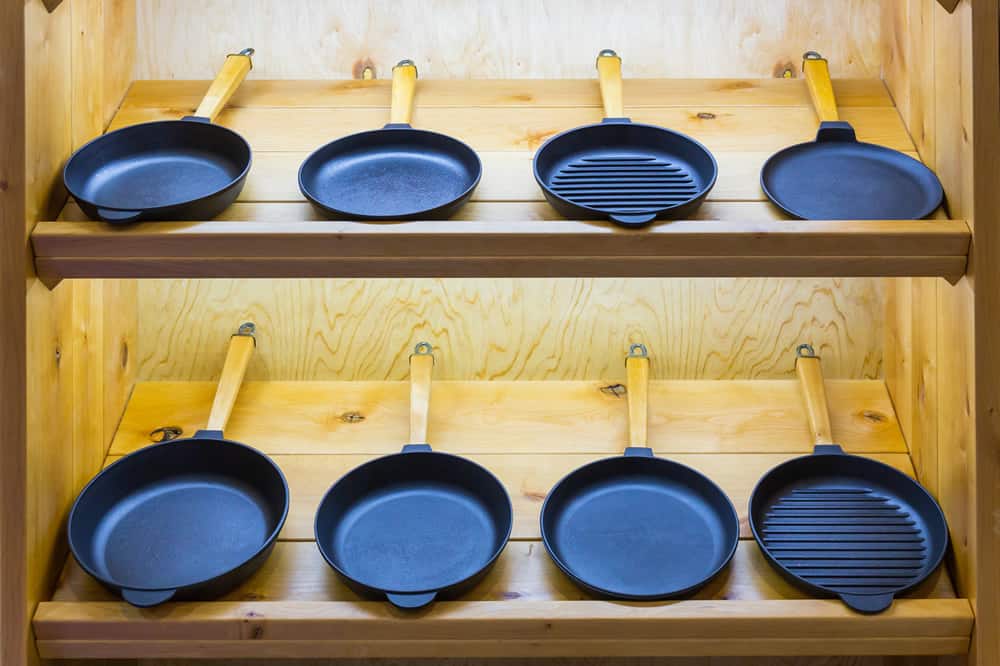
1. Open Shelving: Displaying Your Collection
For those who love to showcase their cast iron collection, open shelving is an excellent option. It allows you to admire your pans while keeping them readily accessible.
- Pros: Visually appealing, easy access, promotes air circulation.
- Cons: Can collect dust, requires more frequent cleaning, takes up wall space.
To prevent dust accumulation, consider wiping down your pans regularly. You can also use a lint-free cloth to cover them loosely.
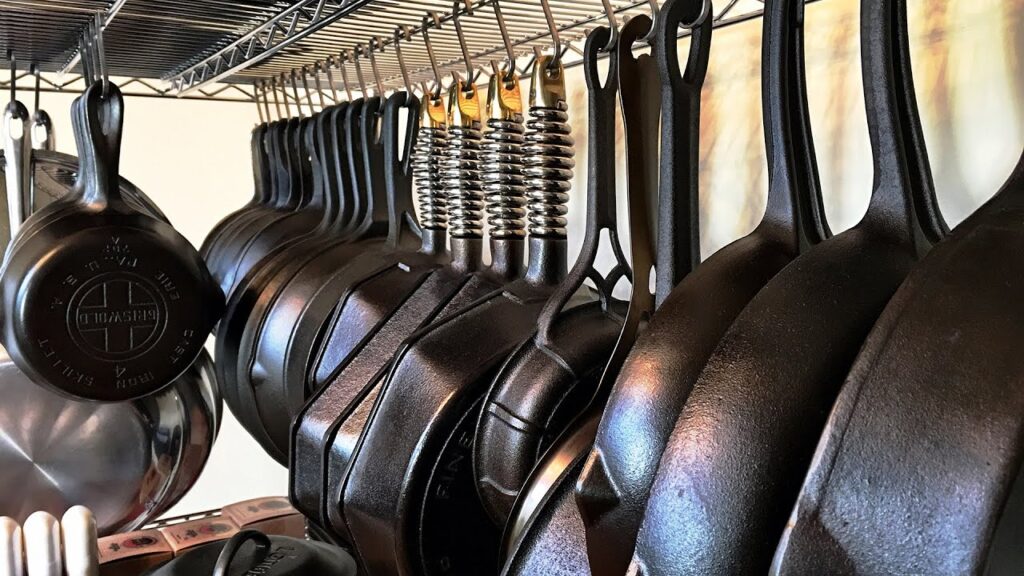
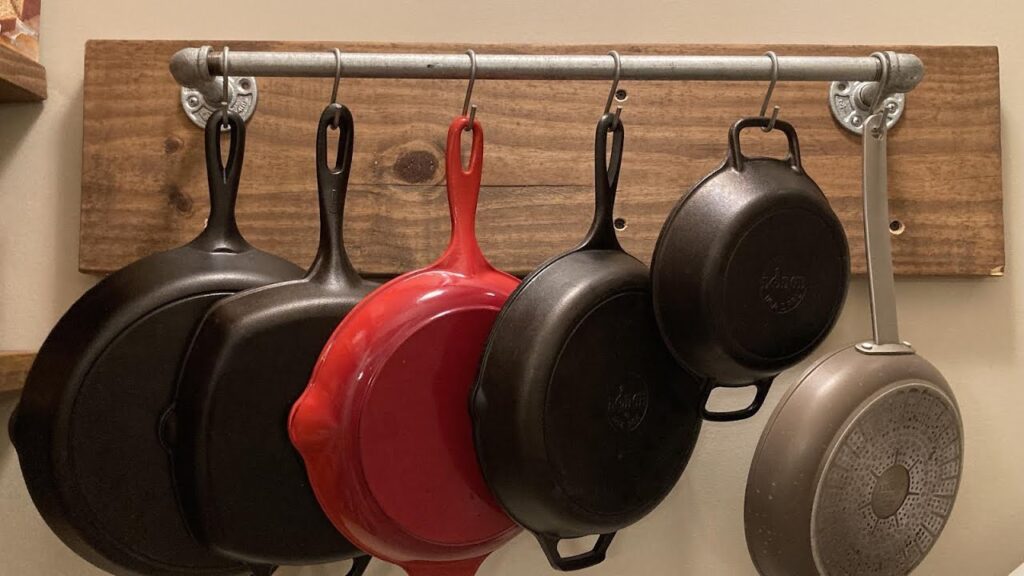
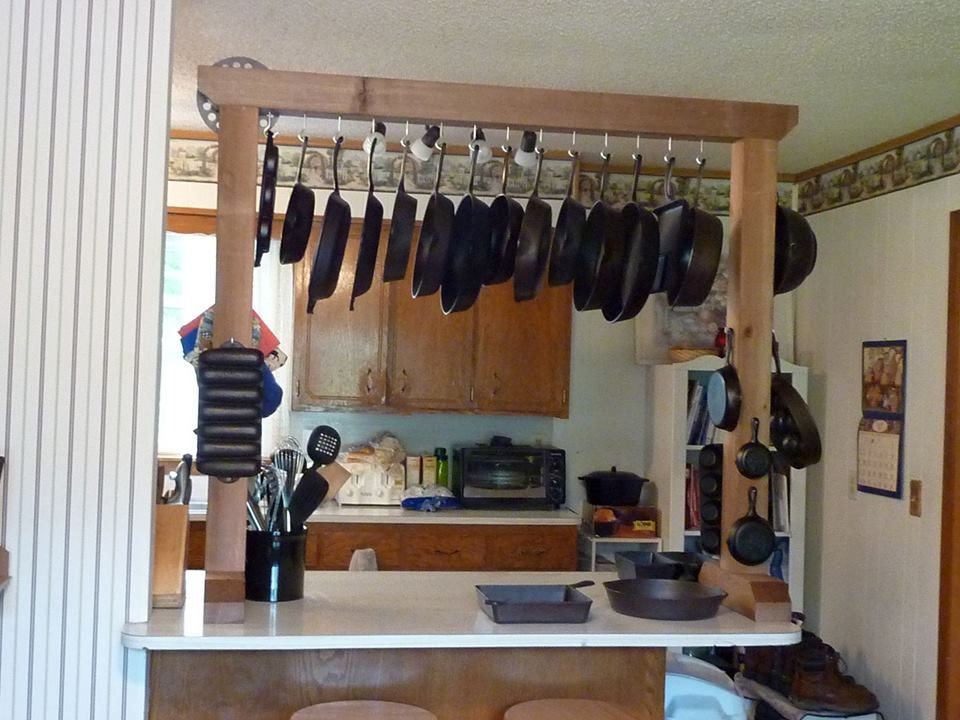
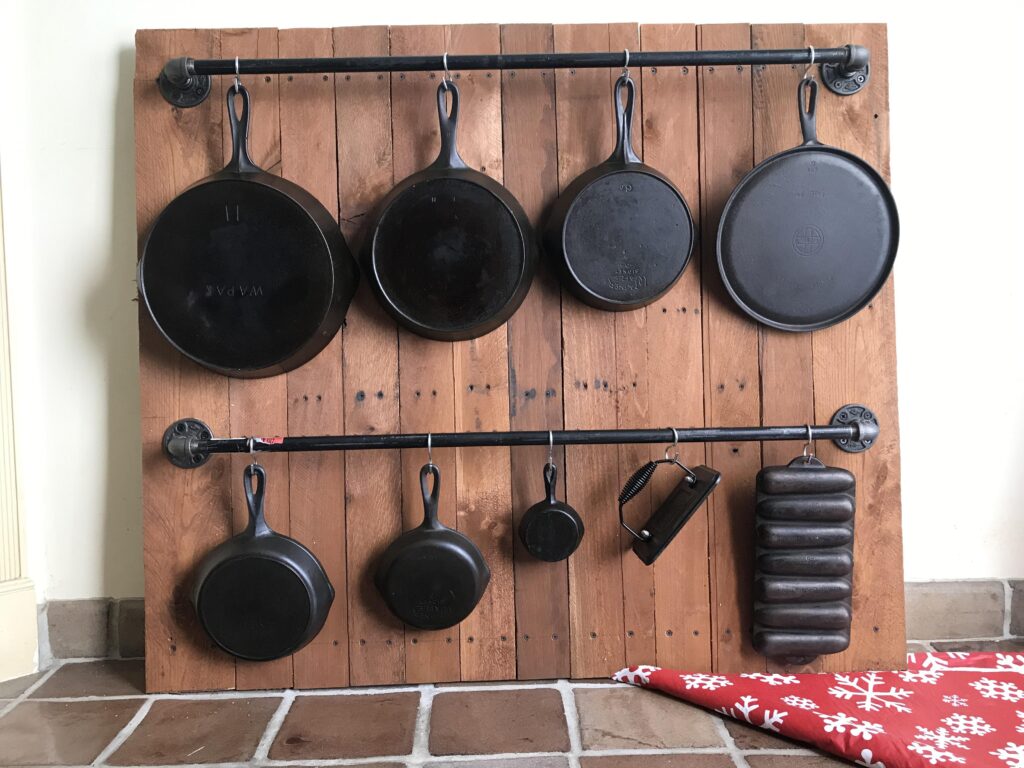
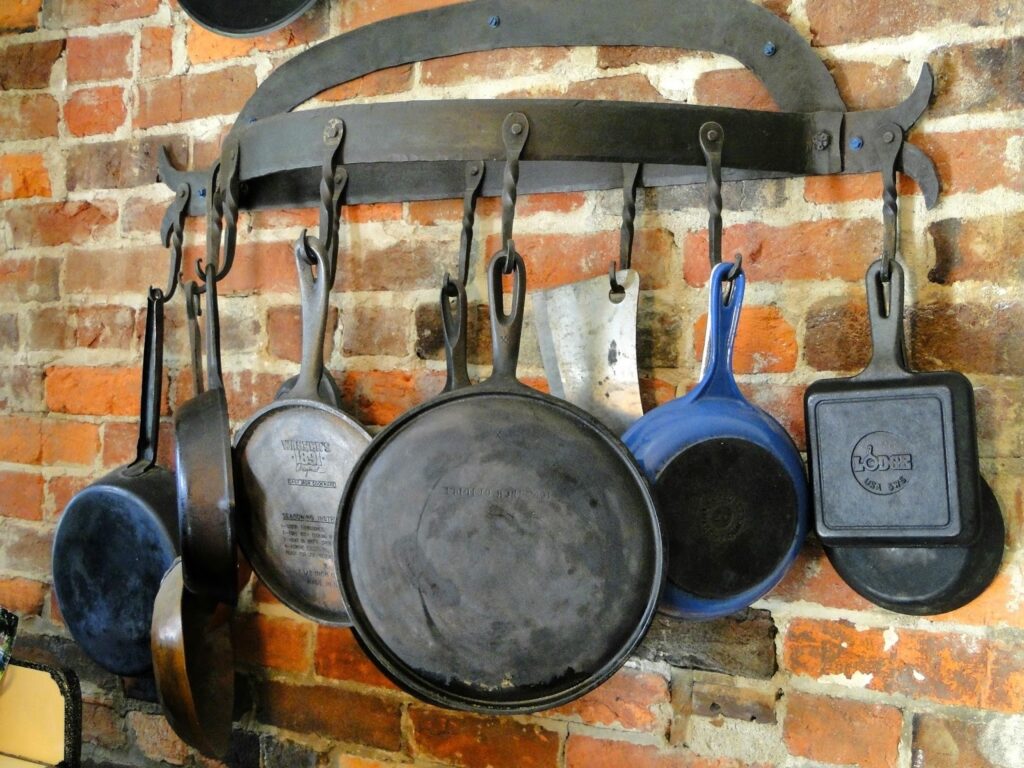
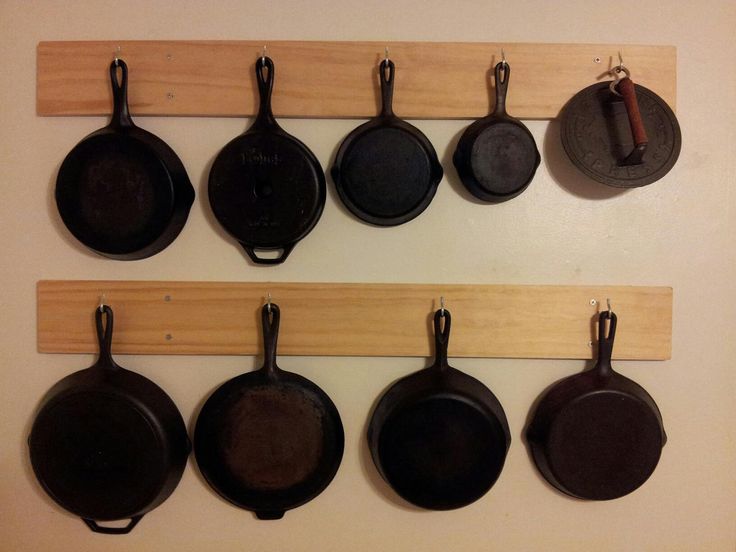
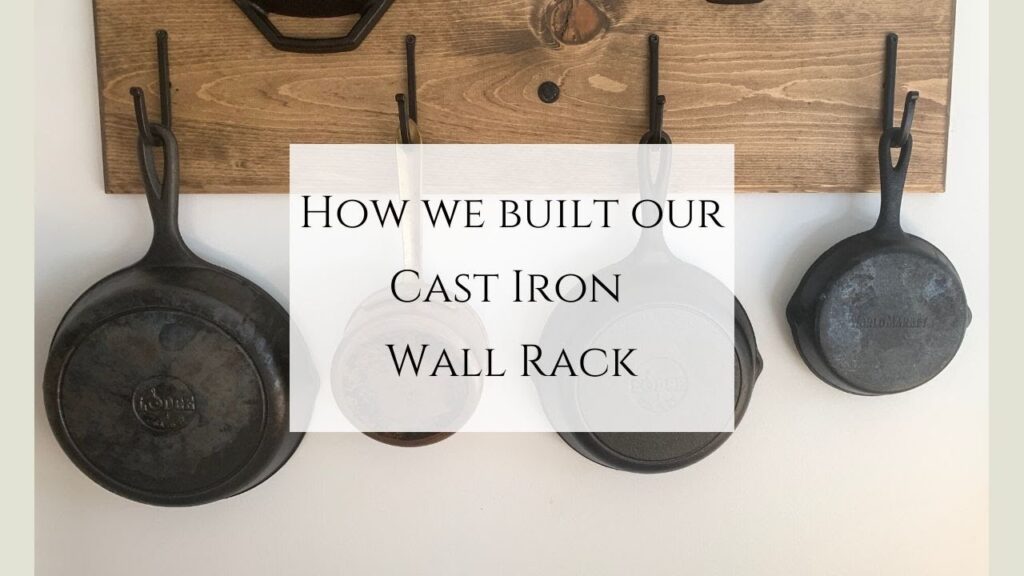
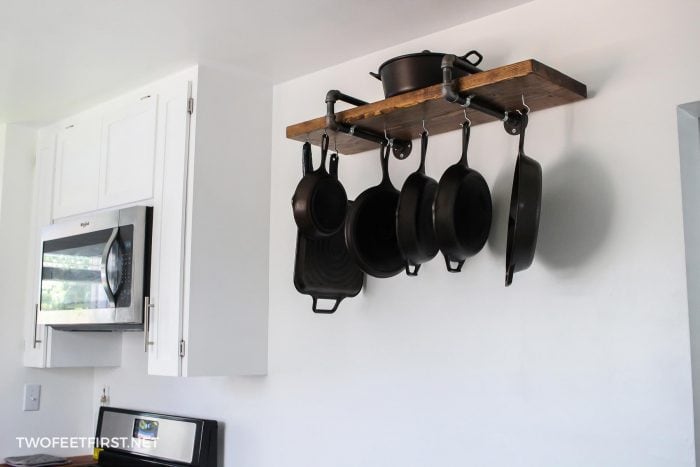
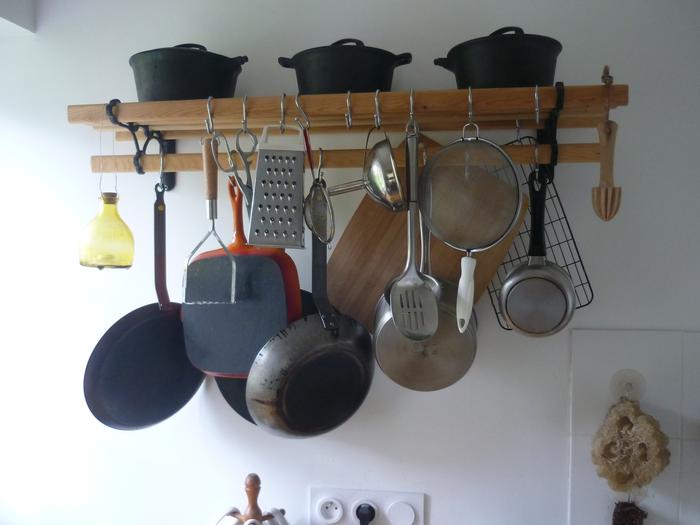
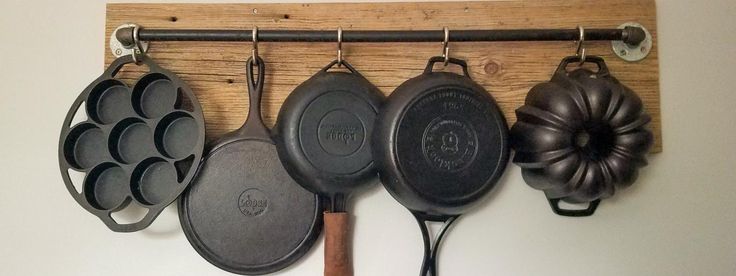
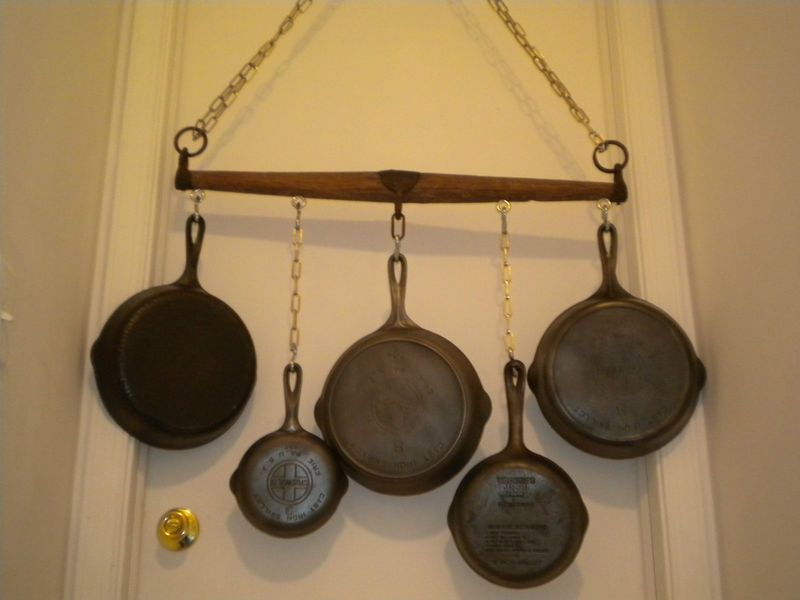
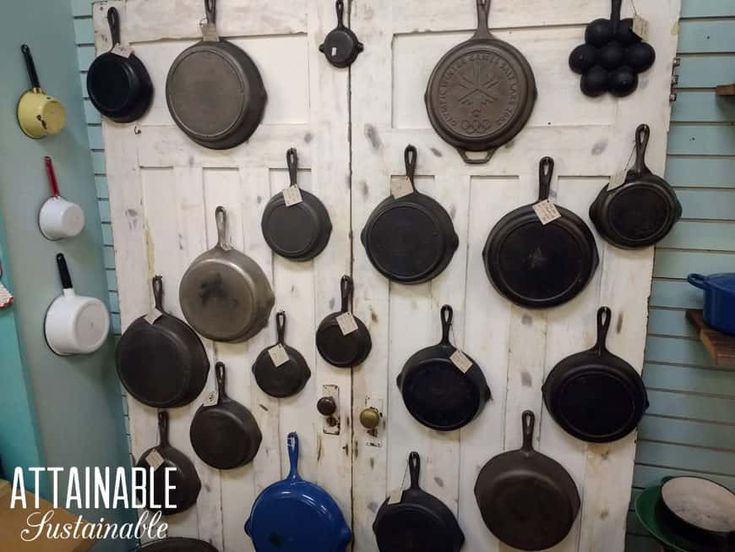
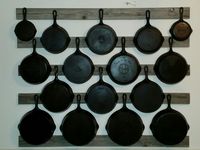
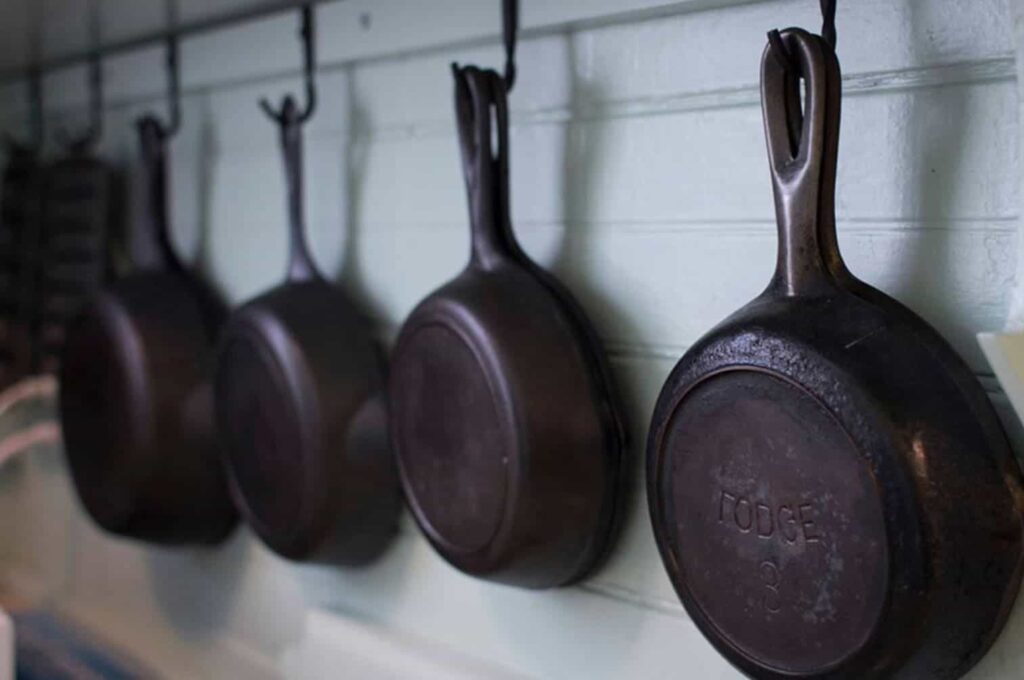
2. Hanging Storage: Maximizing Vertical Space
Hanging your cast iron cookware is a great way to save space and add a rustic touch to your kitchen. Use sturdy hooks or a pot rack designed for heavy items.
- Pros: Saves cabinet space, adds visual interest, good air circulation.
- Cons: Requires sturdy hooks, can be noisy when removing pans, may not be suitable for all kitchen layouts.
Ensure the hooks are strong enough to support the weight of your cast iron. Consider using S-hooks for easy removal and replacement.
3. Cabinet Storage: The Traditional Approach
Storing cast iron in cabinets is a common and practical method. However, it’s important to take precautions to prevent damage.
- Pros: Keeps pans out of sight, protects from dust and debris.
- Cons: Can be heavy to lift, potential for scratching or chipping.
To prevent scratching, place a layer of padding between pans. This could be a piece of felt, a kitchen towel, or even a cardboard insert. Also, avoid stacking too many pans on top of each other, as this can put excessive weight on the bottom pan.

4. Drawer Storage: A Space-Saving Solution
If you have deep drawers, you can store your cast iron horizontally. This is a space-saving option that keeps your pans organized and easily accessible.
- Pros: Efficient use of space, keeps pans organized.
- Cons: Requires deep drawers, can be heavy to pull out.
Line the drawer with a non-slip mat to prevent the pans from sliding around. Again, use padding between pans to prevent scratches.
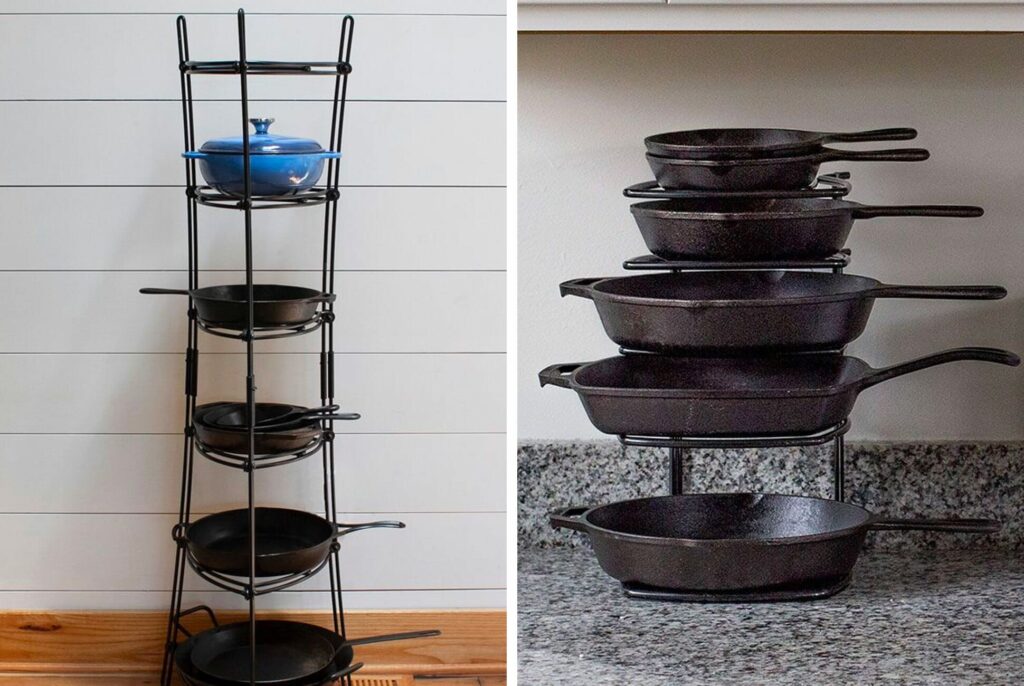
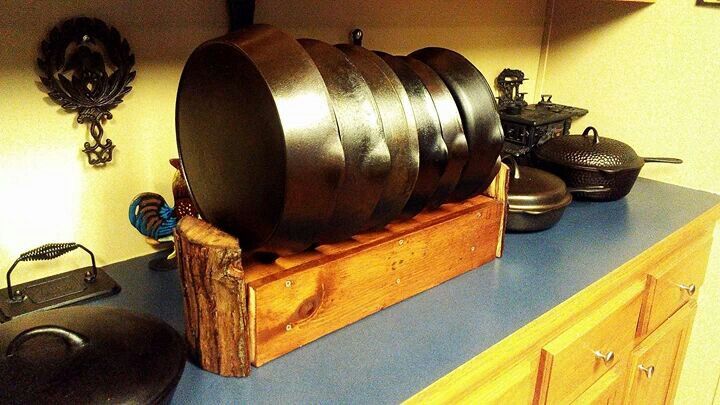
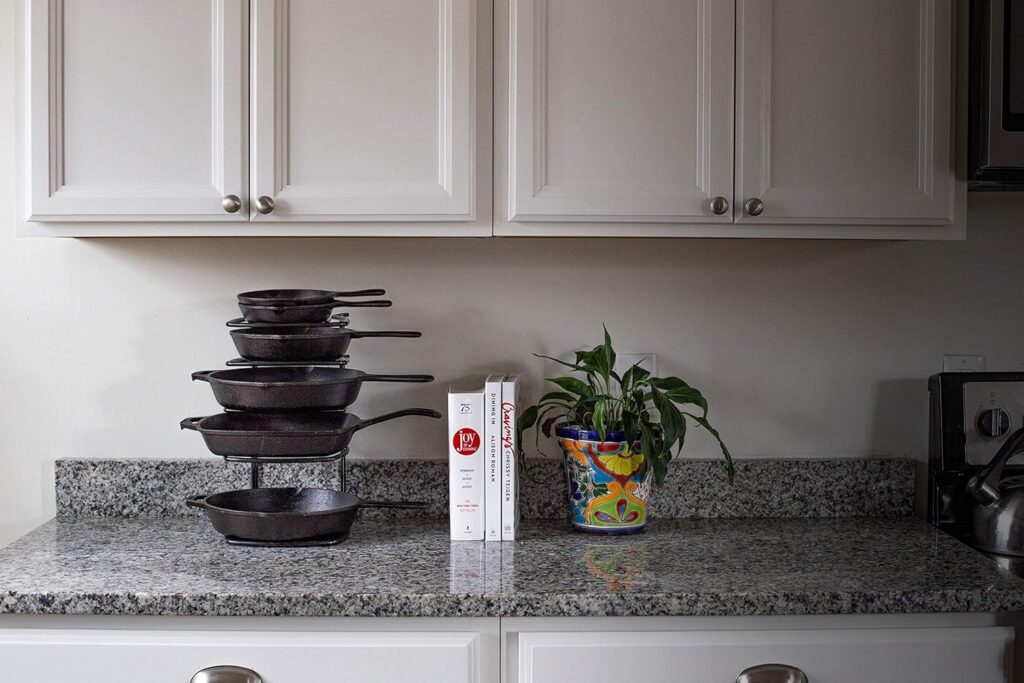
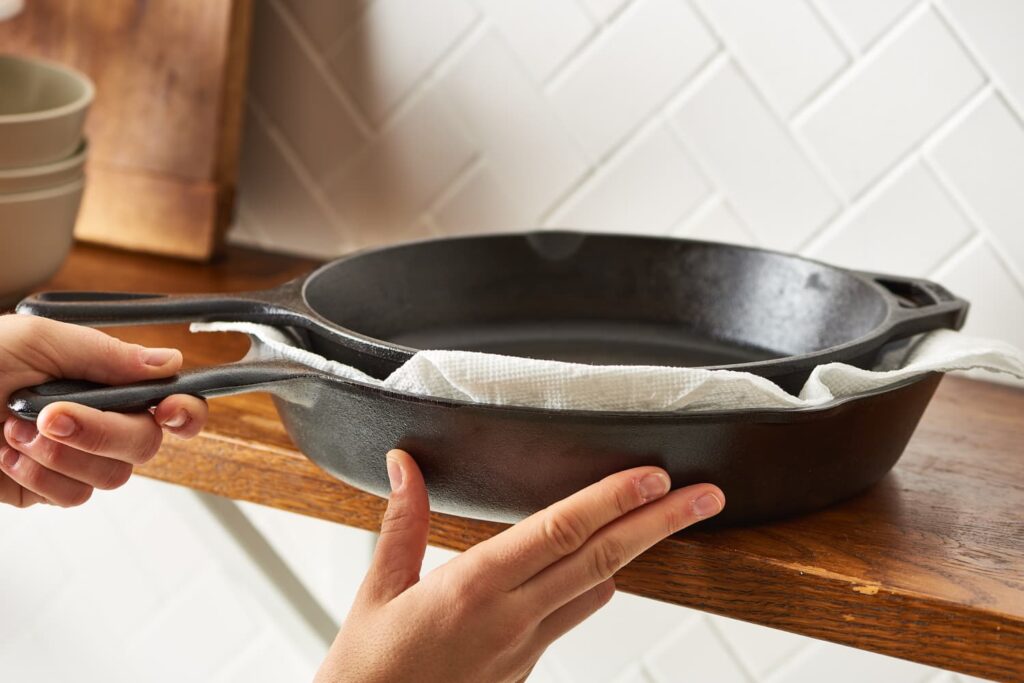
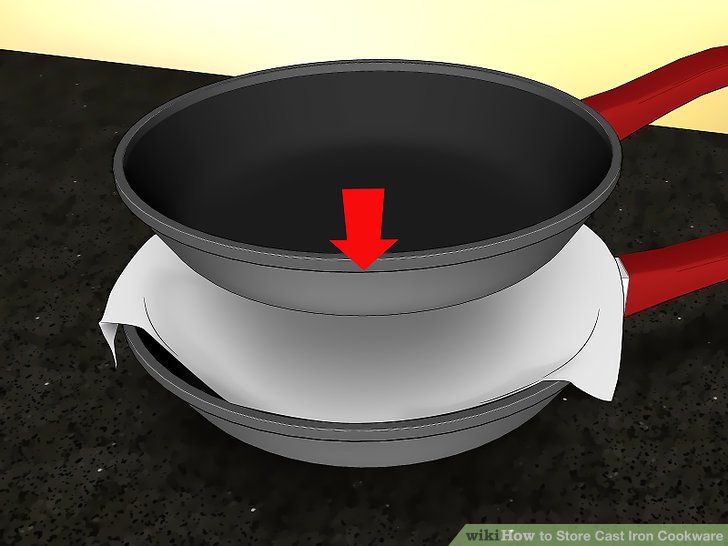
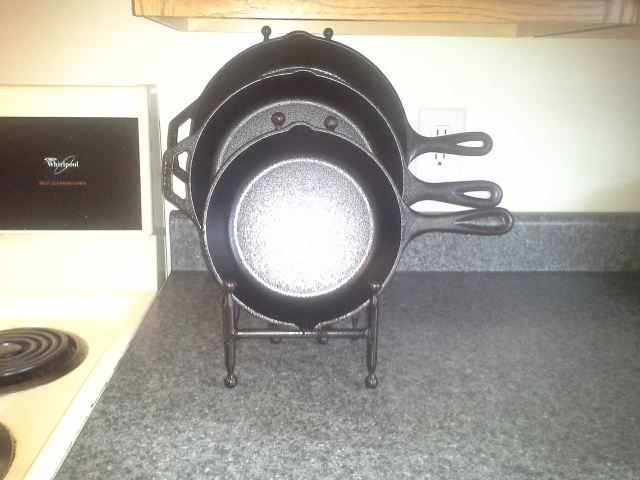
5. Stacking with Protection: Minimizing Space, Maximizing Care
Sometimes, space is at a premium. If you must stack your cast iron, take extra precautions to protect the seasoning and prevent damage.
- Use Padding: Place a layer of padding between each pan. Felt pads, kitchen towels, paper towels, or even pot holders work well.
- Nest Carefully: Make sure the pans are nested securely and won’t slide around.
- Avoid Overloading: Don’t stack too many pans on top of each other. The weight of the top pans can damage the bottom pans.
Long-Term Storage: Preparing Your Cast Iron for Extended Periods of Inactivity
If you’re planning to store your cast iron for an extended period (e.g., moving, traveling, or simply not using it for a while), you need to take extra steps to protect it from rust and damage.
- Thorough Cleaning: Start with a thorough cleaning, as described earlier.
- Complete Drying: Oven drying is essential for long-term storage.
- Generous Seasoning: Apply a slightly thicker layer of oil than usual and bake it in the oven for an hour.
- Protective Coating: After cooling, consider applying a thin layer of beeswax or mineral oil. This will provide an extra barrier against moisture.
- Proper Wrapping: Wrap each pan individually in butcher paper or acid-free paper. Avoid using plastic bags, as they can trap moisture.
- Storage Location: Store your wrapped cast iron in a dry, cool place, away from humidity and temperature fluctuations.
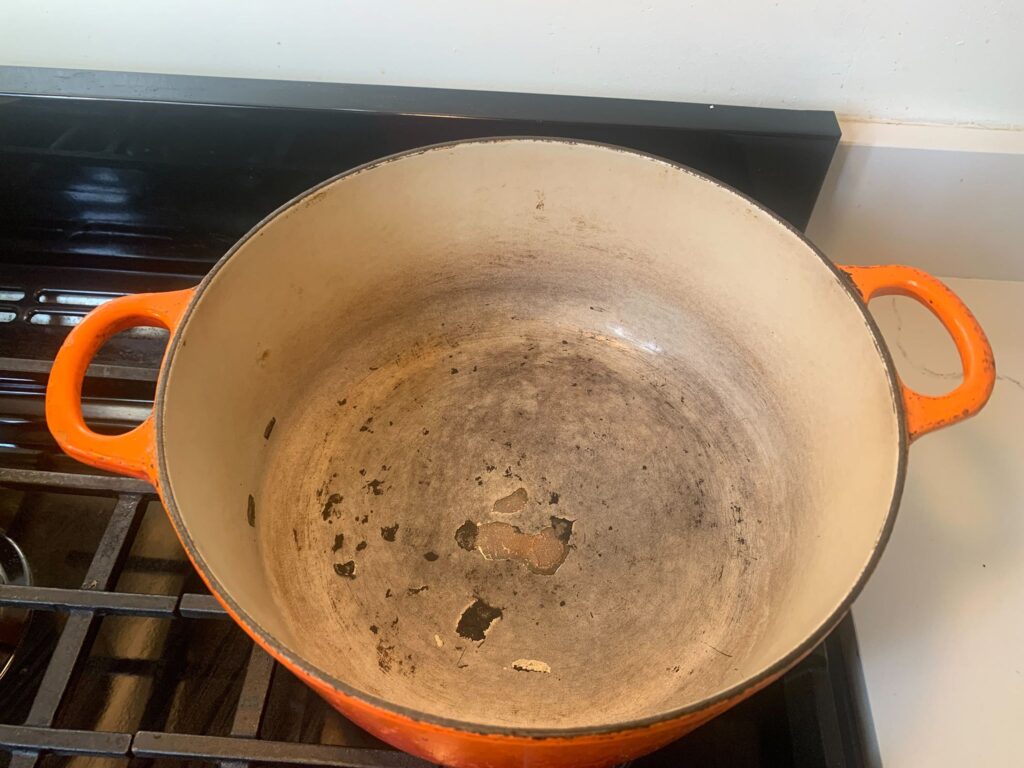
Dealing with Rust: Salvaging Your Beloved Cookware
Despite your best efforts, rust can sometimes appear on cast iron. Don’t despair! In most cases, rust is easily removable.

Assessing the Damage: Light vs. Heavy Rust
First, determine the severity of the rust. Light surface rust is typically easy to remove, while heavy rust may require more aggressive methods.
Removing Light Rust: The Gentle Approach
- Scrubbing: Use a steel wool pad or a rust eraser to gently scrub away the rust.
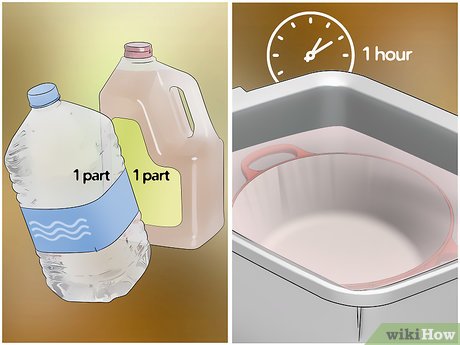
- Vinegar Soak: For more stubborn rust, soak the pan in a solution of equal parts white vinegar and water for no more than 30 minutes. Check the pan frequently to ensure the vinegar doesn’t damage the metal.
- Rinse and Dry: Rinse the pan thoroughly with hot water and dry it completely in the oven.
- Re-season: Re-season the pan as described earlier.
Removing Heavy Rust: The Aggressive Approach
- Electrolysis: This is a more advanced method that uses an electric current to remove rust. It’s effective but requires specialized equipment and knowledge.
- Sandblasting: Sandblasting is another aggressive method that can remove heavy rust. However, it can also damage the surface of the pan if not done carefully.
- Commercial Rust Remover: Use a commercial rust remover specifically designed for cast iron. Follow the manufacturer’s instructions carefully.
After removing heavy rust, it’s crucial to re-season the pan thoroughly to protect it from future rust formation.
Preventative Measures: Keeping Rust at Bay
Prevention is always better than cure. Here are some preventative measures you can take to minimize the risk of rust:
- Regular Use: The more you use your cast iron, the better the seasoning will become, and the less likely it is to rust.
- Proper Cleaning and Drying: Follow the cleaning and drying instructions diligently.
- Consistent Seasoning: Season your cast iron after each use, especially if you’ve cooked acidic foods.
- Avoid Over-Washing: Don’t wash your cast iron unnecessarily. If it’s just been used to cook something dry, simply wipe it clean with a paper towel.
- Store in a Dry Place: Store your cast iron in a dry, well-ventilated area.
- Use a Pan Lid Lifter: A pan lid lifter can help prevent moisture from building up under the lid during cooking and storage.
Choosing the Right Oil for Seasoning: A Matter of Smoke Points
The type of oil you use for seasoning plays a significant role in the durability and quality of the non-stick surface. High-smoke-point oils are ideal because they can withstand high temperatures without breaking down and creating a sticky residue. Here are some excellent choices:
- Canola Oil: A widely available and affordable option with a relatively high smoke point.
- Vegetable Oil: Another common choice with a good smoke point.
- Grapeseed Oil: Offers a high smoke point and a neutral flavor.
- Avocado Oil: An excellent choice with a very high smoke point and a healthy profile.
- Shortening: A traditional option that provides a good, even seasoning.
- Flaxseed Oil: While it can create a beautiful, hard seasoning, flaxseed oil is notoriously difficult to work with. It can easily become sticky if not applied in a very thin layer and baked properly. It’s best left to experienced cast iron users.
Avoid using oils with low smoke points, such as olive oil or butter, as they can burn and create a sticky, unpleasant residue.
Understanding Thermal Shock: Protecting Your Cast Iron from Cracking
Thermal shock occurs when cast iron is subjected to sudden temperature changes. This can cause the metal to expand and contract rapidly, leading to cracks. To prevent thermal shock, avoid these situations:
- Putting a hot pan in cold water: Always let your cast iron cool down gradually before washing it.
- Placing a cold pan on a hot burner: Preheat your cast iron slowly over low heat.
- Using a very high heat: Avoid using extremely high heat, especially on a gas stove.
- Moving a pan directly from the refrigerator to a hot oven: Allow the pan to warm up to room temperature before placing it in the oven.
By avoiding these situations, you can significantly reduce the risk of thermal shock and prolong the life of your cast iron.
Troubleshooting Common Cast Iron Storage Issues
Even with the best intentions, you might encounter some common issues with cast iron storage. Here are some troubleshooting tips:
- Sticky Seasoning: This is usually caused by using too much oil during seasoning or by not baking the pan long enough. To fix it, scrub the pan with a steel wool pad to remove the sticky residue and then re-season it with a thinner layer of oil.
- Uneven Seasoning: This can happen if the oil isn’t spread evenly during seasoning. To fix it, scrub the pan and re-season it, paying close attention to spreading the oil evenly.
- Rust Spots: Remove the rust spots as described earlier and then re-season the pan.
- Warped Pan: Warping is usually caused by extreme temperature changes or by dropping the pan. Unfortunately, a warped pan is often irreparable.
Conclusion: A Lifetime of Culinary Delights with Properly Stored Cast Iron
Cast iron cookware is more than just a kitchen tool; it’s an investment in culinary tradition and a connection to generations past. By following these storage guidelines, you can ensure that your cast iron remains in pristine condition for years to come. From proper cleaning and drying to choosing the right storage method and addressing potential issues, this guide has equipped you with the knowledge and skills to preserve your cast iron heirloom.
So, embrace the warmth and versatility of cast iron, knowing that with a little care and attention, it will continue to be a treasured part of your kitchen for generations to come. Now, go forth and cook some amazing food!


