 Nimila
Rakks ADA compliant vanity support bracket how to install: This comprehensive guide provides a step-by-step approach to installing ADA-compliant vanity support brackets. Understanding the specific requirements and procedures ensures a safe, accessible, and compliant installation, crucial for any bathroom renovation or accessibility project.
The guide covers everything from understanding ADA compliance to comparing different bracket types and troubleshooting potential issues. This detailed resource is your ultimate companion for a smooth and successful installation.
Introduction to Rakks Ada Compliant Vanity Support Brackets
Ada compliant vanity support brackets are designed to meet accessibility guidelines, specifically those Artikeld by the Americans with Disabilities Act (ADA). These brackets are crucial for ensuring that bathroom vanities are safely and comfortably accessible to individuals with disabilities, fostering inclusivity and promoting universal design principles. Proper support is paramount for safe use, and Ada compliance directly addresses this need.These brackets provide stable and secure mounting solutions for vanities, often incorporating features that improve user experience and promote accessibility.
The emphasis on safety, stability, and ease of use is a core tenet of Ada compliant designs. This focus on user experience extends beyond mere compliance, promoting broader inclusivity in bathroom design.
Definition of Ada Compliance
Ada compliance in the context of vanity support brackets signifies adherence to the standards set forth by the Americans with Disabilities Act. These standards mandate accessibility features for various products and facilities, including bathroom vanities. This compliance ensures that the vanity support bracket system can accommodate individuals with diverse physical needs, facilitating safe and independent use. Compliance ensures the bracket can support the weight of a vanity and remain stable.
Typical Features and Benefits
Ada compliant vanity support brackets often incorporate features that facilitate easy access and safety. These might include adjustable mounting points for varied vanity sizes, reinforced structures for robust support, and anti-slip or non-marring finishes to enhance safety. These features translate into greater safety, stability, and ease of use, which is crucial in the context of accessibility. Increased safety is a key benefit of this design.
Intended Use Cases
These brackets are intended for use in bathrooms designed for individuals with disabilities. This includes public restrooms, assisted living facilities, and private residences aiming for universal design. The goal is to enable independent and safe use of the vanity by people with a range of physical limitations.
Common Types of Ada Compliant Vanity Support Brackets
Several types of Ada compliant vanity support brackets cater to various needs and installation requirements. The most common types include wall-mounted brackets, which offer a straightforward installation process and can be adaptable to diverse vanity sizes. Alternatively, some models might utilize a ceiling-mounted bracket system for specialized applications or where space is limited. Another common variation is a bracket system that combines wall and ceiling mounts.
Comparison of Ada Compliant Vanity Support Bracket Types
| Bracket Type | Weight Capacity (lbs) | Material | Installation Method | Accessibility Features |
|---|---|---|---|---|
| Wall-Mounted | 150-300 | Steel, Aluminum | Screws into wall studs | Adjustable mounting points, anti-slip finish |
| Ceiling-Mounted | 100-250 | Steel, Stainless Steel | Anchors into ceiling joists | Secure and stable support, especially for tall vanities |
| Combined Wall/Ceiling | 200-400 | Steel, Stainless Steel | Combination of wall and ceiling mounting | Enhanced stability and support for larger vanities |
The table above provides a comparative overview of common Ada compliant vanity support bracket types. Weight capacity, material, installation methods, and accessibility features are crucial factors in selecting the right bracket for a specific application. Each bracket type offers distinct benefits in terms of stability and ease of use, catering to varying user needs and bathroom configurations.
Understanding Installation Requirements
Proper installation of Rakks ADA compliant vanity support brackets is crucial for ensuring both structural integrity and adherence to accessibility standards. Incorrect installation can lead to instability, potential safety hazards, and non-compliance with ADA regulations. Thorough preparation and meticulous execution of each step are paramount.The installation process requires careful consideration of the specific vanity, wall type, and the bracket’s design features.
A methodical approach, including appropriate tools, materials, and safety measures, is essential for a successful outcome. Adhering to the provided step-by-step guide and anticipating potential issues will minimize complications and ensure a compliant and secure installation.
Necessary Tools and Materials
Adequate preparation involves gathering the necessary tools and materials. This ensures a smooth and efficient installation process. A comprehensive list of required items will reduce the risk of interruptions or delays during the installation.
- Appropriate wall anchors (e.g., toggle bolts, drywall anchors) matching the wall type. The type of anchor selected must be compatible with the wall material (e.g., drywall, concrete) and the required load capacity for the vanity.
- Screwdrivers (Phillips and flathead), drill, level, pencil, measuring tape, and safety glasses.
- Vanity support bracket assembly, including all necessary hardware.
- Caulk or sealant (optional, for cosmetic sealing). This is used to ensure a watertight seal and prevent moisture ingress in some applications, though this isn’t always necessary.
- Safety equipment such as work gloves and a dust mask if applicable.
Installation Procedure
Following a detailed step-by-step process ensures a safe and correct installation. Visual guidance in a table format enhances clarity and comprehension.
| Step | Action | Visual Description |
|---|---|---|
| 1 | Mark and Measure: Determine the mounting locations for the brackets. Use a level to ensure the bracket is mounted straight and plumb. Mark the locations on the wall with a pencil. | A level is placed against the wall, ensuring the vanity support bracket will be properly aligned. Pencil marks indicate the precise drill holes locations for the anchors. |
| 2 | Drill Pilot Holes: Drill pilot holes at the marked locations to pre-drill for the anchor screws. | A drill bit appropriate for the anchor type is used to create pilot holes for the anchors. The pilot holes should be slightly smaller than the anchor screw diameter. |
| 3 | Install Anchors: Secure the wall anchors into the pilot holes. Ensure the anchors are fully seated and secure. | The wall anchors are inserted into the pilot holes and tightened according to the manufacturer’s instructions. |
| 4 | Attach Brackets: Carefully align the brackets with the anchors and secure them using the appropriate screws. | The brackets are carefully positioned and aligned with the anchors. The screws are tightened to secure the brackets to the wall. |
| 5 | Vanity Installation: Install the vanity onto the brackets, ensuring it is level and secure. | The vanity is carefully positioned and attached to the brackets, ensuring it is stable and level. |
| 6 | Final Inspection: Inspect the entire installation for proper alignment and security. Ensure the bracket is securely mounted and the vanity is stable. | A final check to ensure that the vanity support bracket is aligned, secured, and the vanity is stable. |
Potential Issues and Solutions
Addressing potential problems during installation minimizes complications. Anticipating and resolving these issues will help avoid costly rework or safety hazards.
- Incorrect Anchor Selection: Selecting anchors incompatible with the wall material or load capacity. Solution: Use anchors appropriate for the wall material and capable of supporting the weight of the vanity.
- Loose Bracket: The bracket may loosen or become unstable over time. Solution: Ensure the screws are tightened adequately to the manufacturer’s specifications.
- Damage to the Wall: Drilling into the wall may cause damage or cracks. Solution: Use appropriate pilot holes and ensure that the drill bit size matches the anchor type. Consider the material composition and hardness of the wall.
Compliance Standards and Regulations
Adherence to accessibility standards is crucial in construction projects, particularly for public spaces and those serving diverse populations. Compliance ensures that buildings and fixtures are usable by individuals with disabilities, promoting inclusivity and equity. This section details the importance of ADA compliance for vanity support bracket installations and the associated regulations.
Importance of ADA Compliance in Construction
ADA compliance is paramount in construction to guarantee that facilities are accessible to individuals with disabilities. This not only fulfills legal obligations but also promotes social equity and inclusion. Non-compliance can result in costly legal repercussions and reputational damage for the project stakeholders.
Specific Regulations and Standards for Vanity Support Brackets, Rakks ada compliant vanity support bracket how to install
While the Americans with Disabilities Act (ADA) itself does not specifically detail vanity support bracket installation requirements, it mandates accessible design principles for bathroom fixtures. These principles typically involve providing sufficient clearance, appropriate leverages for operation, and accessible locations for supports to ensure ease of use for individuals with mobility impairments. Local building codes may also incorporate specific requirements for accessible bathroom design.
The exact specifications for vanity support brackets are typically detailed within local building codes, as the ADA is a broad guideline.
Consequences of Non-Compliance
Non-compliance with ADA regulations can lead to significant consequences. Penalties can include fines, legal action, and injunctions. Furthermore, non-compliance may result in project delays and increased costs. In some instances, a project may need to be entirely reworked to meet ADA standards, significantly impacting project budgets and timelines. Project stakeholders should consult with legal professionals and accessibility experts to ensure complete compliance.
Accessing ADA Compliance Information
The ADA Standards for Accessible Design provides comprehensive guidelines for accessible design in various building environments. The Department of Justice (DOJ) website and relevant state and local agencies are valuable resources for accessing the latest ADA compliance information and related documents. It’s vital to review the most recent versions of regulations and codes, as they may contain updated requirements.
Relevant Codes and Standards
| Code/Standard | Description |
|---|---|
| ADA Standards for Accessible Design | Comprehensive guidelines for accessible design in buildings and facilities. |
| Local Building Codes | Specific requirements for building construction, including accessibility features. |
| State Accessibility Regulations | May contain additional or specific accessibility standards. |
Troubleshooting and Common Issues: Rakks Ada Compliant Vanity Support Bracket How To Install
Proper installation of ADA-compliant vanity support brackets is crucial for safety and functionality. Incorrect installation can lead to instability, structural damage, and non-compliance with accessibility regulations. This section details common installation errors, their potential causes, and solutions to ensure a successful and compliant installation.Troubleshooting installation issues is often necessary, particularly when dealing with various wall types and construction methods.
A thorough understanding of potential problems allows for proactive identification and resolution, preventing costly rework and ensuring compliance.
Common Installation Errors and Their Causes
Incorrect bracket placement or alignment is a frequent issue. This can be caused by inaccurate measurements, improper use of leveling tools, or failure to account for variations in wall surface. Additionally, improper anchoring or securing of the bracket to the wall can compromise the structural integrity and lead to instability. Lack of adherence to manufacturer’s instructions and inadequate preparation of the mounting surface can also result in installation errors.
Solutions to Troubleshooting Installation Problems
Thorough pre-installation planning, including precise measurements and accurate marking, can prevent alignment errors. Utilizing a level and a straightedge is critical for ensuring proper placement. Adequate anchoring methods, such as using appropriate wall anchors and fasteners for the specific wall type, are essential for secure attachment. Careful consideration of the wall’s material and construction is necessary to select the correct anchors and fasteners for optimal support.
Adherence to the manufacturer’s installation guidelines is paramount for a successful installation.
Potential Issues Related to Bracket Strength or Stability
Bracket strength and stability are directly related to the quality of the materials used and the correct installation procedures. Using brackets with insufficient load-bearing capacity for the anticipated weight of the vanity can lead to failure. Over-tightening or improper torque on the mounting hardware can also compromise the integrity of the bracket or the wall. A thorough review of the manufacturer’s specifications and recommendations is critical to ensure the selected bracket meets the required load-bearing capacity.
Choosing brackets that exceed the anticipated load requirements is also important.
Potential Issues Due to Different Wall Types or Construction
Different wall types and construction methods can present unique challenges during installation. Drywall, concrete, and plaster walls require different types of anchors and fasteners for secure attachment. Failure to use appropriate anchors can result in insufficient support, compromising the stability of the bracket. Identifying the specific wall type and selecting the appropriate fasteners are critical steps in the installation process.
Assessing the structural integrity of the wall prior to installation is essential. Consult with a qualified professional for guidance on specific wall types and their installation requirements.
FAQ
Q: What are the typical causes of bracket instability?
A: Bracket instability can result from incorrect alignment, insufficient anchoring, inappropriate fasteners for the wall type, and inadequate bracket load capacity.
Q: How can I ensure proper alignment during installation?
A: Precise measurements, the use of a level and straightedge, and careful marking are essential for accurate alignment. Double-checking the measurements before drilling is also important.
Q: What types of wall anchors should I use for different wall types?
A: Drywall anchors are typically used for drywall, while concrete anchors are suitable for concrete walls. Plaster walls may require specific types of anchors depending on their construction. Consult the manufacturer’s instructions and building codes for appropriate anchors.
Alternatives and Comparisons

Alternative vanity support bracket options exist, each with varying features and trade-offs. Choosing the right alternative requires careful consideration of the specific needs of the installation, including ADA compliance, structural integrity, and aesthetic preferences. Factors such as budget, material availability, and local building codes should also be taken into account.
Alternative Support Bracket Options
Several alternative support bracket options are available, each with unique characteristics. These include adjustable brackets, fixed-position brackets, and brackets designed for specific vanity types. Adjustable brackets provide flexibility in accommodating variations in vanity size and placement, but may require more precise installation. Fixed-position brackets are often more straightforward to install but offer less adaptability. Specialized vanity brackets, designed for specific vanity styles or construction, are optimized for specific tasks and may not be universally applicable.
Material Comparisons
The materials used in vanity support brackets significantly impact their performance, durability, and cost. Common materials include steel, aluminum, and composite materials.
- Steel brackets offer high strength and durability, making them suitable for heavy vanities. However, they can be more susceptible to corrosion if not properly treated or protected. Steel’s high density can also increase the overall weight of the bracket assembly.
- Aluminum brackets are lightweight and corrosion-resistant, making them a good choice for installations in humid environments or areas prone to moisture. However, their strength may be lower than that of steel, potentially requiring thicker gauge material for heavy-duty applications.
- Composite materials, often engineered polymers, are gaining popularity for their combination of strength, lightweight properties, and resistance to corrosion. These materials offer a good balance between cost and performance, but their long-term durability in demanding environments remains to be fully evaluated.
Wall Surface Compatibility
The type of wall surface significantly influences the appropriate support bracket selection. Different installation methods are required for drywall, concrete, or plaster walls.
- Drywall walls typically require brackets with specific mounting mechanisms, such as drywall anchors or screws. Brackets with appropriate anchor types must be selected for secure installation.
- Concrete walls require brackets with robust mounting hardware, such as heavy-duty anchors or specialized concrete screws. Proper anchoring is crucial to ensure stability in these applications.
- Plaster walls may require specific brackets designed for adhering to plaster surfaces. Proper anchoring methods and materials should be selected based on the plaster’s type and condition.
Installation Method Comparison
The following table summarizes the installation methods for different bracket types, highlighting the steps and required tools.
| Bracket Type | Wall Surface | Installation Method | Tools Required |
|---|---|---|---|
| Adjustable Steel | Drywall | Use drywall anchors and screws. Ensure appropriate anchor type. | Drill, screwdriver, measuring tape, level |
| Fixed Aluminum | Concrete | Use concrete anchors and appropriate screws. Ensure proper concrete anchor selection. | Drill, impact driver, measuring tape, level, concrete drill bit |
| Composite (specific vanity) | Plaster | Use plaster-specific anchors and screws, depending on plaster type. | Drill, screwdriver, measuring tape, level, appropriate plaster anchors |
Visual Representation and Examples
Visual representation of ADA-compliant vanity support bracket installations is crucial for proper implementation and ensuring accessibility. Detailed diagrams and images facilitate understanding of the installation process, correct positioning, and anchoring techniques for various wall types, crucial for maintaining safety and compliance. These visual aids allow for clear comprehension of the necessary steps and aid in troubleshooting potential issues during installation.Installation scenarios vary depending on the specific vanity design, wall structure, and the type of bracket selected.
Illustrative examples demonstrate how to adapt installation procedures to accommodate different wall types, ensuring that the brackets are securely affixed while adhering to accessibility standards.
Installation Scenarios for Different Wall Types
Different wall types require specific anchoring methods for securing the vanity support brackets. Understanding these nuances is critical for a safe and compliant installation.
- Drywall Walls: Installation on drywall necessitates the use of appropriate anchors designed for drywall. These anchors ensure secure attachment without compromising the structural integrity of the wall. Specialized drywall anchors are specifically designed to withstand the load of the vanity. Using the appropriate anchor type is crucial for a secure installation. Incorrect anchoring can lead to instability and potential failure.
- Concrete Walls: Concrete walls present a different installation scenario, requiring different anchoring methods. Installation on concrete walls necessitates the use of appropriate concrete anchors that are specifically designed for the load requirements. These anchors offer the necessary holding power to securely support the vanity. Drill pilot holes of the correct size to accommodate the specific concrete anchors being used.
This is crucial for proper support and ensures that the anchors are properly seated within the concrete.
- Masonry Walls: Installation on masonry walls necessitates using masonry anchors that are suitable for the type of masonry. These anchors are designed to withstand the load of the vanity, ensuring the structural integrity of the wall is maintained. Proper anchor selection is crucial for a safe and compliant installation.
Detailed Installation Process
The installation process should be approached methodically, ensuring proper alignment and secure attachment of the brackets.
- Preparation: Thoroughly inspect the wall for any obstacles or irregularities that may affect the installation process. Verify the wall’s structural integrity to ensure it can support the weight of the vanity.
- Marking and Drilling: Precisely mark the location for each bracket, ensuring the placement adheres to the vanity manufacturer’s specifications and accessibility guidelines. Drill pilot holes to the appropriate depth for the chosen anchors.
- Anchor Insertion: Insert the anchors into the drilled holes, ensuring they are firmly seated within the wall structure. The anchors must be appropriate for the chosen bracket and wall type.
- Bracket Attachment: Carefully attach the brackets to the anchors, ensuring the brackets are properly aligned and secured. Tighten the mounting screws according to the manufacturer’s instructions.
- Vanity Placement: Carefully position the vanity onto the brackets. Ensure the vanity is securely supported and level.
- Final Inspection: Perform a thorough final inspection to confirm the brackets are securely fastened and the vanity is properly supported. Verify that the installation meets all accessibility requirements.
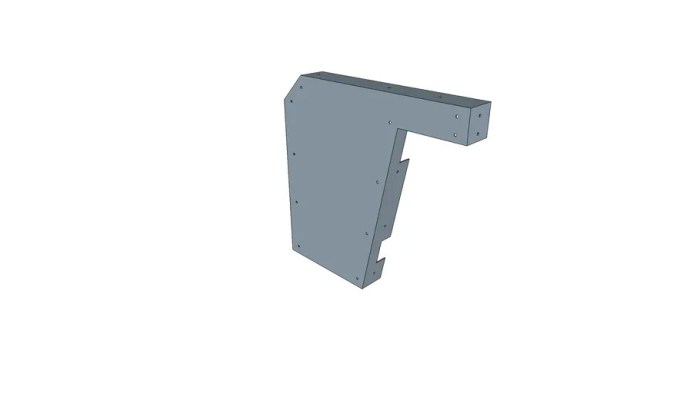
Illustrative Diagram of Correct Installation

Caption: A correctly installed vanity support bracket on a drywall wall. The bracket is securely attached to the drywall anchors, ensuring proper alignment and load-bearing capacity. The bracket is positioned to comply with ADA guidelines, ensuring a safe and accessible vanity installation.
Outcome Summary
In conclusion, installing rakks ADA compliant vanity support brackets requires careful consideration of the installation process, safety precautions, and compliance standards. This guide offers a complete solution, covering installation steps, potential issues, and regulatory requirements. By following the instructions and addressing potential problems, you can ensure a safe, accessible, and compliant installation that meets ADA standards.
Questions and Answers
What is ADA compliance in the context of vanity support brackets?
ADA compliance ensures that bathroom vanities are accessible to individuals with disabilities. It mandates specific features and installation methods to meet accessibility standards.
What tools and materials are needed for installation?
Required tools and materials vary depending on the specific bracket type and wall surface. Typically, you’ll need a drill, screws, measuring tape, level, and the appropriate mounting hardware. Always refer to the manufacturer’s instructions for specific requirements.
What are some common installation errors?
Common errors include improper anchoring, inadequate support for the vanity weight, and incorrect bracket alignment. These issues can lead to instability and potential safety hazards.
What are the differences between various vanity support bracket materials?
Different materials offer varying strength, durability, and aesthetic appeal. Steel is often a strong and reliable option, while other materials may be chosen for specific design considerations.


