 Nimila
How to test TPS sensor effectively is crucial for diagnosing and resolving engine performance issues in automobiles. This comprehensive guide delves into the intricacies of throttle position sensor (TPS) function, troubleshooting, and testing, providing a step-by-step approach to understanding and rectifying problems. From identifying common symptoms of a faulty TPS to utilizing diagnostic tools and calibrating the sensor, this resource offers a detailed analysis of the entire process.
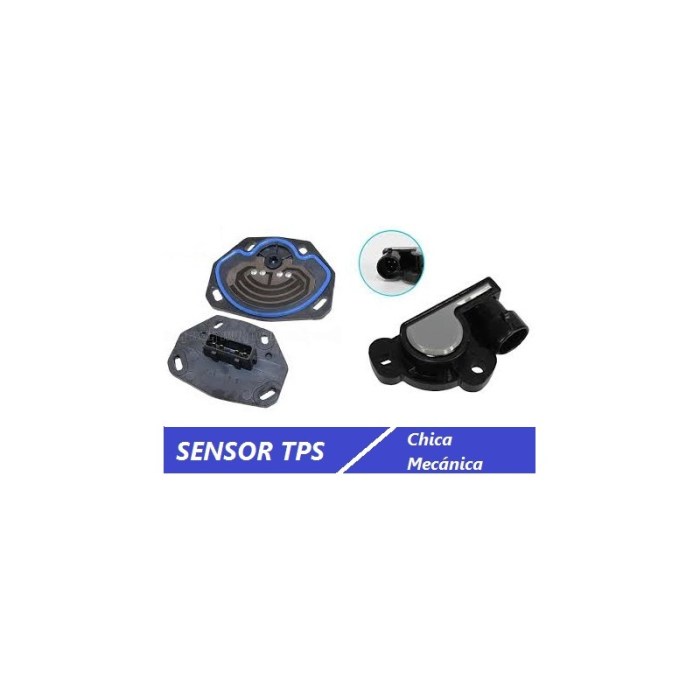
The throttle position sensor (TPS) plays a vital role in a vehicle’s engine management system. It continuously monitors the position of the throttle plate, providing crucial data to the engine control unit (ECU). Accurate TPS readings are essential for maintaining optimal engine performance, fuel efficiency, and overall vehicle operation. Understanding how to accurately test and diagnose issues with the TPS sensor is key to restoring proper engine function.
Introduction to TPS Sensors

The Throttle Position Sensor (TPS) is a crucial component in modern vehicle engine management systems. It plays a vital role in accurately measuring the position of the throttle plate, providing critical data to the engine control unit (ECU). This information is essential for adjusting fuel and air mixture, optimizing engine performance, and ensuring smooth acceleration and deceleration.The TPS’s function is to translate the physical movement of the throttle into an electrical signal.
This signal is then interpreted by the ECU, which uses it to calculate the precise amount of fuel and air needed for optimal combustion. This continuous feedback loop is fundamental to efficient and responsive engine operation.
Types of TPS Sensors
Various technologies are used in TPS sensors, each with its own characteristics and performance advantages. Understanding these different types is crucial for appreciating the design choices in modern vehicles.
Resistive TPS Sensors
These sensors utilize a resistive element whose resistance changes proportionally to the throttle position. As the throttle opens, the resistance decreases. This change in resistance is converted into a voltage signal that the ECU can read. Their simplicity and relatively low cost make them a popular choice in some applications.
Hall Effect TPS Sensors
Hall effect sensors employ a magnetic field to measure the throttle position. A magnet moves relative to a Hall effect sensor, creating a proportional change in voltage output. This type of sensor is often more accurate than resistive sensors and provides better resolution, especially in applications requiring precise throttle position readings.
Comparison of TPS Sensor Types
| Type | Principle | Advantages | Disadvantages |
|---|---|---|---|
| Resistive | Changes in resistance of a conductive material correspond to throttle position. | Relatively inexpensive, simple design. | Less accurate than Hall effect, susceptible to noise, drift over time. |
| Hall Effect | A magnetic field is generated and interacts with a Hall effect device to produce a voltage output. | Higher accuracy and resolution, less susceptible to noise, greater longevity. | Generally more expensive, potentially more complex to calibrate. |
Troubleshooting TPS Sensor Issues
The Throttle Position Sensor (TPS) is a crucial component in engine management systems. Its function is to accurately measure the position of the throttle plate. A malfunctioning TPS can lead to various issues in vehicle operation, affecting performance, fuel economy, and overall drivability. Understanding the common problems and their associated symptoms is vital for proper diagnosis and repair.
Common TPS Sensor Problems
TPS sensors can experience various malfunctions, affecting their ability to accurately report throttle position. These issues can stem from physical damage, electrical problems, or internal component failure. Troubleshooting the TPS sensor often requires a systematic approach, starting with identifying the symptoms and then investigating the potential causes.
Symptoms of a Faulty TPS Sensor
Faulty TPS sensors manifest in several ways, impacting engine performance and drivability. Common symptoms include:
- Rough idle: A significant symptom indicating a problem with the TPS sensor’s ability to maintain a stable idle speed. This can cause the engine to vibrate or stutter at low speeds, making the vehicle uncomfortable to drive. This issue often arises when the sensor inaccurately reports the throttle position at low engine speeds.
- Erratic acceleration: A faulty TPS sensor can cause the engine to respond erratically to acceleration commands. The vehicle may accelerate abruptly, hesitate, or experience surges in speed. The lack of accurate throttle position feedback from the sensor can cause unpredictable responses from the engine control unit (ECU).
- Poor fuel economy: An inaccurate TPS reading can lead to improper fuel delivery, resulting in lower fuel efficiency. The engine control unit might deliver more or less fuel than necessary, depending on the faulty reading, which is a consequence of an inaccurate representation of throttle position.
- Difficulty starting: In severe cases, a faulty TPS sensor can impede the engine’s ability to start. The engine control unit may not receive the correct signals needed to initiate the ignition sequence, hindering the vehicle’s ability to start up. This often relates to the sensor’s inability to communicate the initial throttle position to the ECU during the starting process.
- Check Engine Light: The engine control unit (ECU) detects inconsistencies in the TPS readings and activates the Check Engine Light (CEL) on the dashboard. This is a critical warning signal indicating a possible malfunction in the vehicle’s engine management system.
Diagnosing TPS Sensor Issues
A table outlining the symptoms and possible causes of a faulty TPS sensor can aid in the diagnostic process:
| Symptom | Possible Cause | Further Investigation |
|---|---|---|
| Rough idle | Inaccurate throttle position feedback at low speeds, faulty sensor output, or internal sensor component failure. | Check TPS sensor voltage output at various throttle positions. Inspect wiring for damage or loose connections. Test the sensor’s response to throttle input using a diagnostic tool. |
| Erratic acceleration | Inconsistent readings from the sensor at different throttle positions, damaged sensor, wiring problems, or internal component malfunction. | Verify sensor voltage readings during acceleration. Check for continuity and resistance in the wiring harness. Examine the sensor for physical damage. Consider the ECU’s role in interpreting sensor signals. |
| Poor fuel economy | Inaccurate reporting of throttle position leading to improper fuel delivery. | Inspect fuel trims, check sensor output, and compare readings against expected values. Verify the integrity of the sensor wiring. Consider the interaction between the TPS and other engine components. |
| Difficulty starting | Inaccurate reporting of throttle position during startup. | Inspect the sensor’s response to throttle inputs during the cranking phase. Check for any unusual sensor readings at the start-up phase. Assess the ECU’s startup sequence and related sensor communication. |
| Check Engine Light (CEL) | Various problems with the TPS, including sensor malfunction, wiring issues, or internal component problems. | Verify specific codes retrieved from the diagnostic tool. Assess the sensor’s voltage output. Test for continuity in the wiring. Inspect for physical damage to the sensor or wiring. |
Testing TPS Sensor Functionality
Thorough testing of the Throttle Position Sensor (TPS) is crucial for accurate engine control. A faulty TPS can lead to erratic acceleration, poor fuel economy, and even engine misfires. Understanding how to test the TPS and interpret its readings ensures reliable diagnosis and efficient repairs.Accurate readings from the TPS are essential for the engine’s electronic control unit (ECU) to precisely manage fuel and air mixture, leading to optimal performance and fuel efficiency.
A malfunctioning sensor can disrupt this crucial feedback loop, causing various drivability issues.
Importance of Testing TPS Sensor Readings
Precise TPS readings are vital for the engine’s smooth operation. The ECU relies on these readings to adjust fuel delivery and ignition timing in real-time. Inaccurate or inconsistent readings lead to incorrect adjustments, potentially causing performance problems, fuel inefficiency, and even engine damage. Reliable TPS readings are essential for accurate engine control and smooth acceleration.
Methods for Testing TPS Sensor Output
Several methods can be used to assess TPS sensor functionality. These methods range from basic resistance checks to more comprehensive diagnostic tests using a scan tool. Properly evaluating the TPS output is essential for determining its operational status.
Using a Multimeter to Measure Resistance
A multimeter is a valuable tool for initial TPS testing. It allows for the measurement of resistance across the sensor’s terminals. The resistance value varies depending on the throttle position. A comparison to the sensor’s specifications is crucial for accurate diagnosis.
- Connect the multimeter leads to the TPS terminals, ensuring proper polarity.
- Gradually move the throttle lever through its range of motion.
- Note the resistance readings at different throttle positions.
- Compare these readings with the TPS specifications provided in the vehicle’s repair manual or online resources.
- If the readings significantly deviate from the expected values, the TPS may be faulty.
Interpreting Resistance Readings
The resistance values obtained using the multimeter correlate with the throttle position. A consistent relationship between resistance and throttle position is indicative of a functioning sensor. Deviations from the expected values could signal a faulty sensor.
Typical TPS resistance readings vary by vehicle make and model. Consult the vehicle’s repair manual for specific resistance ranges at different throttle positions.
TPS Sensor Test Using a Diagnostic Tool
Diagnostic tools offer a more comprehensive method for testing TPS functionality. These tools can read the sensor’s output signals in real-time, providing valuable data for diagnosis. Using a diagnostic tool enhances the precision of the test.
- Connect the diagnostic tool to the vehicle’s diagnostic port.
- Initiate the TPS testing mode in the diagnostic tool’s software.
- Observe the sensor’s output signal as the throttle is moved.
- Compare the obtained data with the expected output values specified in the vehicle’s repair manual.
- If the output data exhibits erratic behavior or doesn’t correspond to the expected values, the TPS might be faulty.
Testing Response to Throttle Position Changes
Testing the sensor’s response to throttle position changes is essential to assess its accuracy. This involves observing the sensor’s output as the throttle is progressively moved. This method ensures accurate assessment of the sensor’s functionality.
- Slowly and progressively move the throttle lever from idle to wide-open throttle.
- Monitor the sensor’s output using the diagnostic tool or multimeter.
- Record the sensor’s output signal for each throttle position.
- If the sensor’s output doesn’t smoothly increase with increasing throttle position, the sensor is likely faulty.
Calibration and Adjustment
Proper calibration of a Throttle Position Sensor (TPS) is crucial for accurate engine control. An improperly calibrated TPS can lead to erratic engine performance, reduced fuel efficiency, and potentially damage to other components. Understanding the calibration process and the importance of accuracy is vital for maintaining optimal vehicle operation.
Calibration Procedure Overview
TPS calibration involves adjusting the sensor’s output to match the throttle’s physical position. This ensures the engine control module (ECM) receives accurate data, enabling precise fuel and air mixture control. Calibration methods vary depending on the vehicle make and model, often requiring specialized diagnostic tools and knowledge of specific vehicle specifications.
Importance of Accurate TPS Calibration
Accurate TPS calibration is essential for reliable engine operation. A correctly calibrated sensor ensures the engine receives precise input on throttle position, leading to consistent performance across various throttle inputs. Inaccurate calibration can result in a multitude of issues, including: inconsistent acceleration, rough idling, and improper fuel economy. The precise relationship between throttle position and sensor output is critical for the engine’s ability to respond appropriately to driver input.
Different Calibration Methods for Various Vehicle Models
Various methods exist for calibrating TPS sensors, depending on the specific vehicle model and the diagnostic tools available. Some methods involve using specialized diagnostic equipment that directly interacts with the vehicle’s ECM to adjust the sensor’s calibration parameters. Other methods may require physical adjustments to the sensor itself, typically requiring specialized knowledge and tools. In some instances, the calibration process might involve reading and comparing sensor data with a predefined reference or using an electronic calibration tool.
Calibration Steps for a Specific Vehicle Make and Model (Example: 2020 Toyota Camry)
| Step | Action | Expected Result |
|---|---|---|
| 1 | Connect the vehicle’s diagnostic scan tool (e.g., Toyota’s Techstream) to the diagnostic port. | The scan tool should successfully connect to the vehicle’s computer system. |
| 2 | Select the Throttle Position Sensor (TPS) calibration function within the scan tool’s menu. | The scan tool should display the TPS calibration options. |
| 3 | Follow the scan tool’s prompts to initiate the calibration process. This may involve activating the vehicle’s engine, varying the throttle position, and monitoring the sensor’s output. | The scan tool should display the TPS sensor’s current readings and progress through the calibration. |
| 4 | Adjust any calibration parameters as instructed by the scan tool. Avoid exceeding recommended adjustments to prevent further issues. | The scan tool should display the updated calibration parameters. |
| 5 | Verify the calibration is complete by driving the vehicle and checking for any changes in engine performance. | The vehicle should operate smoothly and consistently across a range of throttle positions. |
Visual Inspection and Component Checks
A thorough visual inspection of the Throttle Position Sensor (TPS) and its associated wiring harness is crucial for identifying potential issues. Neglecting this initial step can lead to wasted time and resources, as a simple visual check can often pinpoint the source of a problem. This process helps determine if there is any obvious physical damage or signs of wear that could be affecting the sensor’s accuracy.
Importance of Visual Inspection
Visual inspection of the TPS is a vital initial diagnostic step. It allows for a quick assessment of the sensor’s physical condition and the integrity of its wiring. Identifying damage early in the troubleshooting process can save time and money by preventing unnecessary testing and repairs. Often, the cause of an intermittent problem is a minor, but easily overlooked, physical issue.
Potential Physical Damage to the TPS
The TPS, like other automotive components, is susceptible to physical damage. This damage can manifest in various ways, including cracks, breaks, corrosion, or deformation. These issues can affect the sensor’s ability to accurately measure throttle position. Furthermore, damage to the mounting bracket or surrounding components can also impact the sensor’s functionality. Examples include:
- Cracks or breaks in the sensor housing: These can compromise the sensor’s structural integrity and affect its ability to transmit accurate signals.
- Corrosion on the sensor’s surface: Corrosion can alter the sensor’s electrical conductivity, leading to inconsistent readings and potentially erratic performance.
- Physical deformation of the sensor’s body: A bent or warped sensor housing will likely have issues transmitting accurate signals.
- Damage to the wiring harness: Cuts, abrasions, or exposed wires can disrupt the electrical signal flow to the control module. This is a common source of intermittent issues.
Common Signs of Physical Damage
Visual cues can help identify potential problems with the TPS. Look for the following signs:
- Visible cracks or breaks in the sensor housing or the wiring harness.
- Signs of corrosion on the sensor surface or the wiring harness. This may appear as a greenish or brownish discoloration.
- Bent or warped sensor housing.
- Damaged or frayed wires within the harness.
- Loose or disconnected connectors.
Visual Inspection Checklist for TPS Wiring Harness
A structured checklist streamlines the inspection process. This checklist helps ensure that no potential problem is overlooked.
- Inspect the sensor housing for any visible damage (cracks, dents, corrosion).
- Examine the wiring harness for any cuts, abrasions, exposed wires, or signs of rodent damage.
- Verify the integrity of all connectors. Ensure that the connectors are securely attached to the sensor and other components.
- Check for any signs of corrosion or damage on the connectors themselves.
- Carefully inspect the TPS mounting bracket for any damage or loose connections.
- Note any unusual smells or unusual temperature differences in the components.
Potential Causes of Intermittent Issues
Intermittent TPS problems often stem from subtle wiring issues. The vibration of the engine and the constant movement of components can cause loose connections or minor breaks in the wiring, leading to unpredictable readings.
- Loose connections: A loose connector can cause intermittent electrical contact, leading to unpredictable sensor readings.
- Damaged or frayed wires: Even minor damage to the wiring can cause intermittent signal issues.
- Corrosion: Corrosion on the sensor or connectors can disrupt electrical flow, leading to intermittent readings.
Using Diagnostic Tools
Diagnostic tools are invaluable assets in troubleshooting throttle position sensor (TPS) issues. They provide a direct and objective way to measure sensor output, allowing for precise identification of problems that might be hidden by visual inspection or manual testing. These tools can pinpoint issues like faulty sensor readings, wiring problems, or even underlying engine control module (ECM) malfunctions, saving time and preventing unnecessary replacements.Using diagnostic tools allows for a more comprehensive evaluation of the TPS sensor’s performance compared to purely visual or manual checks.
This approach provides a more precise and efficient way to diagnose problems and helps isolate the source of the issue, leading to faster and more effective repairs.
Scan Tool Functionality for TPS Testing
Diagnostic scan tools provide a wealth of data related to the TPS sensor’s operation. They allow for real-time monitoring of sensor output, facilitating the detection of inconsistent or faulty readings. This real-time monitoring is crucial for capturing sensor behavior under various operating conditions, enabling a more accurate assessment of the sensor’s health.
- Data Acquisition: Scan tools capture data from various engine components, including the TPS. This data includes the TPS voltage output, which varies with the throttle position. The tool typically records these readings alongside other relevant data points, like engine speed and coolant temperature.
- Identifying Issues: Inconsistencies in the TPS voltage output, particularly during throttle movement, can indicate a faulty sensor. For example, a TPS sensor that consistently reports a low voltage regardless of the throttle position suggests a potential internal malfunction.
- Wiring Problems: Scan tools can also reveal issues in the wiring harness that connects the TPS to the ECM. Intermittent or fluctuating readings could point to a problem with the wiring, such as a poor connection or a damaged wire.
- ECM Malfunction: In some cases, the ECM might not be interpreting the TPS signals correctly. A scan tool can help diagnose this by checking for discrepancies between the sensor’s reported position and the actual throttle position. This can lead to a faulty signal that doesn’t reflect the position of the throttle.
Interpreting TPS Data from Scan Tools
Understanding how to interpret the data from a scan tool is crucial. Different scan tools have varying interfaces, but the fundamental principles remain consistent. The data presented usually includes a table or graph showing TPS voltage readings against throttle position or engine speed.
| Throttle Position (%) | TPS Voltage (V) | Engine Speed (RPM) |
|---|---|---|
| 0 | 0.5 | 750 |
| 25 | 1.2 | 1500 |
| 50 | 2.0 | 2500 |
| 75 | 2.8 | 3500 |
| 100 | 3.5 | 4500 |
A typical TPS sensor output will show a gradual increase in voltage as the throttle position increases.
The table above provides a sample output, showing a correlation between throttle position and TPS voltage. Deviation from this expected pattern, such as erratic readings or a flat voltage output, indicates a potential problem. For instance, a consistently low voltage output at any throttle position may suggest a faulty sensor. This table, coupled with real-time observations from the scan tool, helps in determining the nature and extent of the issue.
This data, when analyzed alongside other readings, provides a clear picture of the sensor’s performance.
Replacement and Installation
Replacing a faulty throttle position sensor (TPS) requires careful attention to detail. Incorrect installation can lead to various engine performance issues, including erratic acceleration, rough idling, and even misfires. Thorough understanding of the procedure and adherence to manufacturer specifications are crucial for a successful replacement.Correct replacement ensures the TPS functions optimally, contributing to the overall reliability and performance of the vehicle.
The procedure Artikeld below provides a step-by-step guide for safe and effective TPS replacement.
Disconnecting the Old Sensor
Properly disconnecting the old TPS sensor is essential to prevent damage to the wiring harness or other components. Carefully identify all connections associated with the TPS sensor, including the electrical connectors and any vacuum lines or hoses. Unplug the electrical connector first, ensuring the connector is securely gripped to prevent accidental damage during removal. If present, disconnect any vacuum lines or hoses connected to the sensor.
Removing the Old Sensor
Thoroughly inspect the mounting location of the TPS sensor. Identify the fasteners holding the sensor in place. Use the appropriate tools to carefully remove these fasteners, being mindful of potential interference with other components. Once the fasteners are removed, gently but firmly pull the old TPS sensor away from its mounting location. If there is any resistance, ensure that all connections have been released before applying further force.
Installing the New Sensor, How to test tps sensor
Before installing the new TPS sensor, visually inspect the mounting surface and the sensor itself for any damage or debris. Clean the mounting surface thoroughly with a suitable cleaner to ensure a secure and clean connection. Position the new TPS sensor into its mounting location, aligning it with the mounting holes. Carefully insert the fasteners and tighten them according to the manufacturer’s specifications.
Over-tightening can damage the sensor or surrounding components.
Securing the New Sensor
Properly securing the new sensor is crucial for its long-term functionality. Ensure all fasteners are correctly tightened to the specified torque. This prevents loosening during operation and maintains the sensor’s alignment. Refer to the vehicle’s repair manual for precise torque specifications.
Reconnecting the Sensor
Reconnect the electrical connector to the new TPS sensor, ensuring a secure and tight connection. Check for any vacuum lines or hoses connected to the sensor and reconnect them properly. Ensure all connections are secure and properly seated. Double-check the wiring connections to prevent any short circuits or other electrical issues.
Potential Installation Issues
Several potential issues can arise during TPS installation. These include misalignment of the sensor, improper tightening of fasteners, and incorrect reconnection of electrical components. Incorrect torque settings can damage the sensor or other components. Carefully following the repair manual and using appropriate tools are critical in avoiding these issues.
Torque Specifications
Torque specifications are critical for mounting the TPS sensor. These specifications, typically provided in the vehicle’s repair manual, dictate the exact amount of rotational force required to tighten the mounting bolts. Using the correct torque ensures the sensor is properly secured without damaging the surrounding components.
Using the wrong torque can lead to premature failure of the sensor or related parts. Adherence to the torque specifications prevents potential issues and ensures long-term sensor functionality.
Troubleshooting Intermittent Problems
Intermittent problems with a Throttle Position Sensor (TPS) can be frustrating to diagnose. These issues manifest as erratic engine performance, sometimes running smoothly and other times exhibiting symptoms like surging, hesitation, or rough idling. Pinpointing the cause of these intermittent issues requires a systematic approach, considering various potential factors.Diagnosing intermittent problems necessitates a methodical approach, combining visual inspection with targeted electrical testing.
Environmental conditions, such as temperature fluctuations, can also play a significant role. This section details strategies for isolating the cause of these intermittent issues, including a crucial step of checking the wiring harness for continuity.
Diagnosing Intermittent TPS Sensor Issues
Intermittent problems often stem from fluctuating electrical signals within the TPS circuit. This fluctuation can be caused by poor electrical connections, faulty wiring, or even issues with the sensor itself. Thorough testing is crucial to isolate the source.
Strategies for Isolating the Cause of Intermittent Issues
A systematic approach is essential when dealing with intermittent problems. Begin by meticulously checking the connections, including the sensor connector, the wiring harness, and any associated components.
- Visual Inspection: Inspect the TPS sensor for any visible damage, such as cracks, corrosion, or loose connections. Examine the wiring harness for signs of damage or fraying.
- Environmental Factors: Consider the potential impact of environmental conditions, particularly temperature changes, on the sensor’s performance. Extreme temperatures can affect the sensor’s accuracy and lead to intermittent problems. Sudden changes in temperature, for instance, from a hot to cold environment, are a common culprit.
- Electrical Continuity Testing: A crucial step is to test the wiring harness for continuity. This checks for any breaks or shorts in the circuit, which can cause intermittent problems. A multimeter is essential for this testing. Ensure you’re using the correct settings on the multimeter to check for continuity. A non-conductive wire or disconnected component will not complete the circuit and will show an open circuit on the multimeter.
Flowchart for Diagnosing Intermittent TPS Problems
A flowchart provides a structured approach to systematically diagnose intermittent TPS sensor problems. 
Testing the Wiring Harness for Continuity
Testing the wiring harness for continuity is a critical step in isolating intermittent problems. Continuity checks ensure that the electrical signal can travel unimpeded through the wiring harness. A break in the circuit will cause intermittent issues.
- Using a Multimeter: Use a multimeter set to the continuity mode to check for continuity between the TPS sensor connector terminals and the engine control module (ECM). This helps to identify any breaks or shorts in the wiring.
- Procedure: Carefully disconnect the TPS sensor from the wiring harness. Test each wire’s connection to the harness. If any section shows an open circuit, the harness is the source of the intermittent issue. Repair or replace the damaged section of the harness.
Concluding Remarks
In conclusion, testing a throttle position sensor (TPS) requires a systematic approach, encompassing visual inspection, diagnostic tool usage, and a thorough understanding of the sensor’s function and associated readings. This guide has provided a comprehensive framework for tackling TPS sensor issues, from recognizing common symptoms to implementing effective troubleshooting strategies. By following the Artikeld steps, you can effectively diagnose and resolve TPS-related problems, leading to improved vehicle performance and efficiency.
Remember that precise calibration and accurate readings are paramount for optimal engine operation.
FAQ Section: How To Test Tps Sensor
What are the typical symptoms of a failing TPS sensor?
Common symptoms include rough idling, erratic acceleration, hesitation during acceleration, and check engine light illumination. These symptoms can also stem from other engine issues, necessitating further investigation.
How can I tell if the problem is in the TPS sensor wiring?
A visual inspection of the wiring harness and connections is a first step. Look for signs of damage or corrosion. Use a multimeter to test for continuity in the wiring circuit. Intermittent issues might suggest a problem with the wiring rather than the sensor itself.
What are the differences between resistive and Hall effect TPS sensors?
Resistive TPS sensors use resistance changes to measure throttle position, while Hall effect sensors utilize magnetic fields. Resistive sensors are generally less expensive but may be susceptible to environmental factors, while Hall effect sensors are more stable but often more costly. A table comparing these types, including their advantages and disadvantages, is often included in the relevant vehicle repair manual.
Can I use a standard multimeter to test a TPS sensor?
Yes, a multimeter can be used to measure the resistance of a TPS sensor. However, precise measurements are required. Consult your vehicle’s specific technical documentation for the expected resistance values at various throttle positions.


