 Nimila
How to test a fuel gauge is a critical skill for any vehicle owner. Understanding the operation, potential issues, and troubleshooting methods is essential for maintaining optimal fuel efficiency and preventing unexpected mechanical problems. This comprehensive guide details the process from basic visual inspections to advanced diagnostic techniques, equipping you with the knowledge to accurately assess and address any fuel gauge malfunctions.
This guide will walk you through various aspects of fuel gauge testing, encompassing different types of fuel gauges, their inherent workings, and the role of critical components. The steps are presented in a clear and sequential manner, progressing from fundamental checks to advanced troubleshooting procedures. Essential information on interpreting readings and understanding common issues is also included, helping you to efficiently identify and resolve fuel gauge problems.
Introduction to Fuel Gauges
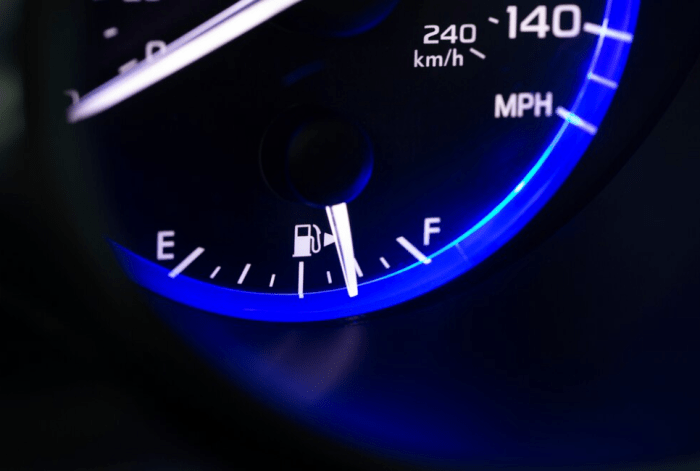
Fuel gauges are essential instruments in vehicles, providing drivers with real-time information about the amount of fuel remaining in the tank. Their accuracy and reliability are crucial for efficient driving and avoiding running out of fuel. Understanding how these gauges work is vital for diagnosing potential issues and maintaining vehicle performance.Accurate fuel level measurement is essential for safe and economical driving.
This understanding helps drivers avoid unexpected fuel shortages, which can lead to costly and inconvenient situations. Knowing the different types of fuel gauges and their underlying principles can aid in troubleshooting and maintenance.
Types of Fuel Gauges
Fuel gauges come in various forms, each employing distinct technologies. The most common types are mechanical and electronic gauges. Understanding their differences is vital for comprehending the strengths and limitations of each.
- Mechanical Fuel Gauges: These gauges rely on a float mechanism to measure the fuel level. The float, usually made of a buoyant material, rises and falls with the fuel level. Its movement is connected to a pointer that indicates the fuel level on a calibrated scale. Mechanical gauges are generally less expensive to manufacture compared to electronic gauges, but their accuracy can be affected by the float’s design and the fuel’s characteristics.
- Electronic Fuel Gauges: Electronic gauges use a sensor to detect the fuel level. This sensor, typically a capacitive or ultrasonic type, measures the fuel’s dielectric properties or the time it takes for a sound wave to travel through the fuel. The signal from the sensor is processed by the vehicle’s electrical system to display the fuel level on the dashboard.
Electronic gauges offer higher accuracy and reliability compared to mechanical gauges and can be integrated with other vehicle systems for more sophisticated displays.
Measurement Principles
The fundamental principle behind measuring fuel level varies depending on the type of gauge. Mechanical gauges utilize the principle of buoyancy, where the float displaces a volume of fuel equivalent to the fuel level. Electronic gauges employ different principles depending on the sensor type. Capacitive sensors measure the dielectric constant of the fuel, while ultrasonic sensors measure the time it takes for a sound wave to travel through the fuel.
Role of Sensors in Fuel Gauge Operation
Sensors play a critical role in electronic fuel gauges. They act as the interface between the fuel level and the vehicle’s electrical system. The signal produced by the sensor is processed and translated into a fuel level reading that is displayed on the dashboard. Different types of sensors have different operating principles and characteristics, impacting the gauge’s accuracy and reliability.
Comparison of Fuel Gauge Types
| Feature | Mechanical | Electronic |
|---|---|---|
| Measurement Method | Float | Sensor (Capacitive/Ultrasonic) |
| Accuracy | Generally lower, prone to errors due to float design and fuel variations | Generally higher, more accurate readings due to sensor technology |
| Maintenance | Minimal, but float wear and tear can affect accuracy over time | Minimal, sensor replacement might be needed in extreme cases |
Visual Inspection and Basic Checks
A visual inspection is a crucial first step in troubleshooting fuel gauge issues. This involves a careful examination of the gauge itself, related components, and the vehicle’s overall condition. Identifying potential problems early can save time and money, preventing further complications.
Visual Inspection Procedure, How to test a fuel gauge
A thorough visual inspection begins with ensuring the fuel gauge is properly connected and secured to the fuel sender unit. Check for any visible damage or corrosion on the gauge’s housing, wiring, or connectors. Note the gauge’s current position and compare it to the fuel level in the tank, if possible. This initial comparison provides a baseline for subsequent checks.
Look for signs of loose connections or damaged wiring harnesses. Also, observe the fuel sender unit for any visible signs of damage or leakage.
Identifying Potential Issues
Incorrect fuel gauge readings can stem from various sources. A consistently inaccurate reading, regardless of the fuel level, suggests a possible problem with the gauge itself or its wiring. A reading that doesn’t change even after refueling indicates a potential issue with the fuel sender unit. Fluctuating readings without a corresponding change in fuel level might point to faulty wiring or connections.
A completely unresponsive fuel gauge (no reading at all) indicates a more significant problem that needs further investigation, possibly involving the wiring, sender unit, or the gauge itself.
Interpreting Fuel Gauge Readings
Interpreting fuel gauge readings requires considering the vehicle’s driving conditions. A gauge that accurately reflects fuel level during steady driving conditions might not be as reliable under acceleration or deceleration. Rapid changes in fuel level readings during driving can suggest a problem with the fuel sender unit’s ability to accurately measure fuel level fluctuations. It’s important to understand that some fluctuations are normal, especially during acceleration or braking.
However, consistent and extreme fluctuations warrant further investigation.
Basic Fuel Gauge Check
This step-by-step guide provides a basic fuel gauge check:
- Turn the ignition switch on without starting the engine.
- Observe the fuel gauge reading. Compare the reading with the amount of fuel currently in the tank. Note any discrepancies.
- Observe the fuel sender unit for any visible signs of damage or leakage. Check for any loose connections or corrosion on the wiring harness.
- If the reading is incorrect, try starting the engine and observe the fuel gauge reading during various driving conditions, like acceleration and deceleration.
- If the problem persists, consult a qualified mechanic for further diagnostics.
Common Fuel Gauge Problems and Solutions
| Problem | Solution |
|---|---|
| Incorrect readings | Check for loose connections in the wiring, inspect the fuel sender unit for damage, or replace the fuel gauge if necessary. |
| No reading | First, check the fuse and relay associated with the fuel gauge. If the problem persists, verify the wiring between the gauge and the fuel sender unit. If the issue persists, consider replacing the fuel gauge or fuel sender unit. |
Troubleshooting Fuel Gauge Issues

Diagnosing fuel gauge problems can be a multi-step process, requiring careful observation and methodical testing. Identifying the root cause is crucial for effective repair and preventing further complications. Understanding the potential problems, symptoms, and diagnostic procedures will allow for a more efficient and accurate resolution.Often, fuel gauge issues are linked to the fuel sender unit, which measures the fuel level and transmits this information to the gauge.
Problems with the wiring, the gauge itself, or the electrical connections within the vehicle’s system can also lead to inaccurate readings. By systematically investigating each component, the source of the problem can be pinpointed.
Potential Fuel Gauge Problems
Several factors can contribute to fuel gauge malfunction. These include issues with the fuel sender unit, wiring, connections, and the gauge itself. A systematic approach to diagnosing these problems is essential for a correct diagnosis and efficient repair.
Symptoms and Causes of Low Readings
A fuel gauge displaying a low reading even when the tank is full suggests a malfunction in the fuel sender unit or the gauge’s internal components. The fuel sender unit, responsible for measuring fuel level, might be faulty, or there could be a problem with the wiring or connections to the gauge.
- Faulty Fuel Sender Unit: The fuel sender unit, typically located inside the fuel tank, can develop internal resistance issues. This resistance can cause the fuel gauge to incorrectly indicate a low fuel level, even when the tank is full. This is a common cause, especially with older vehicles or those exposed to harsh conditions.
- Wiring Problems: Damaged or corroded wiring connecting the fuel sender unit to the gauge can lead to inaccurate readings. Loose connections or short circuits within the wiring harness can also contribute to the issue.
- Gauge Malfunction: In some cases, the fuel gauge itself might be faulty. This could involve internal component failures, leading to inaccurate readings. This is less common than sender or wiring issues.
Symptoms and Causes of Erratic Readings
Erratic readings, where the fuel gauge fluctuates wildly or jumps between different levels without any apparent change in the fuel level, indicate a problem with the electrical system. This could be a malfunctioning fuel sender unit, wiring problems, or issues with the gauge’s internal components.
- Fuel Sender Unit Malfunction: The fuel sender unit may be intermittently failing to provide accurate readings, causing the gauge to fluctuate. This can result from internal components becoming loose or corroded.
- Wiring Issues: Intermittent short circuits, loose connections, or damaged wiring within the system can cause the erratic readings. A frayed wire or a loose connection might not present a constant issue, only manifesting intermittently.
- Gauge Issues: A faulty gauge itself can exhibit erratic behavior, although this is less common than problems with the sender unit or wiring.
Diagnosing Fuel Gauge Problems
A systematic approach is essential for diagnosing fuel gauge issues. Begin by visually inspecting the fuel sender unit and associated wiring for damage or corrosion. Check for loose connections and ensure the wiring is properly secured.
- Visual Inspection: Carefully examine the fuel sender unit for any visible damage, such as cracks, corrosion, or signs of mechanical stress. Inspect the wiring for breaks, exposed wires, or signs of corrosion.
- Continuity Checks: Use a multimeter to check for continuity in the wiring between the fuel sender unit and the gauge. This ensures the electrical circuit is intact.
- Resistance Measurements: Measure the resistance of the fuel sender unit at various fuel levels. This comparison against expected values helps identify problems within the sender unit.
Testing the Fuel Sender Unit
The fuel sender unit is a critical component in the fuel gauge system. Testing it involves verifying its resistance values at different fuel levels. This process helps determine if the sender unit is functioning correctly.
- Gather Necessary Tools: Obtain a multimeter, and a source of fuel to accurately simulate different fuel levels (or the ability to lift the fuel tank for testing).
- Prepare the Fuel Sender Unit: Disconnect the fuel sender unit from the wiring harness to ensure safety and a stable testing environment. Note the correct orientation to avoid confusion.
- Measure Resistance: Measure the resistance of the fuel sender unit at different fuel levels, comparing the results against the manufacturer’s specifications.
Fuel Gauge Issues Categorized by Symptom
| Symptom | Possible Causes | Solutions |
|---|---|---|
| Low reading, even when full | Faulty fuel sender unit, wiring problems, gauge malfunction | Inspect and test fuel sender unit, check wiring connections, test gauge |
| Erratic readings | Intermittent fuel sender unit failure, wiring issues, gauge problems | Inspect wiring, check for loose connections, test fuel sender unit, consider gauge replacement |
Testing the Fuel Sender Unit
The fuel sender unit is a critical component in a vehicle’s fuel system. It measures the amount of fuel in the tank and transmits this information to the fuel gauge. A faulty sender unit can lead to inaccurate fuel gauge readings, potentially causing issues with fuel efficiency and the ability to safely determine the remaining fuel. Accurate readings are essential for efficient fuel management and avoiding running out of fuel unexpectedly.The fuel sender unit, often located inside the fuel tank, contains a float and a resistance element.
As the fuel level changes, the float moves, altering the resistance of the element. This changing resistance is what the fuel gauge interprets to display the current fuel level. A multimeter can be used to test the resistance of the fuel sender unit, verifying its functionality and identifying any potential issues.
Testing the Fuel Sender Unit with a Multimeter
Testing the fuel sender unit involves measuring the resistance of the unit at different fuel levels. This procedure requires careful attention to detail and precise measurements. Using a multimeter, you can accurately assess the sender’s performance and pinpoint any discrepancies.
Procedure for Testing the Fuel Sender Unit
- Ensure the vehicle’s ignition is turned off and the key is removed. Disconnect the fuel sender unit connector from the wiring harness.
- Locate the fuel sender unit terminals. These terminals are typically labeled, or the schematic diagram can be used as a reference.
- Connect the multimeter leads to the fuel sender unit terminals. Set the multimeter to the resistance (Ω) setting.
- Carefully place the vehicle in different fuel level positions. Empty, half full, and full positions are crucial for accurate readings.
- Measure the resistance value displayed on the multimeter. Record the readings for each fuel level.
- Compare the recorded resistance values to the expected values in the table below. Any significant discrepancies indicate a possible problem with the fuel sender unit.
Typical Resistance Values for Different Fuel Levels
The resistance values of the fuel sender unit vary depending on the fuel level. These values are not universal and may vary based on the vehicle model and manufacturer. The table below shows the typical resistance values.
| Fuel Level | Resistance (Ω) |
|---|---|
| Empty | High (e.g., 100-200 Ω) |
| Half Full | Medium (e.g., 50-100 Ω) |
| Full | Low (e.g., 10-20 Ω) |
Note: The values in the table are examples and may vary. Always consult your vehicle’s repair manual for the specific resistance values for your model.
Repair and Replacement Procedures
Replacing a faulty fuel gauge involves careful disassembly, component identification, and precise reassembly. Proper tools and adherence to safety precautions are critical to avoid potential hazards. Understanding the fuel gauge wiring and connections is essential for a successful repair.
Fuel Gauge Replacement Steps
This section details the process of replacing a faulty fuel gauge, encompassing critical steps for safe and effective repair. Following these procedures ensures the fuel gauge is correctly installed and functions as intended.
- Disconnecting the Fuel System: Before commencing any work on the fuel gauge, disconnect the fuel line from the fuel tank. This precaution prevents fuel spillage and potential fire hazards. Always use appropriate safety equipment, including gloves and eye protection. Ensure the fuel tank cap is securely closed to prevent fuel from escaping during the procedure.
- Removing the Existing Fuel Gauge: Carefully detach the fuel gauge’s electrical connections and any mounting hardware. Use appropriate tools, such as screwdrivers and pliers, and take care to avoid damaging the surrounding components. Document the exact location and orientation of all parts for proper reassembly.
- Installing the New Fuel Gauge: Position the new fuel gauge in its mounting location, aligning it with the existing mounting points. Ensure the fuel gauge is properly seated and secure. Attach the mounting hardware to fasten the new fuel gauge to its housing.
- Connecting Electrical Components: Reconnect the fuel gauge’s electrical connections, ensuring proper polarity. Carefully route and secure all wires to prevent short circuits and maintain a clean and organized wiring system. Verify the connections are secure and the wires are not pinched or damaged.
- Connecting the Fuel System: Reattach the fuel line to the fuel tank, ensuring a tight seal. Thoroughly inspect all connections for leaks and ensure proper sealing to prevent fuel leaks. Carefully check for any damage to the fuel line or fittings.
- Testing the Fuel Gauge: After reconnecting the fuel system, turn the ignition switch on to check the fuel gauge function. Observe the gauge’s operation to confirm that it accurately reflects fuel levels. If the gauge does not operate correctly, review the wiring and connections for errors. If issues persist, consult the vehicle’s repair manual or a qualified mechanic.
Required Tools and Materials
Appropriate tools and materials are essential for safe and efficient fuel gauge replacement. A checklist ensures you have the necessary items to complete the task.
- Tools: Screwdrivers (Phillips and flathead), pliers, wire strippers, multimeter, socket set, wrench set, safety glasses, work gloves, and appropriate tools for disconnecting fuel lines. The specific tools required may vary depending on the vehicle make and model.
- Materials: New fuel gauge, fuel line disconnect tool, new fuel line clamps, electrical tape, sealant, and replacement gaskets. Consult the vehicle’s repair manual or a qualified mechanic for the correct specifications for the required parts.
Safety Precautions
Adhering to safety precautions is critical to prevent accidents and injuries while working on the fuel system.
- Fuel Safety: Never work on a fuel system with the engine running or if the fuel tank is not vented. Always use caution when handling fuel and keep the area well-ventilated. Be mindful of the potential for fuel spills and avoid open flames or sparks in the work area. Ensure proper grounding is used to avoid static electricity sparks.
- Electrical Safety: Turn off the power source before working on any electrical components. Use appropriate personal protective equipment, such as safety glasses, to avoid eye injuries. Carefully inspect all wires and connections for damage before reconnecting.
- General Safety: Use appropriate work gloves and clothing to protect hands and skin. Maintain a clear and organized workspace to prevent accidents. Ensure proper ventilation and avoid working in poorly lit areas.
Fuel Gauge Wiring Diagram
A visual representation of the fuel gauge wiring and connections is provided below. This diagram aids in identifying the proper connections and ensures accurate reassembly.
[Insert a diagram here. The diagram should clearly show the fuel gauge’s connections to the fuel sender unit, the power source, and the instrument cluster. Label all wires and connectors.]
Fuel Gauge Calibration and Adjustment
Fuel gauge accuracy is crucial for proper vehicle operation and fuel management. Calibration ensures the fuel gauge accurately reflects the amount of fuel remaining in the tank. This process involves adjusting the gauge’s readings to match the actual fuel level. Inaccurate readings can lead to wasted fuel, unnecessary trips to the gas station, and potentially damage to the vehicle.
Understanding Fuel Gauge Calibration
Fuel gauge calibration involves adjusting the gauge’s electrical signal or mechanical linkage to align its display with the actual fuel level in the tank. This process is essential for maintaining the accuracy of the fuel gauge over time. Calibration procedures can vary based on the type of fuel gauge system, either electronic or mechanical. Factors such as fuel level sensor accuracy and wiring integrity also play a significant role in overall gauge accuracy.
Correct calibration is essential to prevent overfilling or running out of fuel prematurely.
Calibration Methods for Different Fuel Gauge Types
Different fuel gauge types necessitate specific calibration procedures. Mechanical fuel gauges rely on float mechanisms, while electronic ones utilize fuel level sensors. The methods vary significantly in their complexity.
| Method | Tools | Procedure |
|---|---|---|
| Method 1: Mechanical Fuel Gauge Calibration | Precise measuring tools (ruler, calipers), replacement float if necessary, screwdriver, fuel tank access, fuel. | Precisely measure the fuel level in the tank using the measuring tools. Mark the corresponding fuel gauge needle position on the gauge face. Using the marked position as a reference, adjust the float mechanism linkage to match the correct fuel level. If the float is damaged, replace it with a new one. Ensure the gauge linkage operates smoothly. Fill the tank with fuel to verify the accuracy. |
| Method 2: Electronic Fuel Gauge Calibration | Fuel level sensor tester, diagnostic scan tool (OBD-II scanner), multimeter, fuel tank access, fuel. | Use the fuel level sensor tester to measure the voltage output from the fuel level sensor at various fuel levels. Compare these readings with the expected voltage values. Use the diagnostic scan tool to access and adjust fuel gauge settings in the vehicle’s computer system if available. If the sensor readings are inaccurate, repair or replace the sensor. Verify the fuel gauge reading against the actual fuel level. Fill the tank to verify the accuracy of the calibrated fuel gauge. |
Tools and Procedures for Fuel Gauge Adjustment
Accurate calibration necessitates specialized tools and a precise procedure. The tools required for mechanical gauges may differ from those for electronic systems. Calibration procedures typically involve adjusting the mechanical linkage or recalibrating the electronic signal to ensure accurate readings.
Advanced Fuel Gauge Testing Techniques: How To Test A Fuel Gauge
Advanced fuel gauge testing goes beyond basic checks, delving into complex diagnostics to pinpoint the root cause of malfunctioning fuel gauges. This often involves specialized tools and procedures that can be crucial in identifying subtle issues not apparent during initial assessments. Understanding these advanced techniques is essential for accurate diagnosis and efficient repair.
Specialized Diagnostic Tools
Advanced fuel gauge diagnostics often necessitates the use of specialized tools. These tools provide detailed readings and analyses that can reveal subtle issues not detectable with basic tools. Oscilloscope-based diagnostics, for instance, can capture voltage fluctuations and waveforms related to the fuel sender and gauge circuit. Automotive-specific scan tools can retrieve data from the vehicle’s electronic control unit (ECU), providing insights into fuel level readings and potential error codes associated with the fuel system.
Advanced Troubleshooting Procedures
Advanced troubleshooting procedures are designed to systematically isolate problems in the fuel gauge system. These methods involve more intricate tests and evaluations than basic checks. For example, a comprehensive approach might involve: 1) checking the fuel sender unit’s resistance against expected values; 2) measuring the voltage at various points in the fuel gauge circuit under varying fuel levels; 3) verifying the functionality of the gauge’s internal components through electrical simulations; 4) examining the wiring and connections for damage or corrosion.
Case Study: A Complex Fuel Gauge Issue
A vehicle owner reported a fluctuating fuel gauge reading, with the needle occasionally jumping erratically. Initial checks revealed no obvious problems with the fuel sender or wiring. Advanced diagnostics, utilizing an oscilloscope, showed erratic voltage fluctuations in the fuel gauge circuit. This indicated a potential problem within the fuel gauge’s internal circuitry or a faulty wiring connection within the gauge itself.
Further testing using a specialized scan tool revealed a minor short in the gauge’s internal components, leading to the fluctuating readings. This case highlights the importance of employing advanced techniques to identify subtle problems that might be overlooked during basic testing.
Advanced Testing Methods
| Method | Description |
|---|---|
| Advanced Method 1: Oscilloscope Analysis | Using an oscilloscope to capture voltage waveforms in the fuel gauge circuit allows for the detection of erratic fluctuations and voltage drops that might not be apparent with standard multimeter readings. This method helps pinpoint issues within the fuel gauge itself, the wiring, or the fuel sender unit. |
| Advanced Method 2: Data Logging with Scan Tool | Employing a scan tool to log fuel level data over time helps to identify intermittent problems. This can involve recording fuel level readings under various driving conditions, including acceleration, deceleration, and steady-state driving. Identifying patterns in the logged data can reveal inconsistencies in the fuel gauge’s readings. |
| Advanced Method 3: Resistance Measurements under Load | Testing the resistance of the fuel sender unit under varying fuel levels, and measuring voltage drops across the fuel gauge circuit under load, can detect potential problems with the sender unit or its wiring. This ensures that the readings accurately reflect the actual fuel level. |
Concluding Remarks
In conclusion, accurate fuel gauge readings are vital for efficient driving and preventing potential mechanical issues. This guide has provided a thorough overview of the testing process, encompassing visual inspections, troubleshooting, and advanced techniques. By following the provided steps, you can effectively diagnose and address any fuel gauge problems, ensuring optimal fuel efficiency and vehicle performance. Remember to prioritize safety precautions throughout the process.
Questions and Answers
What are the typical resistance values for different fuel levels in a fuel sender unit?
Resistance values vary depending on the specific fuel sender unit. However, a general guideline is as follows: empty – high resistance; half-full – medium resistance; full – low resistance. Consult the vehicle’s repair manual for precise values for your particular model.
How can I interpret fuel gauge readings in different driving conditions?
Fuel gauge readings can fluctuate due to factors such as engine load and driving style. For instance, during acceleration, the gauge may show a lower reading than the actual fuel level. Steady-state driving conditions generally provide more accurate readings. Pay attention to the consistency of the gauge readings over time to better assess the overall fuel level.
What are some common fuel gauge problems and their solutions?
Common problems include incorrect readings and no reading at all. Possible solutions for incorrect readings may involve checking the fuel sender unit or wiring connections. If there’s no reading, a potential cause could be a faulty fuel sender or issues with the wiring harness. Refer to the troubleshooting sections for detailed guidance.


