

How to self tan your back effectively and achieve a flawless, natural-looking tan is a topic that concerns many. This guide delves into the crucial steps for achieving an even and attractive tan, from meticulous preparation to post-application care, addressing potential pitfalls and offering solutions. Proper techniques are vital to avoid streaks and ensure a beautiful, consistent result. Let’s explore the best methods and products for achieving your desired back tan.
This comprehensive guide covers everything from preparing your skin to applying self-tanner, and ultimately, achieving a beautiful, natural-looking back tan. We’ll cover various application methods, their pros and cons, and essential tips for avoiding common issues. The detailed step-by-step instructions, combined with expert advice, will empower you to confidently and successfully self-tan your back.
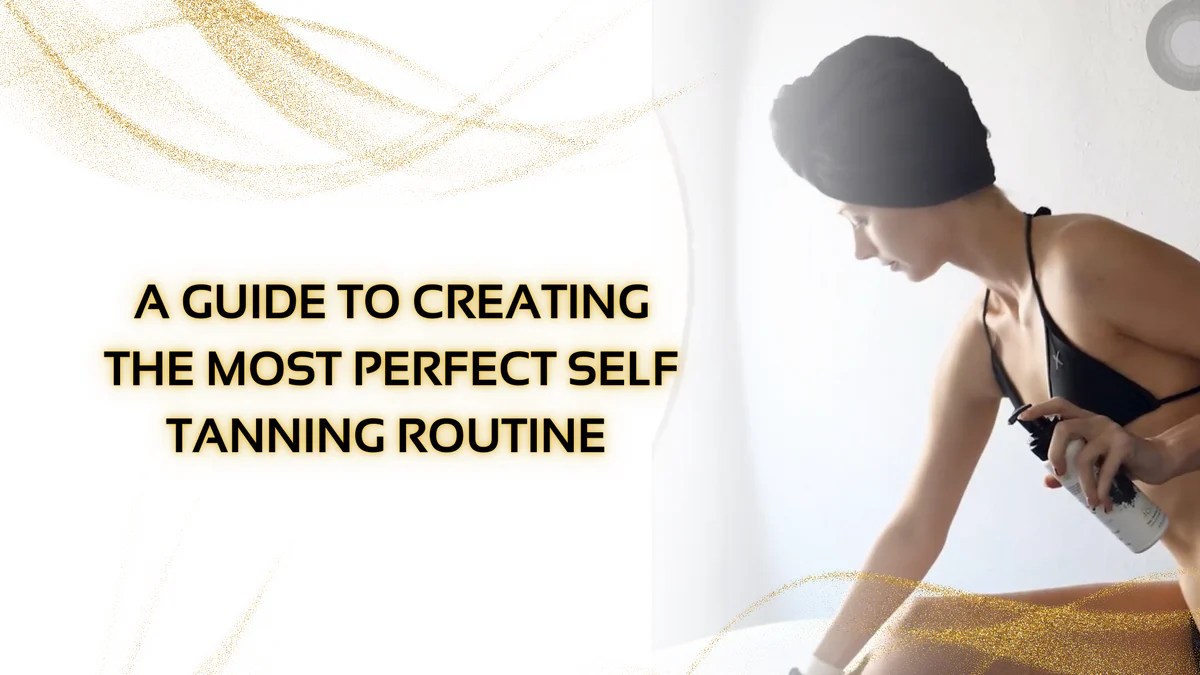
Introduction to Self-Tanning the Back
Yo, so you wanna level up your back game? Self-tanning is your secret weapon, but it’s not all sunshine and rainbows. It’s totally doable, but you gotta know the rules. This ain’t about fake bronzer, it’s about looking good without the sun’s harsh rays. Proper pre-prep and the right technique are key to a flawless, natural-looking tan.
Plus, we’ll break down the different self-tanning methods and how they work on your back, so you can pick the perfect one for you.Self-tanning for your back offers a convenient way to achieve a sun-kissed glow without the harmful UV rays. However, improper application can lead to streaks, uneven tones, or a patchy appearance. Careful preparation and the right technique are crucial for a smooth, natural-looking tan on your back.
Self-Tanning Methods for the Back
Different self-tanning methods cater to different preferences and needs. From lotions to mousses to sprays, each has its own pros and cons. Knowing these will help you choose the best option for your back.
| Method | Pros | Cons | Application Tips |
|---|---|---|---|
| Lotion | Easy to use, often affordable, good for beginners | Can be messy, may not be as quick as other methods, more prone to streaks | Apply in thin, even layers, focus extra attention on areas prone to streaks like the shoulder blades and the curves of your back. Don’t forget to moisturize beforehand. |
| Mousse | Easy to use, often less messy than lotion, lighter texture, often provides a more even tan | May require more application time, can be a bit pricier than lotion | Apply in thin, even layers, smooth out quickly to avoid streaks, especially along your spine. Use gentle upward motions. |
| Spray | Fast application, even coverage, ideal for large areas, often provides a quick tan | Requires special equipment, may not be accessible to everyone, can be more expensive than lotion or mousse | Follow manufacturer’s instructions carefully, ensure proper ventilation, especially in small spaces. Apply a thin layer of moisturizer afterward to avoid drying. |
Choosing the right method depends on your personal preferences and the level of effort you’re willing to put in. Consider factors like ease of use, messiness, and time commitment when making your decision.
Preparation for Self-Tanning the Back
Yo, fam! Self-tanning your back can be a total game-changer for your Insta feed, but you gotta prep right. Skip the uneven streaks and orange tones; let’s get you looking flawless. This ain’t rocket science, just a few key steps to make sure your back tans like a dream.Proper preparation is key to achieving a smooth, even, and natural-looking tan.
It’s all about prepping your skin to soak up the self-tanner like a sponge. Think of it as giving your skin a little spa day before the big reveal.
Essential Skin Preparation Steps
Prep work is crucial for a flawless self-tan. Exfoliation, hydration, and sensitivity checks are your best friends. These steps help the tanner go on smoothly and prevent any unwanted surprises.
- Exfoliation is your first move. Get rid of dead skin cells to let the tanner absorb better. Think of it like giving your skin a deep clean. This helps prevent the tan from looking patchy or streaky. Use a gentle scrub or exfoliating mitt to avoid irritating your skin.
- Hydration is super important before and after application. Moisturized skin absorbs self-tanner more evenly, and it prevents dryness after application. Keep your skin hydrated to avoid any dryness or flakiness. Use a good lotion or body oil to keep your skin moisturized.
- Spot-check for sensitivities. Before applying self-tanner all over, do a patch test on a small, inconspicuous area of skin, like your inner arm or wrist. This lets you see how your skin reacts. If you have any concerns about sensitivity, it’s always a good idea to consult a dermatologist. Listen to your body.
If it’s not feeling right, don’t push it.
Necessary Tools and Supplies
You need the right tools to make this a smooth process. No need for fancy stuff, just essentials.
- A good self-tanner is your main weapon. Choose a formula that’s designed for your skin type and goals. Read reviews and find a formula that’s right for you. Don’t be afraid to ask for recommendations. Lots of people have good ones.
- A soft-bristled brush or mitt is a lifesaver for applying the tanner evenly. A sponge or washcloth can also work, but make sure it’s clean. You don’t want any bacteria or dirt getting on your skin.
- Gloves are essential for protecting your hands from the self-tanner. You don’t want to end up with a surprise tan on your hands. Get some disposable gloves to keep your hands protected.
- A clean towel or washcloth will help you wipe away any excess tanner and keep your skin clean.
Exfoliating Techniques for Even Tanning
Exfoliating properly is like giving your skin a makeover. It gets rid of dead skin cells, leaving your skin smooth and ready for the self-tanner to work its magic.
- Use a gentle exfoliating scrub or mitt in circular motions. Don’t scrub too hard or you might irritate your skin. A gentle touch is best.
- Focus on areas prone to dryness or uneven tanning, like elbows, knees, and heels. These areas often need extra attention to ensure even coverage.
- Rinse thoroughly after exfoliating to remove any residue. Don’t forget to pat your skin dry before applying self-tanner.
Step-by-Step Preparation Procedure
This is your guide to flawless back tanning.
- Thoroughly cleanse and dry your back.
- Exfoliate your back using a gentle scrub or mitt.
- Apply a hydrating lotion or body oil to your back.
- Perform a patch test on a small area of skin.
- Apply self-tanner to your back using a soft-bristled brush or mitt.
- Ensure even coverage, especially on areas like elbows and knees.
- Allow the self-tanner to dry completely.
- Once dry, rinse your hands thoroughly.
Application Techniques for the Back


Yo, so you prepped your skin, now it’s time to get that tan lookin’ flawless on your back. Forget those uneven streaks, we’re about to make sure your back is lookin’ like a sun-kissed dream. This ain’t no amateur hour, fam.Proper application is key to a smooth, even tan. Skip the streaks and awkward patches, and get a flawless finish.
We’re gonna break down the best techniques, so you can rock that sun-kissed look without the hassle.
Various Application Techniques
Different methods work best for different areas. Finding the right technique for your back is crucial for avoiding those dreaded streaks. Experiment to find what feels most comfortable and gives you the best results.
- The Circular Motion: Imagine you’re painting your back in small circles. Start with a small area, then gradually work your way across. This method helps ensure even coverage, especially for those hard-to-reach spots. This method is great for beginners because it’s less intimidating and less likely to lead to streaks.
- The Upward and Downward Stroke: Use long, even strokes going straight up and down your back. This method is more efficient for larger areas and works well for those who are comfortable with a bit more speed.
- The “Zig-Zag” Technique: This method involves applying the self-tanner in a zig-zag pattern, overlapping slightly with each stroke. It’s great for intricate areas like the shoulder blades or lower back, and it helps prevent streaks. This method works well for those with tricky curves.
Using Proper Tools and Techniques
Using the right tools and techniques can make all the difference in getting an even, streak-free tan. The tools and the way you use them will influence the quality of your tan.
- Gloves are your friend: Protect your hands from the self-tanner and ensure clean, consistent application. Avoid getting self-tanner on your hands and use gloves to prevent smudges.
- A mitt is a lifesaver: A self-tanning mitt helps to ensure even application and prevents streaking. Use the mitt to get a consistent, smooth layer of self-tanner on your back.
- Small, controlled strokes: Apply the self-tanner in small, controlled strokes. Avoid large swaths of product; you want to build up the tan gradually and avoid over-applying in one area. Think about applying the tan like you would paint a wall. The more control you have, the better the outcome.
Hard-to-Reach Areas
Targeting those tricky spots on your back, like the lower back and shoulder blades, requires a little extra care. Knowing how to apply to these areas will help you achieve a seamless tan.
- Lower Back: Use a mirror to help with the lower back, and apply self-tanner in small, controlled strokes. Work from the bottom up, ensuring each stroke overlaps the previous one. You may need to use your non-dominant hand to assist in reaching those lower areas.
- Shoulder Blades: Apply in small, circular motions, focusing on the curves of your shoulder blades. Use your fingers or a small brush to get into these hard-to-reach areas. Don’t forget to apply evenly and overlap strokes to avoid streaking.
Comparing Application Methods
Each method has its pros and cons. Finding what works best for you is key to achieving a flawless tan. Try different techniques and see what you like best.
| Method | Efficiency | Effectiveness |
|---|---|---|
| Circular | Moderate | High |
| Upward/Downward | High | Moderate |
| Zig-Zag | Low | High |
Step-by-Step Procedure
This detailed guide will walk you through the process.
- Apply self-tanner to your back in small circular motions. Use gentle pressure and even strokes. Don’t rush the process.
- Use upward and downward strokes for larger areas, or a zig-zag pattern for intricate spots.
- Focus on hard-to-reach areas like the lower back and shoulder blades using smaller strokes.
- Make sure to use proper tools, like gloves or a self-tanning mitt, to prevent streaking.
- Allow the self-tanner to dry completely before getting dressed.
Post-Application Care for the Back: How To Self Tan Your Back
Yo, so you just slapped on that self-tanner, right? Now it’s time to keep that glow going strong. This ain’t just about slapping it on, fam. It’s about making sure it lasts and looks good. Proper aftercare is key for a flawless, long-lasting tan.Proper aftercare isn’t just about looking good; it’s about keeping your skin healthy.
Ignoring these steps can lead to dryness, unevenness, and even potential skin issues. So, let’s dive into the deets on keeping your back looking snatched after you self-tan.
Moisturizing: Hydration is Key
Keeping your skin hydrated is super important after self-tanning. Think of it like this: If you don’t moisturize, your skin is gonna be dry, and that’s a recipe for unevenness and flakes. This dryness will show up more prominently in the tan. Use a moisturizer specifically designed for use after tanning, or a really good, hydrating lotion.
It’ll lock in the color and keep your skin looking smooth.
Preventing Streaks and Unevenness
Okay, so you’ve got that fresh tan. But what if it’s not lookin’ smooth? Streaks and unevenness are a total bummer. To avoid those, use a mitt or a brush for application. This helps with even distribution.
If you notice any streaks, gently rub the area with a damp washcloth or a soft-bristled brush to blend them in. This should fix most minor issues.
Maintaining the Tan
Want your tan to last longer? You gotta keep up with the moisturizing. Think of it like a plant: You gotta water it to keep it thriving. Using a body scrub or exfoliating regularly, but not too often, will remove dead skin cells, keeping the tan looking fresh and helping the color stay on longer. This is crucial for maintaining that fresh, sunkissed look.
Removing Self-Tanner (If Needed)
Let’s say you’re not feeling the tan. Removing it isn’t hard, but it’s best to follow the instructions on your self-tanner product. Most self-tanners can be removed with a gentle scrub, a body wash, or a specialized remover. Just be gentle and don’t scrub too hard. You don’t want to irritate your skin.
Maintaining a Flawless Tan: Tips
| Tip | Description |
|---|---|
| Exfoliate Regularly | Remove dead skin cells for even application. |
| Moisturize | Keep skin hydrated to prevent dryness and flaking. |
| Use a Mitt or Brush | Avoid streaks and ensure even coverage. |
| Use a Bronzer | Enhance the tan and add dimension. |
| Apply in Layers | Build up the color gradually and carefully. |
Troubleshooting Common Issues

Yo, self-tanning your back can be a total vibe, but sometimes things can go a little sideways. Like, you end up with weird streaks or an orangey hue that ain’t cute. This section is all about how to avoid those pitfalls and fix ’em if they happen. We’ll also talk about picking the perfect self-tanner for your skin.
Preventing Streaks and Uneven Color
Getting a flawless self-tan is all about prep work and precision. If you skip the exfoliation or don’t apply evenly, you’re setting yourself up for a whole lotta streaks. Using a loofah or scrub before applying the tanner can help to smooth out any rough patches.
Application Techniques for Avoiding Unevenness
Applying the tanner in thin, even layers is key. Think of it like painting, not slapping. Start with your back, working your way from the top down. Use a tanning mitt or a brush for even distribution. Don’t forget those hard-to-reach spots!
Addressing Orange Tones
Orange tones are a common self-tanning problem. This usually happens when you apply too much product or don’t let it develop properly. Start with a lighter application and let the product work its magic. If you already have an orangey hue, use a self-tanning mitt or brush to gently blend it into the surrounding area.
Choosing the Right Self-Tanner
Self-tanners come in different formulas and strengths. Look for a self-tanner that’s specifically designed for your skin tone. A darker self-tanner for fair skin can create an uneven, unnatural look. If you have sensitive skin, opt for a self-tanner that’s specifically formulated for sensitive skin types.
Skin Sensitivity and Dermatologist Consultation
Skin reactions to self-tanners are totally possible. If you experience any redness, itching, or burning, stop using the product immediately. A dermatologist can help you figure out the cause of the reaction and recommend appropriate solutions. Don’t be afraid to reach out to a pro if you’re not sure what’s going on.
Products and Brands
Yo, squad, lemme break down the self-tanning game for your back. Finding the right stuff is key to flawless results, and we’re about to get into the nitty-gritty of brands and products. From lotions to mousses to sprays, we’ll cover it all, so you can rock that sunkissed back without the sunburns.This section dives deep into the world of self-tanning products, helping you choose the perfect one for your back.
We’ll cover reputable brands, specific product recommendations, and a breakdown of the pros and cons of different formulas, like lotions, mousses, and sprays. Plus, we’ll get real with price comparisons and user reviews, so you can make an informed decision.
Reputable Self-Tanning Brands, How to self tan your back
A solid brand is crucial for a good tan. These brands have a track record of delivering results and are trusted by many.
- St. Tropez: Known for its consistent formulas and a wide range of products, St. Tropez is a go-to for many. They’re popular for their ability to create a natural-looking tan.
- Fake Bake: Another popular choice, Fake Bake is recognized for its smooth application and buildable results. They have a range of options to cater to different skin tones and preferences.
- Isle of Paradise: A more budget-friendly option that still delivers results. Isle of Paradise is a great option for those looking for a solid tan without breaking the bank.
- Jergens Natural Glow: A more accessible option that’s well-regarded for its ease of use and natural-looking finish. It’s a great entry point for self-tanning.
Product Recommendations for the Back
Picking the right product for your back is important for even coverage.
- St. Tropez Gradual Tanning Lotion: A popular choice for a gradual, natural-looking tan. It’s known for its easy application and good coverage, even on tricky areas like the back.
- Fake Bake Bronzing Mousse: This mousse is ideal for building a deeper tan and providing good coverage on large areas. It’s known for being easy to apply and blend.
- Isle of Paradise Self Tanning Spray: This spray provides fast and even coverage, making it great for quickly achieving a tan on hard-to-reach areas like the back. It’s super convenient.
Features and Benefits of Different Products
Understanding the differences between lotions, mousses, and sprays is key to choosing the right product.
| Product Type | Features | Benefits |
|---|---|---|
| Lotions | Creamy texture, easy to apply, often provides a gradual tan | Great for beginners, easy to blend, can build a tan over time |
| Mousses | Lightweight, airy texture, often provides a deeper tan | Easy to apply and blend, often good for large areas, buildable tan |
| Sprays | Fast application, often provides even coverage | Quick and easy, great for hard-to-reach areas, sometimes a less even finish |
Price Range Comparison
Price points vary significantly depending on the brand and product.
- Budget-friendly options (e.g., Jergens) typically range from $8-$15.
- Mid-range options (e.g., Isle of Paradise) are generally in the $15-$25 range.
- Higher-end brands (e.g., St. Tropez, Fake Bake) often cost more, sometimes in the $25-$40 range.
User Reviews
Real-life experiences can offer valuable insights.
“St. Tropez Gradual Tanning Lotion is amazing! I’ve used it for years and it’s my go-to for a natural-looking tan. The application is smooth and the results are consistent.”
@tanning_diva on Instagram.
“I love the Fake Bake Bronzing Mousse! It’s great for building a darker tan and provides excellent coverage, even on my back. It blends in super easily.”
@back_tanner on TikTok.
Summary
In conclusion, achieving a perfect self-tan on your back involves careful preparation, precise application techniques, and diligent post-application care. By following the detailed steps Artikeld in this guide, you can confidently and effectively achieve a stunning, even tan. Remember to listen to your skin and consult a dermatologist if you experience any irritation. This comprehensive guide provides the essential knowledge and tools to confidently self-tan your back, allowing you to enjoy a flawless, natural-looking tan with confidence.
FAQ Insights
What are the best self-tanning products for the back?
Several brands and products excel at achieving even coverage on the back. Look for products specifically formulated for the body, offering smooth application and minimal streaking. Consider mousse or lotion formulas, and pay attention to reviews for ease of use and desired results.
How can I prevent streaks when self-tanning my back?
Using a tanning mitt or brush, applying thin layers, and working in sections are key to preventing streaks. Thorough exfoliation before application and careful smoothing of the tanner are also important. Pay attention to hard-to-reach areas like the lower back and shoulder blades, applying in multiple, small sections.
How long does a self-tan last on the back?
The longevity of a self-tan depends on factors like skin type and exfoliation habits. Generally, self-tans can last anywhere from a few days to a week, but regular exfoliation will affect how long the tan lasts. Using a body scrub after showering can help remove dead skin cells and keep the tan looking fresh.
What if I experience irritation after self-tanning my back?
If you experience irritation, discontinue use immediately and consult a dermatologist. Reactions can vary, and it’s essential to address any skin issues promptly. Consider using a hypoallergenic product next time and be sure to avoid harsh scrubbing.