

How to remove stuck idler pully – How to remove stuck idler pulley? This comprehensive guide will walk you through the entire process, from identifying the problem to successfully reassembling the system. Understanding the symptoms, gathering the right tools, and safely preparing your vehicle are crucial steps. This detailed approach will help you tackle this common automotive repair with confidence.
A stuck idler pulley can cause significant issues with your vehicle’s operation. Ignoring the problem could lead to more costly repairs down the line. This guide will equip you with the knowledge and steps to confidently address the issue, restoring your vehicle’s smooth performance.
Identifying the Stuck Idler Pulley
A stuck idler pulley can significantly impact your vehicle’s performance and potentially lead to further mechanical issues if left unaddressed. Identifying the problem early is crucial for preventing more serious damage and costly repairs. This section will detail the various symptoms, visual indicators, and potential scenarios leading to a stuck idler pulley, helping you diagnose the problem before it escalates.
Symptoms of a Stuck Idler Pulley
A stuck idler pulley often manifests as a series of noticeable symptoms. These symptoms can range from subtle noises to more pronounced issues affecting the overall functionality of your vehicle. Pay close attention to these cues, as they can signal a problem with your idler pulley.
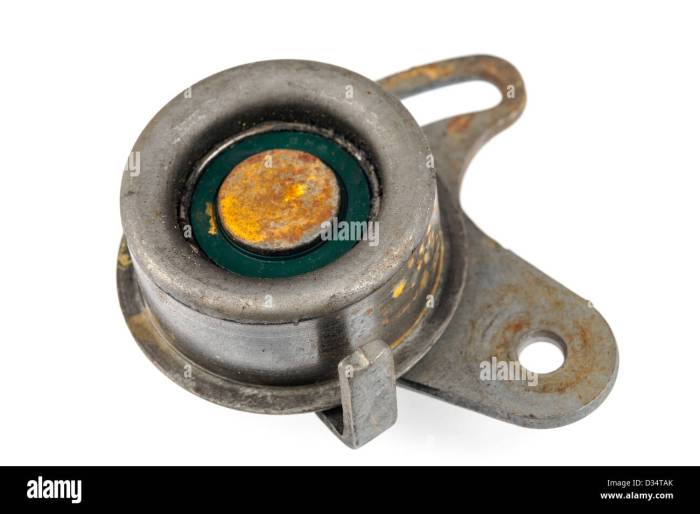
Visual Indicators of a Problematic Idler Pulley
Visual inspection plays a vital role in identifying a stuck idler pulley. Look for any signs of unusual wear, damage, or misalignment. A visually impaired pulley may not be moving freely. Check for visible cracks, bends, or excessive wear on the pulley itself, as well as any damage to the belt that wraps around it.
Scenarios Where an Idler Pulley Might Get Stuck
Idler pulleys can become stuck due to various factors. They may be affected by debris lodged between the pulley and the belt, or from corrosion that has accumulated over time. Environmental conditions such as excessive moisture or extreme temperatures can also contribute to pulley sticking. Additionally, a misaligned pulley can experience friction against surrounding components, potentially leading to a stuck condition.
A worn or damaged pulley bearing can also cause the pulley to seize or become stuck.
Common Causes for Idler Pulley Sticking
Several factors can lead to an idler pulley becoming stuck. Corrosion, debris buildup, and improper lubrication can cause the pulley to lose its smooth operation. Worn or damaged components within the pulley system, such as the bearings, can lead to the pulley seizing. External factors like excessive moisture or extreme temperatures can also impact the pulley’s functionality, leading to sticking.
Furthermore, improper tensioning of the serpentine belt or other components of the pulley system can result in friction that causes the pulley to seize.
Table of Symptoms and Potential Causes
| Symptom | Potential Cause |
|---|---|
| Loud grinding or screeching noises from the engine compartment | A stuck idler pulley, a damaged belt, or a misaligned component |
| Difficulty turning the engine over | A seized pulley, a worn belt, or a problem with the crankshaft |
| Engine overheating | A malfunctioning pulley system, a damaged water pump, or a problem with the cooling system |
| Irregular engine performance (hesitation, sputtering, or loss of power) | A stuck pulley, a slipping belt, or a misaligned component in the system |
| Visible damage to the idler pulley or belt | Excessive wear, impact damage, or improper belt tensioning |
Gathering Necessary Tools and Materials
Properly removing a stuck idler pulley requires the right tools and materials. Careless or improper use of tools can lead to damage to the pulley, surrounding components, or even personal injury. This section Artikels the essential tools and materials, emphasizing safety and efficiency.
Required Tools
A comprehensive toolkit is crucial for safely and effectively removing a stuck idler pulley. The tools listed below cover various aspects of the removal process, from loosening bolts and nuts to safely supporting the belt and tensioning mechanism.
- Various sized open-end wrenches and/or adjustable wrenches:
- Different sizes of socket wrenches (both standard and metric) and a socket set, with extensions and a ratchet:
- Torque wrench (critical for accurate tightening of fasteners):
- Screwdrivers (Phillips and flathead):
- A pry bar (for gently dislodging stubborn components):
- A sturdy work surface or jack stands to safely support the vehicle:
- A pair of needle-nose pliers for precision work:
- A set of precision feeler gauges for verifying proper clearance between components:
- A belt tension gauge (important for proper belt tension adjustment after pulley removal):
- A bucket for used fluids or debris (and appropriate disposal methods):
Specific Wrench Sizes
The exact sizes of wrenches and sockets needed will vary depending on the make and model of the vehicle. Consulting the vehicle’s repair manual is essential for accurate sizing. Always verify the torque specifications for each fastener.
- For example, a typical idler pulley might use a 10mm socket, a 12mm open-end wrench, and an 18mm socket for associated mounting bolts. Always refer to the vehicle’s repair manual.
Spare Parts
In some cases, a stuck idler pulley might necessitate replacement parts. Anticipating potential needs reduces downtime and ensures a complete repair.
- New idler pulley:
- Belt tensioner:
- Belt:
- Optional: New bolts and nuts for the pulley, if damaged or stripped:
Tool Function Table
The table below Artikels the tools and their specific roles in the pulley removal process. This aids in understanding the purpose of each tool.
| Tool | Function |
|---|---|
| Open-end/Adjustable Wrenches | Loosening and tightening nuts and bolts. |
| Socket Wrenches | Loosening and tightening bolts using sockets of various sizes. |
| Torque Wrench | Ensuring proper tightening torque on fasteners to prevent damage or malfunction. |
| Screwdrivers | Removing or installing screws and fasteners. |
| Pry Bar | Gently dislodging stubborn components or accessing tight areas. |
| Work Surface/Jack Stands | Providing a stable and secure platform for working on the vehicle. |
| Needle-nose Pliers | Handling small parts or manipulating components in tight spaces. |
| Feeler Gauges | Verifying clearances between components for proper operation. |
| Belt Tension Gauge | Adjusting belt tension after pulley replacement for optimal performance. |
| Bucket | Collecting fluids and debris during the repair process. |
Preparing the Vehicle for Repair
Ensuring a safe and efficient repair process is paramount when tackling a stuck idler pulley. Proper preparation minimizes risks and maximizes the chances of a successful repair. This section details the crucial steps involved in readying your vehicle for this procedure.
Securing the Vehicle
Properly securing the vehicle prevents any unwanted movement during the repair process. This precaution is essential to maintain a safe working environment and to prevent potential injury. Parking the vehicle on a level surface and engaging the parking brake are fundamental steps. Additional measures, like placing wheel chocks behind the tires, significantly enhance stability, especially on inclines.
Disconnecting the Battery
Disconnecting the vehicle’s battery is a critical safety measure. This prevents accidental electrical shocks or damage to the electrical system during the repair. Locate the battery compartment, disconnect the negative terminal first, and then disconnect the positive terminal. Always refer to your vehicle’s owner’s manual for specific instructions regarding battery removal and connection procedures.
Locating and Disconnecting Belts and Hoses
Careful removal of belts and hoses connected to the idler pulley is crucial. Improper handling could damage these components. First, identify all belts and hoses in proximity to the idler pulley. Using appropriate tools, disconnect these components, ensuring they are securely stored to prevent entanglement. A visual inspection of the belts and hoses for signs of damage or wear is highly recommended before reconnecting.
Safety Precautions
Adhering to safety precautions is essential throughout the repair process. These precautions minimize the risks associated with working on a vehicle. Always wear appropriate personal protective equipment (PPE), including safety glasses and gloves. Ensure the workspace is well-lit and free of obstructions. Keep children and pets away from the work area.
Proper ventilation is also crucial in some situations to mitigate the risk of fumes. Following these precautions significantly reduces the potential for accidents and injuries.
Step-by-Step Procedure for Preparing the Vehicle
- Park the vehicle on a level surface and engage the parking brake. Place wheel chocks behind the tires, particularly on inclines.
- Locate the battery compartment and disconnect the negative terminal first, followed by the positive terminal. Ensure all electrical connections are safely disconnected.
- Carefully identify all belts and hoses connected to the idler pulley. Disconnect these components, storing them securely to prevent entanglement.
- Inspect the belts and hoses for any signs of damage or wear. Replace any damaged parts before reconnecting them.
- Ensure the workspace is well-lit and free of obstructions. Keep children and pets away from the work area.
- Wear appropriate personal protective equipment (PPE), including safety glasses and gloves, to minimize the risks of injury.
Removing the Stuck Idler Pulley

Removing a stuck idler pulley requires careful planning and execution to prevent damage to surrounding components and ensure a safe repair. Improper force application can lead to bent or broken parts, requiring further costly repairs. Understanding the various methods and potential challenges is crucial for a successful outcome.The idler pulley’s function is to maintain tension on the serpentine belt.
A stuck idler pulley prevents the belt from functioning correctly, potentially leading to engine damage if not addressed promptly. Correct removal is essential for restoring proper belt tension and engine operation.
Methods for Removal
Careful consideration of the specific cause of the pulley’s sticking is important. Is it seized, rusted, or perhaps jammed by debris? Different methods may be more effective depending on the cause. The following Artikels several approaches.
- Using Impact Wrenches with Caution: Impact wrenches are powerful tools, but they can cause damage if not used correctly. Ensure the impact wrench’s air supply is adequate and apply controlled, gradual force. This is a powerful option but requires experience to prevent over-tightening and damaging the surrounding components.
- Employing a Locking Wedge or Screw: A locking wedge or screw can be strategically positioned to hold the pulley in place while applying force to the bolt. This method provides a controlled environment to minimize damage. A metal wedge can be inserted between the pulley and the engine, creating a solid support point for the impact wrench or breaker bar.
- Using a Puller: A specialized pulley puller is often the best solution, especially when the pulley is seized. The puller’s design isolates the force on the pulley, preventing damage to the surrounding area. It applies force directly to the pulley, minimizing stress on the bolt or other components.
- Heat Application: In cases of severe rust or seizing, applying heat to the pulley can help loosen the grip. Heat, however, should be carefully applied to prevent warping or damage to surrounding components. Using a heat gun or a propane torch, keep a safe distance to avoid burns and melting of the plastic parts of the engine. Direct the heat to the pulley only, and monitor for any signs of melting or damage.
Proper Force Application
Applying force to a stuck idler pulley requires a precise approach to avoid damaging surrounding components. Never apply force directly to the pulley without proper support. This will likely result in bent or broken parts, requiring further costly repairs.
- Use a breaker bar or a wrench with a suitable extension: These tools provide leverage, allowing you to apply controlled force without risk of damaging the pulley or surrounding components. Using a longer extension will allow you to apply force in a more controlled manner.
- Work in increments: Avoid applying sudden, forceful impacts. Instead, apply gradual pressure to the pulley. This technique helps to avoid snapping or bending parts. Apply small increments of force and assess the pulley’s response. If the pulley doesn’t budge after several attempts, consider another approach.
- Check for any signs of damage: While applying force, regularly inspect the pulley and surrounding components for any signs of bending or breakage. If any damage is observed, immediately stop applying force and assess the damage.
Troubleshooting Stubborn Pulleys, How to remove stuck idler pully
Some pulleys prove more difficult to remove than others. Troubleshooting steps can help in such situations.
- Inspect the Bolt: A stripped or damaged bolt can prevent the pulley from turning. Examine the bolt for any signs of damage or wear. If necessary, replace the bolt to ensure proper removal.
- Check for Debris: Debris can sometimes jam the pulley, preventing its movement. Clean the pulley area thoroughly to remove any obstructions. Using compressed air or a brush to remove any particles stuck in the grooves of the pulley.
- Consider Lubrication: In some cases, a small amount of penetrating oil or lubricant can help loosen the pulley. Apply the lubricant to the bolt threads and surrounding area. Allow time for the lubricant to work before applying further force.
Inspecting and Replacing the Idler Pulley: How To Remove Stuck Idler Pully


The removed idler pulley now needs careful inspection to determine if it’s damaged. A visual examination, combined with feeling for any irregularities, is crucial. This ensures the pulley’s continued proper function and prevents potential future problems.
Visual Inspection of the Idler Pulley
Thoroughly examine the removed idler pulley for any signs of damage. Look for cracks, dents, or significant wear on the pulley’s surface. Pay close attention to the bearing surfaces and the mounting area. A damaged pulley will not only affect performance but could also lead to premature failure.
Identifying Potential Damages
Several potential damages can affect the idler pulley’s functionality. Cracks in the pulley material can compromise its structural integrity. Dents or significant wear can affect the pulley’s ability to properly engage with the belt, leading to slippage or noise. Inspect the bearing surfaces for excessive wear or damage that may cause the pulley to seize or make unusual noises.
Check the mounting area for damage that could prevent proper alignment.
Replacing a Damaged Idler Pulley
Replacing a damaged idler pulley is a straightforward process. First, ensure the replacement pulley is compatible with the vehicle’s specifications. Refer to the vehicle’s repair manual for the correct part number. Using the correct replacement part is vital for optimal performance and safety.
Choosing the Correct Replacement Part
The correct replacement idler pulley ensures optimal performance and safety. Match the replacement pulley to the original specifications of the vehicle. This often involves matching the pulley’s diameter, bore size, and material type. The manufacturer’s part number is a critical identifier for accurate compatibility. Avoid using a pulley that is not precisely the same as the original.
This could cause issues with proper belt engagement or potentially other mechanical issues.
Comparison of Idler Pulley Types
| Type | Features |
|---|---|
| Steel Idler Pulley | Durable, strong, cost-effective. Often used in heavy-duty applications. |
| Aluminum Idler Pulley | Lightweight, corrosion-resistant. Often preferred in high-performance or racing applications. |
| Polyurethane Idler Pulley | Quiet operation, low friction. Suitable for applications requiring minimal noise. |
A steel pulley, for example, might be a good choice for a heavy-duty truck, while an aluminum pulley might be suitable for a high-performance sports car. The correct material choice depends on the specific application and its environmental factors. Using the wrong material could lead to premature failure.
Reassembling the System
Carefully reassembling the idler pulley system is crucial to restoring the vehicle’s functionality and preventing further damage. Incorrect reassembly can lead to belt slippage, premature wear, and potentially dangerous engine malfunction. This section details the precise steps for a safe and effective reassembly process.The following steps Artikel the process of reconnecting all components, ensuring proper alignment, and verifying that the system is ready for operation.
This meticulous approach guarantees optimal performance and longevity of the repaired system.
Reconnecting Belts and Hoses
Properly connecting the serpentine belt is paramount to the idler pulley’s function and the vehicle’s overall operation. Carefully inspect the belt routing and ensure all components are aligned correctly before securing the belt. Ensure the belt is correctly routed over all pulleys, and the tensioner is adjusted properly. Incorrect belt routing can lead to premature belt wear, damage to the pulleys, or engine misalignment.
Similarly, ensure all hoses are securely connected to their respective components and that no kinks or obstructions exist. Incorrect routing or connections may result in leaks or improper fluid flow.
- Verify the serpentine belt’s alignment over all pulleys, ensuring no interference with other components.
- Carefully position the belt onto the tensioner pulley and the idler pulley, making sure the belt is routed correctly.
- Confirm the tensioner pulley’s proper adjustment to maintain the necessary belt tension.
- Inspect all hoses for proper connection and secure attachment to prevent leaks.
Securing Components and Tightening Bolts
Precise tightening of bolts is essential to ensure the structural integrity and functionality of the system. Over-tightening can damage components, while under-tightening can lead to looseness and eventual failure. Consult the vehicle’s repair manual for the specific torque specifications for each bolt.
- Tighten the bolts securing the idler pulley to the engine or accessory bracket, using the appropriate torque specifications to avoid damage to the threads or components.
- Verify that the alignment of the idler pulley is correct, ensuring proper belt routing and tension.
- Carefully tighten the bolts that secure the tensioner pulley to the engine or accessory bracket, adhering to the torque specifications Artikeld in the vehicle’s repair manual.
- Verify the belt tension after tightening all components.
- Inspect all connections to ensure no leaks or loose components are present.
Safety Checks Before Starting the Engine
Thoroughly inspect all connections and ensure the system is correctly assembled before starting the engine. Any loose or misaligned components can lead to serious damage. Ensure the belt is properly routed, tensioned, and securely connected. Visually inspect the entire system for any potential hazards.
- Visually inspect the entire system for any potential leaks or loose components.
- Verify that all belts and hoses are correctly routed and securely connected.
- Check the alignment of the idler pulley and other components.
- Confirm that all bolts are properly tightened according to the specified torque values.
- Ensure no obstructions or interference exists in the belt routing path.
Testing and Verification
Properly verifying the idler pulley system’s function after repair is crucial to ensure the vehicle operates safely and efficiently. This step confirms the successful completion of the repair and prevents potential issues arising from overlooked problems. A thorough test guarantees the belt tension, alignment, and overall system integrity are restored to optimal levels.
Verifying Correct Idler Pulley Operation
The idler pulley’s primary function is to redirect the serpentine belt, maintaining its tension and preventing slippage. Proper operation is evident through smooth, quiet belt movement. Listen carefully for any unusual noises, such as grinding or screeching, during the vehicle’s operation. These sounds indicate potential issues that require further investigation. Visual inspection for excessive belt wear or damage is also necessary.
A visibly damaged belt necessitates replacement to prevent catastrophic failure.
Checking Belt Tension and Alignment
Accurate belt tension and alignment are critical for the system’s smooth operation. Visual inspection is a first step; a properly tensioned belt will exhibit slight sag between pulleys, avoiding excessive tightness or slack. Use a tension gauge to measure the belt tension precisely, ensuring it falls within the manufacturer’s specifications. A misaligned belt will exhibit rubbing or excessive wear on specific pulley areas.
Employ a straight edge to assess the belt’s alignment across the pulleys, ensuring it is aligned with minimal deviation. Misalignment can cause premature wear and tear on the belt and pulleys.
Checking for Leaks and Unusual Noises
Regular checks for leaks or unusual noises are vital. Leaks, particularly of coolant or other fluids, can indicate underlying issues. Inspect the area surrounding the idler pulley system for any signs of fluid leakage. Unusual noises, such as grinding, squealing, or screeching, during operation point to problems that may need further attention. Note the specific location and nature of the noise to aid in diagnosis.
For example, a grinding noise near the idler pulley could indicate a problem with the pulley bearings.
Testing the Vehicle After Reassembly
After reassembling the idler pulley system, carefully test the vehicle. Start the engine and let it run at idle speed for a few minutes to allow the system to stabilize. Observe the belt’s movement, ensuring smooth and quiet operation. Listen for any unusual noises or grinding sounds. Subsequently, accelerate the vehicle to various speeds to ensure the belt continues to function correctly without any issues.
During acceleration and deceleration, monitor the belt’s tension and alignment.
Post-Repair Checklist
- Visual inspection of the idler pulley for damage or wear.
- Audible check for unusual noises (grinding, squealing, or screeching) during operation.
- Verification of proper belt tension using a tension gauge.
- Assessment of belt alignment using a straight edge to ensure proper alignment across all pulleys.
- Inspection for fluid leaks in the area surrounding the idler pulley system.
- Test drive the vehicle at various speeds to verify the system’s performance.
- Record any observations or issues encountered during the testing process.
Conclusion
Successfully removing a stuck idler pulley requires careful planning, the right tools, and precise execution. By following the steps Artikeld in this guide, you can tackle this repair confidently. Remember to prioritize safety throughout the process. A well-maintained idler pulley system ensures smooth vehicle operation and prevents future complications.
FAQ Insights
What are the telltale signs of a stuck idler pulley?
Common symptoms include a loud grinding noise, difficulty turning the engine, and unusual belt slippage. Visual inspection can also reveal a pulley that’s not rotating freely.
What types of wrenches and sockets might I need for this repair?
You’ll likely need various sizes of open-end and socket wrenches, plus possibly a torque wrench. Specific sizes will depend on your vehicle’s make and model.
Can I replace the idler pulley myself, or should I seek professional help?
While this guide provides a comprehensive walkthrough, the complexity of the repair might vary. If you lack experience with automotive repairs, seeking professional assistance is recommended.
What if I can’t get the pulley off after applying force?
If the pulley remains stuck, consider using penetrating oil to loosen it. If that doesn’t work, carefully inspect the pulley for any obstructions. If the issue persists, consult a mechanic.