

How to remove pulley from alternator is a crucial skill for any car owner. This comprehensive guide will walk you through the process, from identifying your alternator to safely removing the pulley. Understanding the potential risks and necessary safety precautions is paramount. We’ll cover the tools, procedures, and troubleshooting for various alternator types.
This guide provides a step-by-step approach to safely and effectively removing the pulley from your alternator. We’ll delve into the specific procedures for different alternator models, ensuring a tailored approach for every car. Detailed explanations and visuals will make the process easier to understand and execute. Remember to prioritize safety throughout the entire procedure.
Introduction to Alternator Pulley Removal
Removing an alternator pulley is a procedure that might be necessary for various maintenance and repair tasks, such as replacing a worn-out pulley, inspecting the alternator bearings, or installing a new alternator. Proper removal is crucial to avoid damage to the alternator, the vehicle’s components, and ensuring the safety of the technician performing the task.Careful attention to safety precautions and the correct tools is paramount for a successful and risk-free procedure.
Understanding the specific alternator type and its associated pulley removal procedure is essential to prevent any accidental damage during the process. A detailed understanding of the procedure will also help in reducing potential risks and ensuring the safety of the mechanic performing the task.
Potential Risks and Safety Precautions
Removing an alternator pulley involves working with potentially high-stress components and rotating parts. Improper techniques or inadequate safety precautions can lead to serious injury. Ensuring a secure working environment, using appropriate safety gear, and meticulously following the steps Artikeld in the procedure are crucial to minimize risks. Potential risks include accidental cuts from sharp edges, burns from hot components, and injuries from flying debris.
Tools Typically Needed
Several tools are commonly required for alternator pulley removal. These include but are not limited to: a socket wrench set, a ratchet, various types of screwdrivers, a pulley puller (specialized tool), and possibly a torque wrench. Proper selection and usage of these tools are essential to prevent damage to the alternator and ensure the safe removal of the pulley.
Alternator Types and Pulley Removal Procedures
The specific tools and steps for removing an alternator pulley may vary depending on the type of alternator. The table below provides a general overview of common alternator types and their corresponding pulley removal procedures. This overview will help in determining the best approach for a specific alternator model.
| Alternator Type | Tools | Steps |
|---|---|---|
| Standard Alternator (with a standard pulley) | Socket wrench set, ratchet, screwdriver, pulley puller (if needed), torque wrench (if needed) | 1. Disconnect the battery terminals. 2. Identify and loosen any retaining bolts or fasteners securing the pulley. 3. Use a pulley puller to remove the pulley. 4. Carefully inspect the pulley and the alternator for any damage. 5. Clean and lubricate the pulley and the alternator as needed. 6. Reassemble the pulley in the reverse order. |
| Alternator with a serpentine belt | Socket wrench set, ratchet, screwdriver, pulley puller (if needed), torque wrench, belt tensioner tool | 1. Disconnect the battery terminals. 2. Identify and loosen any retaining bolts or fasteners securing the pulley. 3. Use a pulley puller to remove the pulley. 4. Carefully inspect the pulley and the alternator for any damage. 5. Loosen or release tension on the serpentine belt. 6. Reassemble the pulley in the reverse order. 7. Ensure the belt tensioner is correctly set and the serpentine belt is properly routed. |
| High-output Alternator (with a specific pulley) | Socket wrench set, ratchet, screwdriver, specialized pulley puller, torque wrench, belt tensioner tool (if needed) | 1. Disconnect the battery terminals. 2. Identify and loosen any retaining bolts or fasteners securing the pulley. 3. Use a specialized pulley puller to remove the pulley. 4. Carefully inspect the pulley and the alternator for any damage. 5. Reassemble the pulley in the reverse order. 6. Reinstall the belt, ensuring proper alignment. |
Identifying the Specific Alternator

Accurately identifying the make and model of your alternator is crucial for proper pulley removal. This step ensures you utilize the correct procedures and avoid potential damage to the alternator or vehicle. Understanding the specifics allows for precise selection of tools and techniques.Identifying the alternator’s make and model involves several key steps. A visual inspection of the alternator itself is the first step.
Look for any markings or labels on the alternator housing. These labels often contain the manufacturer’s name and model number. If no markings are visible, or if the markings are unclear, other methods of identification are necessary.
Alternator Identification Methods
A thorough approach to identifying your alternator involves leveraging various resources. Owner’s manuals provide a detailed record of the vehicle’s components, including the alternator. Consult the owner’s manual for the exact specifications. Online forums dedicated to automotive repair can be a valuable source of information. Experienced mechanics and enthusiasts often share knowledge and experiences, which can be helpful in pinpointing the alternator model.
If possible, taking a picture of the alternator and posting it in a relevant forum can expedite the process. A detailed description of the vehicle (make, model, and year) will help to ensure the most accurate results.
Potential Resources for Identification
This section details several resources that can aid in identifying the make and model of your alternator.
- Owner’s Manuals: Vehicle owner’s manuals often contain diagrams and specifications for each component, including the alternator. This document is a reliable source of information regarding the alternator model and part number.
- Online Forums: Numerous online forums cater to automotive enthusiasts and repair professionals. These forums offer a wealth of information and allow for direct interaction with experienced individuals who can provide specific details about your alternator’s make and model.
- Automotive Parts Retailers: Automotive parts retailers often have online databases or physical catalogs that list part numbers and specifications for alternators. Using the make, model, and year of the vehicle, you can narrow down the search for your alternator.
Alternator Model Comparison
A comparison table, like the one below, can highlight potential differences in pulley removal complexity based on specific alternator models. This information is essential for preparing for the removal process. Different alternator models may have unique pulley designs or mounting configurations.
| Alternator Model | Pulley Type | Removal Complexity |
|---|---|---|
| Example Model A | Single-ribbed | Low |
| Example Model B | Multi-ribbed | Medium |
| Example Model C | Integrated | High |
Note: This table provides a general overview. The specific complexity of pulley removal may vary depending on the particular design of the alternator.
Pulley Type Distinction
Identifying the pulley type is essential for successful removal. Different pulley types require specific tools and techniques. Understanding the differences can prevent damage to the alternator or the vehicle itself.
- Single-ribbed pulleys: These pulleys typically have a single, smooth surface with grooves for the belt. They are generally simpler to remove compared to other types.
- Multi-ribbed pulleys: These pulleys have multiple ribs or grooves that are crucial for gripping the belt. Removal may require specific tools to ensure the belt is released properly and the pulley is removed without damage.
- Integrated pulleys: These pulleys are often part of the alternator’s housing. Removal may require specialized tools and a methodical approach to avoid damaging the alternator or the pulley itself.
Preparing the Vehicle and Tools
Proper preparation is crucial for a safe and successful alternator pulley removal. This involves meticulous attention to safety precautions, the correct tools, and the appropriate vehicle setup. A well-executed preparatory phase minimizes risks and ensures a smooth procedure.
Essential Tools
Careful selection of the necessary tools is essential to ensure efficiency and safety during the pulley removal process. The right tools will expedite the process and minimize the risk of damage to components.
- Socket wrench set (various sizes): A comprehensive set of socket wrenches is essential for loosening and tightening bolts and nuts involved in the pulley removal process. Sizes will vary depending on the specific vehicle and alternator model.
- Torque wrench: A torque wrench is imperative for ensuring bolts are tightened to the manufacturer’s specifications. Incorrect torque can lead to component damage or malfunction.
- Ratchet set: Ratchets are used to turn the socket wrenches, providing leverage for loosening and tightening fasteners. The use of a ratchet set is crucial for efficient and controlled application of force.
- Pliers (needle-nose and slip-joint): Pliers are useful for various tasks, including gripping small parts and manipulating fasteners. Needle-nose pliers are ideal for handling delicate components, while slip-joint pliers are suitable for gripping larger objects.
- Jack stands: Proper vehicle support is crucial for safety. Jack stands provide a stable platform to support the vehicle, preventing it from dropping unexpectedly during the procedure.
- Jack: A jack is necessary to lift the vehicle safely for maintenance access.
- Gloves: Protecting your hands is crucial for safety. Wear work gloves to prevent injury from sharp edges or accidental contact with fluids.
Disconnecting Electrical Components, How to remove pulley from alternator
Disconnecting the battery and related electrical components is paramount to prevent electrical hazards during the removal process. Failure to do so could result in electrical shock or damage to electrical systems.
- Disconnect the negative battery terminal first: This prevents accidental short circuits and minimizes the risk of electrical shock.
- Disconnect the alternator wiring: Disconnect any wiring connections associated with the alternator. This precaution further reduces the risk of electrical shock or damage.
Securing the Vehicle
Securing the vehicle is crucial to maintain stability and prevent accidental movement during the procedure. This precaution protects both the vehicle and the technician.
- Position jack stands strategically under the vehicle: Proper placement of jack stands is vital to ensure even weight distribution and secure support. Consult the vehicle’s owner’s manual for specific lifting points and jack stand placement recommendations.
- Engage the parking brake: This further stabilizes the vehicle, preventing movement.
Safe Handling of Tools
Appropriate handling of tools is essential to prevent injuries and damage to components. Carefully using the tools is vital to a successful and safe outcome.
- Inspect tools for damage: Before use, inspect all tools for any damage or wear that could affect their functionality or safety. Replace damaged tools immediately.
- Use appropriate techniques for each tool: Employ the proper techniques and procedures when using each tool to maximize efficiency and minimize the risk of injury or damage.
- Avoid forceful or reckless use: Applying excessive force is detrimental to the task and may cause damage to components. Employ controlled movements and techniques.
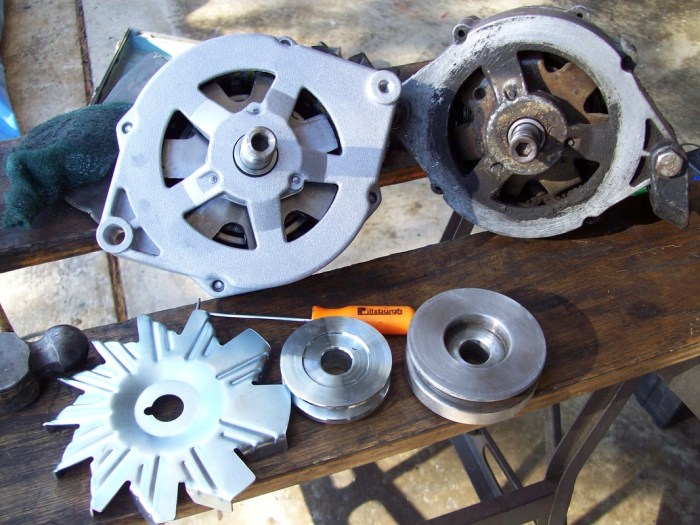
Removing the Pulley
Removing the alternator pulley is a crucial step in alternator repair or replacement. Proper procedure is essential to avoid damaging the pulley, alternator, or other components. This section Artikels common methods and their associated steps, providing detailed torque specifications and comparisons of different tools and techniques. Following these guidelines ensures a safe and successful repair.The methods for removing an alternator pulley vary depending on the specific pulley design and the tools available.
Understanding these differences allows for the selection of the most appropriate method for a given situation. Careful attention to torque specifications is paramount to prevent damage during the removal process.
Common Pulley Removal Methods
Various methods exist for removing alternator pulleys. These methods are broadly categorized and described below.
- Using a Pulley Removal Tool: This method typically involves specialized tools designed for specific pulley types. These tools provide a controlled leverage point for removing the pulley. Often, these tools include a threaded section or a gripping mechanism to secure the tool to the pulley and apply the necessary force. Careful selection of the correct tool is critical to avoid damage to the pulley or alternator.
- Using a Socket and Wrench: Some pulleys have a bolt or nut that can be loosened or removed using a socket and wrench. This method is suitable for specific pulley designs. Proper selection of the correct socket size and wrench size is important. Care must be taken to avoid damaging the pulley or surrounding components. The torque specification for loosening the bolt or nut should be strictly adhered to.
- Using a Puller: A pulley puller is a versatile tool used to remove pulleys from their shafts. This method is effective for a wide range of pulley designs and often provides more controlled force than other methods. The puller is typically designed to fit over the pulley and then exert force on it to remove it. Careful selection of the puller to match the pulley size is essential.
Step-by-Step Procedures (Using a Pulley Removal Tool)
- Preparation: Ensure the vehicle is securely supported and the alternator is accessible. Gather all necessary tools and protective gear. Verify the correct pulley removal tool is selected.
- Positioning the Tool: Carefully position the pulley removal tool onto the pulley. The tool should be firmly secured and centered over the pulley. Ensure the tool is aligned correctly with the pulley.
- Applying Force: Gradually apply force to the tool, following the torque specifications provided with the tool. Use a wrench to assist in maintaining the force and applying consistent pressure. Do not apply excessive force or try to remove the pulley too quickly.
- Removing the Pulley: Once the pulley has been loosened, remove the tool. Carefully remove the pulley from the alternator shaft.
Torque Specifications and Tools
Accurate torque specifications are crucial to avoid damage during the removal process. These specifications can be found in the vehicle’s repair manual.
Torque specifications vary based on the vehicle’s make and model and the type of pulley. Consult the repair manual for the exact torque specifications. It’s essential to use calibrated tools to accurately apply the required torque.
| Tool | Application | Torque Range (Example) |
|---|---|---|
| Pulley Removal Tool | Removing the pulley | 15-20 Nm |
| Socket and Wrench | Loosening/removing bolts/nuts | 10-15 Nm |
| Puller | Removing the pulley | 20-25 Nm |
Note: These are example torque ranges. Always consult the vehicle’s repair manual for precise torque specifications.
Replacing the Pulley (Optional)
Replacing the alternator pulley is often a necessary step when the original pulley is damaged, worn, or no longer compatible with the vehicle’s electrical system. Proper replacement ensures optimal alternator performance and prolongs the life of the component. This section provides guidance on the process, emphasizing the importance of precision and correct procedures.Replacing the alternator pulley is an optional procedure but can be crucial for maintaining optimal alternator function.
If the pulley is damaged or no longer compatible with the vehicle’s electrical system, replacement becomes necessary. It is essential to understand the specific requirements of the alternator and the correct pulley type to avoid potential issues.
Choosing the Correct Pulley
The alternator pulley plays a critical role in the alternator’s function. The pulley’s diameter and design are directly related to the alternator’s output and the vehicle’s charging system. Using an incorrect pulley can lead to reduced charging capacity, damaged components, or even system failure. Carefully verifying the pulley’s specifications against the vehicle’s specifications is essential to ensure compatibility.
Ensure the new pulley is compatible with the existing alternator.
Torque Specifications for Reinstallation
Correct tightening is paramount for the pulley’s secure attachment to the alternator. Incorrect torque can result in the pulley loosening, potentially leading to a loss of power or damage to the alternator. Adhering to the manufacturer’s torque specifications is critical for preventing such issues. These specifications are often found in the vehicle’s repair manual or online resources.
Using the correct torque wrench and following the sequence Artikeld in the manual is essential.
Potential Problems During Replacement
Several potential problems might arise during the pulley replacement process. Incorrect installation can cause the pulley to become loose or misaligned, resulting in a malfunctioning alternator. Improper torque can damage the alternator or pulley, leading to premature failure. Carefully following the replacement procedure, including checking for proper alignment and torque values, is critical to minimize the risk of complications.Potential problems may include:
- Incorrect Pulley Size/Type: Using a pulley that is not compatible with the alternator can result in reduced charging output or damage to the alternator.
- Improper Torque: Over-tightening can damage the alternator’s mounting points or the pulley itself. Under-tightening can cause the pulley to loosen and lead to misalignment.
- Alignment Issues: Misalignment of the pulley with the alternator’s shaft can lead to vibration and premature wear on the pulley and associated components.
- Damaged Mounting Points: If the alternator’s mounting points are damaged or corroded, they may not provide adequate support for the pulley, resulting in premature failure.
Importance of Using the Correct Pulley
Using the correct pulley is essential for optimal alternator performance and the long-term reliability of the charging system.
Failure to use the correct pulley can lead to reduced charging capacity, damage to the alternator, or other related issues. The pulley’s size and design must match the alternator’s specifications to ensure compatibility. Using the incorrect pulley type can lead to a reduced charging capacity or potential damage to the charging system.
Troubleshooting Common Issues
Addressing potential difficulties during alternator pulley removal and replacement is crucial for a successful repair. Careful attention to detail and a methodical approach can prevent further complications. Understanding the common problems and their solutions will streamline the process and enhance the overall outcome.
Pulley Removal Resistance
Encountering resistance during pulley removal can stem from several factors. This resistance may be caused by a stubborn pulley, a seized pulley, or a component that has become stuck. In some cases, the pulley may be corroded or the mounting surface may be damaged.
- Inspection of Pulley and Mounting Surface: Thoroughly inspect the pulley and the surrounding area. Look for signs of corrosion, damage, or debris that could hinder the removal process. Use a visual inspection to identify any visible obstruction or unusual wear patterns. Ensure the pulley is free of any significant damage or deformation.
- Lubrication: Applying a penetrating lubricant, such as WD-40 or a similar product, to the pulley and the mounting area can aid in loosening any seized components. Allow ample time for the lubricant to work its way into the affected area. This process may require repeated applications and patience.
- Use of Specialized Tools: Consider employing a pulley removal tool designed for the specific alternator model. Using the correct tool will significantly reduce the force required and avoid damaging the pulley or surrounding components. Ensure the tool is compatible with the specific alternator design.
- Careful Application of Force: If resistance persists, carefully apply a controlled force to the pulley. Avoid using excessive force, as this could damage the pulley or other components. If the pulley still won’t budge, seek professional assistance.
Alternator Alignment Issues
Misalignment of the alternator can cause significant problems. If the alternator is not properly aligned, it may not operate efficiently or at all.
- Visual Alignment Check: Verify the alternator is aligned with the crankshaft pulley and other supporting components. Ensure the alternator is in the proper position and not angled or misaligned with the vehicle’s drive train. A visual inspection can identify potential misalignments. Proper alignment ensures smooth operation.
- Alignment Tools: Employing alignment tools, such as a dial indicator or alignment gauges, can accurately assess the alternator’s position relative to other components. This helps to pinpoint any misalignment and identify the precise nature of the problem.
- Realignment Procedure: If misalignment is detected, follow the vehicle’s service manual to realign the alternator. This usually involves adjusting mounting bolts or using alignment tools. Ensure the procedures align with the vehicle’s specific requirements.
Pulley Damage
Pulley damage can impede the removal process.
- Visual Inspection: Examine the pulley for any signs of damage, such as cracks, deformation, or significant wear. Assess the pulley for any visible imperfections. Proper inspection prevents further issues.
- Replacement: If the pulley is damaged beyond repair, replace it with a new or reconditioned pulley. This is essential to maintain proper functionality. A new or reconditioned part ensures optimal performance.
Table of Common Issues
| Issue | Potential Cause | Troubleshooting Steps |
|---|---|---|
| Pulley Removal Resistance | Seized pulley, corrosion, damaged mounting surface, debris | Lubricate, use specialized tools, carefully apply force, inspect for damage |
| Alternator Alignment Issues | Misaligned mounting, loose bolts, damaged components | Visual check, use alignment tools, realign according to service manual |
| Pulley Damage | Impact, wear, corrosion | Visual inspection, replace if necessary |
Safety and Precautions


Proper safety measures are paramount when working on any vehicle component, especially when dealing with potentially hazardous parts like the alternator pulley. Adhering to these precautions minimizes the risk of injury and ensures a safe working environment. Taking proactive steps to avoid potential hazards is crucial to completing the task successfully and safely.Thorough preparation and careful execution are essential to prevent accidents and ensure a smooth, safe procedure.
Observing the safety guidelines presented below will greatly contribute to a positive and incident-free experience.
Critical Safety Precautions
Following safety procedures is essential to avoid injury during alternator pulley removal. Safety gear and mindful techniques are crucial to prevent accidents.
- Always disconnect the vehicle’s battery terminals before starting any work on the alternator. This crucial step prevents electrical shocks, a significant safety concern.
- Wear appropriate personal protective equipment (PPE), including safety glasses, gloves, and closed-toe shoes. PPE is vital to protect against flying debris or accidental contact with sharp edges.
- Ensure the vehicle is securely supported on jack stands or ramps. This prevents the vehicle from rolling, a serious risk that could cause injury to the technician or bystanders.
- Work in a well-lit area to improve visibility and reduce the risk of accidents due to poor lighting conditions.
- Keep children and pets away from the work area. This is essential to avoid accidental contact or interference during the procedure.
Proper Handling of Tools and Components
Safe handling of tools and components is crucial to avoid injuries during the process. Carelessness can lead to accidents.
- Inspect tools for any damage or defects before use. Using damaged tools can lead to unexpected failures, posing a risk of injury or equipment malfunction.
- Use the appropriate tools for the job. Using the wrong tools can cause damage to the alternator or other components, leading to further complications.
- Handle components with care to avoid dropping or damaging them. A dropped component could lead to injury or further complications in the repair.
- Use the proper technique when using power tools. Incorrect use of power tools can lead to injuries such as cuts, burns, or other forms of damage.
- Ensure the pulley is securely held while being removed to prevent it from slipping or causing accidental injury. Proper gripping techniques are essential to maintain control.
Risks Associated with Improper Techniques
Improper techniques can lead to various risks, ranging from minor inconveniences to severe injuries.
- Using improper techniques when removing the alternator pulley can lead to damage to the pulley or other components. Damage can require additional repairs, leading to increased costs.
- Insufficient support for the vehicle while working underneath it can result in a vehicle roll-over, causing serious injury or fatality. This highlights the necessity of using proper support systems.
- Failure to disconnect the battery before working on the alternator can lead to electric shocks. This underlines the importance of disconnecting the battery as a critical safety step.
- Dropping tools or components while working can cause injury to the technician or others nearby. This reinforces the importance of careful handling and secure work environments.
- Inadequate lighting can hinder visibility, increasing the risk of accidents and damage. This underscores the need for well-lit work areas.
Maintaining the Alternator
Proper alternator maintenance is crucial after removing the pulley to ensure optimal performance and longevity. Neglecting these steps can lead to reduced charging output, potentially damaging other components of the vehicle’s electrical system. A well-maintained alternator provides reliable power for starting, charging, and running accessories, contributing to the overall health and efficiency of the vehicle.Regular maintenance tasks, Artikeld below, can help prevent potential issues and extend the life of your alternator.
Following these procedures will help maintain the charging system’s functionality and prevent costly repairs in the future.
Importance of Post-Pulley Removal Maintenance
Maintaining the alternator after pulley removal is essential to prevent damage and ensure reliable electrical output. The alternator’s components, including the bearings, brushes, and the voltage regulator, are susceptible to wear and tear from the removal process. Proper maintenance can minimize these effects, allowing the alternator to function at peak performance.
Alternator Maintenance Checklist
This checklist provides a structured approach to maintaining the alternator’s health. Following these steps regularly will help you catch potential problems early.
- Visually inspect the alternator housing for any signs of damage, such as cracks, dents, or corrosion. These issues can compromise the structural integrity of the alternator, leading to premature failure. Check for any loose connections or damaged wiring.
- Examine the belts for any signs of fraying, cracking, or damage. A damaged belt can cause the alternator to slip or fail to provide adequate power. Ensure the belt is properly tensioned and securely fitted to the pulleys.
- Check the condition of the alternator’s bearings and brushes. Worn bearings can cause excessive noise and reduce efficiency, while worn brushes can lead to poor electrical contact. Proper lubrication and regular checks can prevent such issues.
- Inspect the voltage regulator. This critical component controls the output voltage. Ensure it is properly seated and undamaged, preventing overcharging or undercharging.
- Verify the alternator’s charging output. A low charging output can lead to battery problems and electrical issues. Use a multimeter to measure the voltage and ensure it meets the manufacturer’s specifications.
Inspecting Alternator Condition
Thorough inspection of the alternator’s condition is vital to maintain its proper functioning. This involves visually assessing the external components and internally testing its output.
- Visual Inspection: Carefully examine the alternator’s housing, belts, and connections for any signs of damage, wear, or corrosion. A visually healthy alternator typically shows no significant signs of wear or damage.
- Functional Test: Use a multimeter to measure the output voltage of the alternator. A faulty alternator may produce an abnormal voltage reading. Compare the reading with the manufacturer’s specifications for the vehicle.
- Bearing Check: Inspect the alternator’s bearings for smooth rotation and absence of unusual noise. A grinding or squealing noise may indicate worn bearings, necessitating replacement. Proper lubrication can extend the lifespan of these crucial components.
Lubricating Alternator Components
Lubrication is essential for maintaining the proper operation of the alternator’s internal components, especially the bearings. This process ensures smooth rotation and reduces friction, extending the lifespan of the alternator. Regular lubrication helps maintain the alternator’s efficiency and reduces the risk of damage due to excessive friction.
- Bearing Lubrication: Ensure the bearings are properly lubricated according to the vehicle’s maintenance schedule. Use the recommended lubricant specified by the manufacturer.
Additional Tips and Tricks
Efficiently removing an alternator pulley involves a combination of careful preparation and strategic execution. These supplementary tips and tricks provide valuable insights to streamline the process, minimize potential damage, and ensure a successful outcome. By understanding these nuances, you can significantly reduce the time and effort required for the task.
Utilizing Specialized Tools
Proper tools are instrumental in ensuring a smooth and safe pulley removal. Specialized pulley removal tools, often designed with a specific shape and gripping mechanism, can greatly simplify the process. These tools often feature a lever or ratchet system, enabling controlled and precise force application. Their use can significantly reduce the risk of damaging the pulley or surrounding components.
A good example of this is a pulley puller designed specifically for alternator pulleys, which helps avoid over-tightening or bending the pulley.
Strategic Torque Management
Maintaining accurate torque throughout the process is critical for preventing damage. Using a torque wrench when re-installing components, including the pulley, is paramount to avoid over-tightening. Over-tightening can deform the pulley, damage the bolt threads, or strain the alternator. Referencing the vehicle’s service manual is essential to determine the correct torque specifications for the pulley bolts and ensure proper installation.
Preventing Damage to the Alternator
Careful handling of the alternator throughout the process is essential to prevent damage. Support the alternator during pulley removal and replacement to avoid unnecessary stress on the components. For example, use a suitable jack or support stand to elevate the vehicle’s engine compartment to facilitate easier access and prevent the alternator from resting on a potentially damaged surface.
This prevents warping or bending of the alternator housing.
Shortcuts and Efficiency Techniques
Several shortcuts can accelerate the process without compromising safety or efficiency. Utilizing a suitable pulley puller, as mentioned previously, significantly reduces the effort needed to remove the pulley. Pre-lubricating the bolts and securing them with a thread lock compound can facilitate easier removal in future maintenance. Having all necessary tools readily available and organized beforehand can streamline the process and prevent interruptions.
Importance of Safety Gear
Safety should always be prioritized. Proper safety gear, such as safety glasses, gloves, and closed-toe shoes, is crucial for protecting yourself from potential hazards during the process. For example, flying debris or accidental contact with sharp edges can be mitigated with these protective measures. Using appropriate safety gear not only prevents minor injuries but also protects you from more serious incidents.
Closing Notes: How To Remove Pulley From Alternator
In conclusion, removing an alternator pulley can seem daunting, but with careful preparation, precise execution, and adherence to safety protocols, it can be achieved successfully. This guide has provided a detailed overview, equipping you with the knowledge and confidence to tackle this task. Remember to prioritize safety and refer to your vehicle’s specific manual for further guidance. By following these steps, you can maintain and troubleshoot your vehicle’s electrical system effectively.
Query Resolution
What are the common tools needed for removing an alternator pulley?
Common tools include a socket wrench set, a breaker bar, adjustable wrench, pliers, a torque wrench, and possibly a puller. Specific tools may vary depending on the alternator type.
What if the pulley is stuck?
If the pulley is stuck, try using penetrating oil to loosen it. If that doesn’t work, a pulley removal tool might be necessary.
How do I know if the pulley is the right one for my alternator?
Match the pulley’s size, shape, and other specifications to your alternator’s model and diagrams in your owner’s manual.
What should I do if I damage the alternator during the process?
If damage occurs, stop immediately. Consult a mechanic for assessment and repair.