

How to reheat tri tip – How to reheat tri-tip? This isn’t just about warming up leftovers; it’s about resurrecting a delicious masterpiece. From oven to stovetop, microwave to sous vide, we’ll explore the best methods to maintain the juiciness and flavor of your prized tri-tip, ensuring every bite is a culinary delight.
Tri-tip, with its rich marbling and tender texture, deserves the utmost respect when reheating. This guide will arm you with the knowledge and techniques to achieve perfection, transforming yesterday’s dinner into today’s satisfying meal.
Introduction to Reheating Tri-Tip


Tri-tip, that juicy, flavorful cut of beef, is a real crowd-pleaser. But reheating it right is key to keeping that deliciousness intact. Its leaner nature compared to other cuts means it can dry out easily if not reheated properly. Plus, safety’s a must – reheating to the correct temperature kills any potential harmful bacteria. So, let’s dive into how to make sure your tri-tip is both safe and sensational.Proper reheating isn’t just about getting it warm; it’s about preserving the texture and flavor.
Tri-tip’s tenderness depends on the initial cooking method, and reheating can either enhance or diminish it. Different methods have their strengths and weaknesses, so understanding the options is crucial. Knowing the ideal temperature range for reheating is also important to prevent foodborne illnesses.
Reheating Methods for Tri-Tip
Different methods offer varying results. Some methods preserve the juiciness better than others. Choosing the right method depends on your available resources and desired outcome.
- Oven Reheating: A reliable, consistent way to heat tri-tip evenly. It’s great for larger portions or when you need to reheat multiple pieces simultaneously. You can maintain the moisture and tenderness well, especially if you use a covered dish or foil.
- Microwave Reheating: Quick and convenient, but it can sometimes make the tri-tip a little dry. Distribute the tri-tip evenly within the microwave-safe container to avoid hot spots. It’s best for small portions or when speed is a priority.
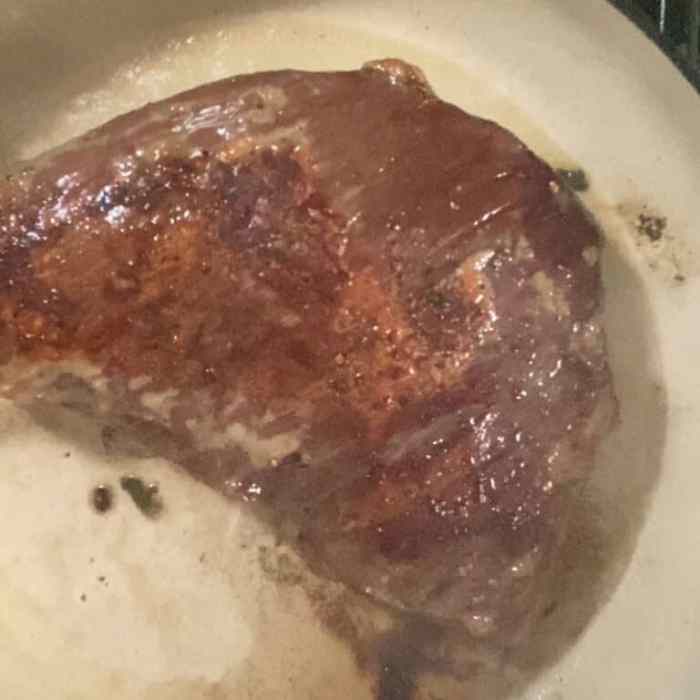
- Pan Reheating: Great for a quick touch-up or when you want a crispier texture. You can add a little oil to the pan and sear the tri-tip for a few minutes per side, giving it a nice browned exterior. This method is best when you want to add a little extra flavor.
- Slow Cooker Reheating: Excellent for reheating large portions and keeping the tri-tip tender and moist. This method works well for larger pieces of tri-tip, like if you have leftovers from a whole roast. The low and slow heat allows the flavors to meld and the meat to remain moist.
Comparison of Reheating Methods
This table summarizes the different methods based on time, temperature, and ease of use.
| Method | Time (approx.) | Target Temperature | Ease of Use |
|---|---|---|---|
| Oven | 20-30 minutes | 165°F (74°C) | Medium |
| Microwave | 2-5 minutes | 165°F (74°C) | Easy |
| Pan | 5-10 minutes | 165°F (74°C) | Medium |
| Slow Cooker | 1-2 hours | 165°F (74°C) | Easy |
Proper reheating temperature is crucial for food safety. The internal temperature must reach 165°F (74°C) to eliminate harmful bacteria.
Oven Reheating Methods

Yo, fam, reheating tri-tip in the oven is a total game-changer. It’s way easier than trying to do it on the stovetop, and you get a perfectly cooked result every time. Plus, it’s low-key the safest way to make sure your tri-tip is piping hot without burning it.This method lets you control the heat and temperature perfectly, so you can make sure your tri-tip is juicy and delicious.
Whether you’re aiming for a crispy exterior or a tender interior, the oven method delivers. It’s also a super convenient option if you’re short on time and need a quick way to get dinner on the table.
Oven Temperature and Cooking Times
Different thicknesses of tri-tip require different oven temps and cooking times. If you try to cook a thick tri-tip at a low temperature, it won’t get hot enough. Conversely, a thin tri-tip at a high temp could dry it out. Proper temperature control is key for a perfect result.
Maintaining consistent oven temperature is crucial for even reheating.
Using an oven thermometer is a must. It ensures your oven is actually at the temperature you set it to. This way, you can trust your cooking times and get a consistently great outcome. Don’t just go by the oven’s display—verify with a thermometer.
Common Reheating Mistakes to Avoid
Overcrowding the oven is a big no-no. This leads to uneven heating and can cause your tri-tip to dry out. Make sure there’s enough space between the tri-tip and other dishes in the oven.Another mistake is not using a meat thermometer. This is super important for ensuring your tri-tip reaches a safe internal temperature. If you don’t, you risk undercooking it, which is a major health concern.
Using a thermometer is the only way to be sure.
Tri-Tip Thickness and Reheating Times
This table provides a general guideline for reheating tri-tip in the oven, based on thickness. Remember, these are estimates, and actual times may vary depending on your oven’s performance and the initial temperature of the tri-tip.
| Tri-Tip Thickness (inches) | Oven Temperature (°F) | Estimated Reheating Time (minutes) |
|---|---|---|
| 1 | 350 | 15-20 |
| 1.5 | 325 | 20-25 |
| 2 | 300 | 25-30 |
Stovetop Reheating Methods
Yo, fam, reheat that tri-tip like a boss on the stove. Skip the oven drama and get that juicy goodness back in minutes. Stovetop reheating offers quick and customizable options, perfect for when you’re in a rush or just want to control the heat.
Stovetop Reheating Techniques
Different stovetop methods offer varying levels of control and results. Choosing the right method depends on your desired outcome and the amount of tri-tip you’re working with. Let’s break down the options.
- Pan-Frying: This method is ideal for smaller portions of tri-tip. Heat a skillet or pan over medium-low heat. Add a little oil, then gently sear the tri-tip for a few minutes on each side to crisp up the exterior. This method is great for getting a nice sear and retaining moisture. The key is to maintain low heat to prevent burning, and flipping frequently to ensure even cooking.
- Skillet Reheating: Perfect for thicker cuts or larger portions of tri-tip. Heat a heavy-bottomed skillet or Dutch oven over medium heat. Add a little oil and gently place the tri-tip in the skillet. Cook until heated through, ensuring the internal temperature reaches your desired level. Flip the tri-tip occasionally to ensure even cooking.
- Using a Griddle: A griddle is awesome for reheating a lot of tri-tip at once. Heat the griddle to medium-low heat. Place the tri-tip on the griddle, ensuring you’re not overcrowding it. Cook, flipping occasionally, until the internal temperature reaches your desired level. This is a good option for larger gatherings or if you’re preparing tri-tip for a party.
Keep an eye on it to prevent burning. Overcrowding leads to uneven heating.
Benefits and Drawbacks of Each Method
Each stovetop method has its pros and cons. Consider these factors when deciding which approach is best for you.
- Pan-Frying: Pros: Quick, great for smaller portions, allows for easy flipping, and you can control the temperature more precisely. Cons: Can be tricky with larger cuts, and you need to be careful not to overcrowd the pan. Watch out for burning.
- Skillet Reheating: Pros: Good for thicker cuts and larger portions, allows for even heating, and you can control the temperature more precisely. Cons: Can take longer than pan-frying, and you need a large enough skillet to avoid overcrowding. Maintaining even heating is key.
- Using a Griddle: Pros: Excellent for large batches, and allows for even heating across the entire surface. Cons: Can be challenging to control the temperature, and you need to ensure the tri-tip isn’t overcrowded to avoid sticking and burning. Be vigilant and use a meat thermometer.
Temperature and Time Considerations
This table summarizes the estimated time and temperature requirements for each method. Remember, these are just guidelines; adjust based on your specific tri-tip and desired outcome.
| Method | Temperature (degrees F) | Time (minutes) |
|---|---|---|
| Pan-Frying | Medium-Low (300-350) | 5-7 |
| Skillet Reheating | Medium (350-400) | 8-12 |
| Griddle Reheating | Medium-Low (325-375) | 10-15 |
Microwave Reheating Methods: How To Reheat Tri Tip
Yo, fam, reheating tri-tip in the microwave is a total game-changer. It’s quick, easy, and perfect for a late-night snack or a quick meal. But, you gotta know the right moves to avoid that rubbery, dry texture. This ain’t no microwave burrito situation; we’re talking about tender, juicy tri-tip.Microwaving tri-tip is all about managing the heat and moisture.
Overcooking it in the microwave can leave your tri-tip lookin’ like leather. The key is to work with the power of the microwave, understanding its strengths and weaknesses.
Optimal Microwave Reheating Times
Knowing the ideal reheating time is crucial. The time depends on several factors, including the thickness of the tri-tip, the power of your microwave, and the desired level of doneness. A general rule of thumb is to start with shorter intervals and monitor closely. A thinner cut of tri-tip will heat up much faster than a thicker one.
Microwave Reheating Techniques
Different techniques can significantly affect the outcome. One common approach is to use a microwave-safe plate with a little bit of water. This helps retain moisture during the reheating process, preventing it from getting too dry. Another method is to use a microwave-safe cover to contain the steam and help distribute heat evenly.
Avoiding Overcooking
Overcooking is a major enemy when reheating in the microwave. To prevent this, you should use shorter intervals and monitor the internal temperature frequently. A meat thermometer is your best friend in this situation. Aim for a safe internal temperature and keep a close eye on the temperature readings. If the tri-tip starts to get too hot, quickly pull it out and let it rest.
This allows the heat to redistribute and prevents overcooking.
Monitoring Internal Temperature
Using a meat thermometer is essential for ensuring food safety and achieving the desired doneness. A digital thermometer is the easiest and most reliable method for checking the internal temperature of the tri-tip. Insert the thermometer into the thickest part of the tri-tip, making sure it doesn’t touch bone or gristle. The safe internal temperature for reheating tri-tip is around 165°F (74°C).
A thermometer is crucial for achieving the right level of doneness.
Comparison of Techniques
Different methods yield varying results. Using a microwave-safe plate with water retains moisture better, resulting in a more tender and juicy tri-tip. Using a cover can help to keep the moisture inside and prevent splattering. A meat thermometer ensures accurate temperature readings, preventing overcooking. Using a microwave-safe plate with water is generally the best method for retaining moisture and preventing the tri-tip from drying out.
Sous Vide Reheating Method
Yo, so you want to bring that tri-tip back to life without it getting all rubbery? The sous vide method is the ultimate way to do it. It’s like magic, man, perfectly reheating your meat to a precise temperature and making sure it stays juicy. This method uses a water bath to ensure even heating throughout the entire cut, resulting in a perfectly cooked tri-tip every time.
Sous Vide Reheating Process
This method is all about precision and control. The key to the sous vide method is to maintain a constant temperature in a water bath. This prevents any drastic temperature fluctuations that could lead to uneven cooking. It’s like having a personal chef that knows exactly how to cook your tri-tip, every single time.
Steps for Sous Vide Tri-Tip Reheating
- First things first, prep your tri-tip. Slice it into manageable portions if it’s a large cut. This will ensure even cooking throughout.
- Next, carefully place the tri-tip in a vacuum-sealed bag or a resealable bag. Make sure to remove as much air as possible from the bag. This helps maintain moisture and prevents the water bath from diluting the flavor of the meat. This is crucial, trust me.
- Now, fill a large pot or container with water and heat it to your desired reheating temperature (e.g., 135°F for medium-rare). A thermometer is essential here, so you don’t end up with overcooked tri-tip.
- Carefully place the vacuum-sealed bag (or resealable bag) into the water bath. Make sure the bag is fully submerged. This ensures consistent heating throughout the tri-tip.
- Let it simmer for the appropriate amount of time (refer to the table below). This is the part where you gotta be patient, bro. Don’t rush it. The longer it sits, the more tender it will become.
- Finally, remove the bag from the water bath and let it rest for a few minutes before serving. This allows the juices to redistribute, resulting in a more flavorful and tender tri-tip. Letting it rest is key.
Advantages of Sous Vide Reheating
The sous vide method offers a plethora of advantages over other reheating techniques. It ensures a perfectly cooked tri-tip every time. The constant temperature guarantees that every part of the tri-tip reaches the desired doneness, avoiding the common issue of some parts being overcooked while others are undercooked. Plus, the controlled environment preserves the natural juices of the meat, resulting in a much more tender and flavorful tri-tip.
Tips for Perfect Sous Vide Tri-Tip Reheating
- Use a precise thermometer to maintain the correct temperature throughout the reheating process. This will ensure even cooking.
- Ensure the tri-tip is fully submerged in the water bath to ensure even heat distribution.
- Don’t overcrowd the pot. Make sure there’s enough space for the water to circulate around the tri-tip.
- Adjust the reheating time based on the thickness of the tri-tip.
Comparison Table: Sous Vide vs. Other Reheating Methods
| Method | Time (approx.) | Temperature (°F) |
|---|---|---|
| Sous Vide | 15-30 minutes | 130-140 |
| Oven | 20-30 minutes | 325-350 |
| Stovetop | 10-15 minutes | 350-400 |
| Microwave | 2-5 minutes | High |
Reheating Tri-Tip for Different Purposes
Yo, fam, reheating tri-tip ain’t just about getting it warm again. It’s about getting itperfect* for your meal. Different dishes call for different approaches, and knowing how to adjust your method is key to a killer meal. From sandwiches to tacos, we’ll break down the best ways to reheat your tri-tip for any occasion.Proper reheating isn’t just about taste; it’s about texture too.
A perfectly reheated tri-tip will be juicy and tender, not dry and rubbery. Understanding the best methods for different dishes ensures your tri-tip hits the spot every time.
Reheating Tri-Tip for Sandwiches
The goal here is to maintain the tenderness and juiciness of the tri-tip. Overheating will lead to a tough, dry result, making your sandwich a total fail. Using lower and slower methods like the oven or sous vide are ideal. The oven’s even heat distribution works well, and sous vide provides a precise temperature control for ultimate tenderness.
Aim for a temperature range of 160-170°F (71-77°C) for optimal results.
Reheating Tri-Tip for Salads, How to reheat tri tip
For salads, you want the tri-tip to be warm, but not overly cooked. A slightly higher temperature than for sandwiches is often ideal, allowing the tri-tip to retain its flavor and juiciness while also warming the salad components. The stovetop method with a pan works well for this purpose. You can also use the oven or microwave, but be careful to avoid overcooking.
A temperature of 180-190°F (82-88°C) is a good starting point.
Reheating Tri-Tip for Tacos or Similar Dishes
When making tacos or other similar dishes, you’ll want a slightly higher temperature to warm the tri-tip and also warm the toppings. The stovetop is a good option here, as it allows you to control the heat and sear the tri-tip if desired. If the tri-tip is already sliced, you might want to use the oven method to ensure even heating.
A temperature of 190-200°F (88-93°C) is usually suitable, but adjust based on the other ingredients in your taco mix.
Importance of Temperature Control
Proper temperature control is crucial for maintaining the texture and flavor of the tri-tip. Different dishes require different temperatures to achieve the desired outcome. Undercooking can result in a cold sandwich, while overcooking can lead to a dry, tough meal. For example, a sandwich needs a lower temperature than tacos.
Comparing Reheating Methods
| Method | Texture | Ease of Use | Ideal Application |
|---|---|---|---|
| Oven | Tender, even heating | Easy, low maintenance | Sandwiches, salads |
| Stovetop | Good for searing, controllable heat | Medium | Tacos, other dishes requiring some sear |
| Microwave | Can be inconsistent, potentially dry | Quickest | Quick reheating for salads or a small portion |
| Sous Vide | Extremely tender, consistent | Slightly more involved | Best for maintaining tenderness, sandwiches |
Different reheating methods will yield different textures. Oven reheating provides even heating for a more tender result. Stovetop methods are great for searing and controlling the heat. Microwave methods can be inconsistent, sometimes leading to a dry texture. Sous vide provides the most tender results, but it requires more preparation time.
Safety Considerations for Reheating
Yo, fam, reheating tri-tip is crucial, but safety’s key. We gotta keep those germs at bay, and make sure our grub is bomb, not a biohazard. This ain’t no game, it’s about keeping everyone healthy and happy.Food safety is totally essential when you’re warming up your tri-tip. You gotta be on point with temperatures and timing to avoid getting sick.
It’s not just about taste; it’s about well-being.
The Danger Zone
The danger zone is the temperature range where bacteria multiply rapidly. It’s a no-go area for food safety. Foodborne illnesses can sneak up on you if you don’t pay attention to these temps. Keeping food out of the danger zone is the first step in preventing illness.
Proper Internal Temperature
The ideal internal temperature for reheating tri-tip is crucial. It’s not just about feeling it with your hand. You need a food thermometer to be sure. The exact temp varies, so you gotta know the specific requirements for your meal.
Importance of Food Thermometers
Using a food thermometer is a must-have for reheating any meat. It’s like having a secret weapon against foodborne illnesses. You can’t rely on your eyes or touch to get the right temperature. Get a digital thermometer, it’s totally worth it.
Safe Internal Temperatures
| Meat Type | Safe Internal Temperature (°F) |
|---|---|
| Beef (including Tri-Tip) | 165°F |
| Poultry | 165°F |
| Ground Meat | 160°F |
| Seafood | 145°F |
Note: These temperatures are crucial for food safety. Always use a food thermometer to ensure the meat reaches these temperatures throughout.
This table shows the safe internal temperatures for various types of meat. Always double-check your thermometer readings. These are standard guidelines and should be followed religiously. Different cooking methods might need slight adjustments.
Tips for Maintaining Tri-Tip Quality
Yo, fam! Reheating tri-tip ain’t rocket science, but keeping it juicy and delicious is key. We’re droppin’ some serious knowledge on how to keep your tri-tip from becoming a dry, tough mess. These tips are straight fire, so listen up!Tri-tip’s texture and flavor are totally dependent on how you approach reheating. Proper techniques will help maintain its tender, flavorful goodness.
Whether you’re using the oven, stovetop, microwave, or sous vide, these methods are the game-changers.
Preparing Tri-Tip for Reheating
Proper prep before reheating is crucial. This sets the stage for a successful outcome. Don’t just throw it in the oven or microwave!Tri-tip should be patted dry before reheating. This prevents excess moisture from steaming off, which can lead to a dry, unappealing result. Use paper towels to soak up any lingering moisture.
This simple step can make a big difference.
Oven Reheating Techniques for Quality
Oven reheating can be a solid method for maintaining tri-tip quality. It allows for even heating, preventing hotspots that can dry out the meat.
- Low and Slow: Set the oven to a low temperature (around 300-325°F). This slow and steady heat allows for even cooking throughout, helping to retain moisture.
- Basting: Drizzle with pan juices or a little broth during the reheating process. This adds extra moisture back into the tri-tip and helps to maintain its tenderness.
- Foil Packet: Wrapping the tri-tip in foil helps to trap moisture and prevents it from drying out. Add a little broth or pan juices to the packet for extra juiciness.
Stovetop Reheating Techniques for Quality
Stovetop reheating can be quick and easy, but maintaining moisture is key. You gotta control the heat to avoid burning or drying out the tri-tip.
- Skillet or Pan: Using a skillet or pan allows for easy basting. Add a little broth or pan juices to the pan to keep the tri-tip moist. Cook over medium heat and flip periodically.
- Dutch Oven: The Dutch oven’s ability to hold heat evenly is ideal for tri-tip. Add a little liquid to the bottom of the Dutch oven and let the tri-tip cook gently in the liquid, ensuring even heating and moisture retention.
Microwave Reheating Techniques for Quality
Microwave reheating is often the fastest option, but it can lead to uneven cooking and dryness. Using proper techniques can help maintain quality.
- Damp Paper Towel: Wrapping the tri-tip in a damp paper towel helps to retain moisture during reheating. This simple technique can dramatically improve the results.
- Short Intervals: Reheating in short bursts, with pauses in between, allows for even cooking and helps to prevent burning.
Sous Vide Reheating Techniques for Quality
Sous vide reheating is a precise method that guarantees consistent results. It’s great for maintaining moisture and achieving a tender texture.
- Temperature Control: Maintain the ideal temperature for reheating tri-tip (around 130-135°F) to ensure the meat remains tender and juicy. This method is precise and prevents overcooking.
- Reheating Time: Reheating times will vary based on the thickness of the tri-tip. The precise time is critical for achieving a consistent and optimal result.
End of Discussion
So, whether you’re prepping for a quick weeknight dinner or a weekend feast, this guide equips you to reheat your tri-tip with confidence and skill. Remember, the key to success lies in understanding your chosen method and adhering to safe food handling practices. Enjoy your perfectly reheated tri-tip!
FAQ Guide
How long should I reheat tri-tip in the oven?
Oven reheating times vary based on thickness. A general guideline is 15-20 minutes at 325-350°F (160-175°C) for medium-rare to medium tri-tip.
Can I reheat tri-tip in the microwave?
Yes, but be cautious. Microwave reheating often results in uneven cooking and dryness. Use short bursts, with careful monitoring, and consider a moisture-retaining technique like wrapping in a damp paper towel.
What’s the safest internal temperature for reheated tri-tip?
The safe minimum internal temperature for reheating tri-tip is 165°F (74°C). Always use a food thermometer to ensure food safety.
What if my tri-tip is tough after reheating?
Toughness often arises from overcooking or improper reheating. Aim for lower temperatures and shorter cooking times, especially when using methods like the microwave.