

How to fix rain pipe in brick wall? This isn’t your average DIY project; it’s a mission to keep your house from becoming a soggy mess! Water damage is a nightmare, and a leaky or clogged rain pipe can be a major headache. This guide will walk you through identifying the problem, assessing the damage, performing the repair, and preventing future issues, all while keeping your safety in mind.
Buckle up, it’s going to be a wild ride!
Imagine a scene: water cascading down your brick wall, leaving behind unsightly stains and potentially weakening the structure. A clogged rain pipe can cause this, and a leaky one can be just as problematic. We’ll cover everything from diagnosing the issue to the best repair techniques, so you can confidently tackle this common household problem.
Identifying the Problem

A leaky or clogged rain pipe can wreak havoc on a brick wall, leading to unsightly water damage and structural weakening. Understanding the potential problems and their causes is the first step towards effective repair. Identifying the source of the issue allows for targeted solutions, preventing further damage and costly repairs.Rain pipes, essential for directing rainwater away from buildings, can experience a multitude of problems.
These range from minor leaks to significant structural damage, and understanding the telltale signs is crucial for prompt intervention.
Common Rain Pipe Issues
Rain pipes, vital for directing rainwater away from a building, can experience several issues. Understanding these common problems and the symptoms they produce allows for proactive identification and repair.
- Leaks: Leaks manifest as dampness or moisture on the wall surface near the pipe. This might be accompanied by a drip, or a constant, subtle trickle. Over time, the accumulation of water can lead to discoloration and the development of mold. In severe cases, leaks can result in the weakening of the mortar or brick, compromising the structural integrity of the wall.
- Blockages: Blockages, often caused by debris like leaves, twigs, or even nesting birds, can lead to water accumulating above the blockage. This causes pressure buildup, potentially bursting the pipe. This buildup of water also creates a breeding ground for bacteria and algae, affecting the aesthetic appeal and potentially harming the structural integrity.
- Material Degradation: Over time, the materials used in rain pipes can degrade. Corrosion, particularly in metal pipes, can cause leaks. Deterioration of the pipe’s joints can also lead to leaks. Additionally, the movement of water and freezing/thawing cycles can cause cracks and deterioration in the pipe itself.
- Improper Installation: Faulty installation is a frequent cause of problems. Poorly secured pipes, misaligned joints, or improper slope can result in leaks or water pooling. A poorly positioned downspout may not direct water far enough away from the building, causing water damage to the foundation or nearby landscaping.
Types of Rain Pipes and Potential Failure Points
Different types of rain pipes are susceptible to specific problems. Recognizing these differences is key to predicting potential issues.
- Metal Pipes (e.g., copper, galvanized steel): Corrosion, especially in galvanized steel, is a significant concern. Over time, the zinc coating can deteriorate, leading to rust and leaks. Cracks can develop in the pipe due to expansion and contraction caused by temperature fluctuations. Metal pipes are prone to leaks if the joints are poorly fitted or corroded.
- Plastic Pipes: While generally more resistant to corrosion than metal pipes, plastic pipes can still experience issues. Poorly installed pipes or pipes that have been subjected to extreme temperatures (e.g., prolonged exposure to intense sunlight) can become brittle and crack. They are also vulnerable to damage if they are not correctly supported or protected from impacts.
- Clay Pipes: Clay pipes, often used in older buildings, can be prone to cracks or damage over time due to pressure from water or soil movement. The mortar used to connect these pipes can degrade, causing leaks and damage to the brickwork. They can be more fragile compared to other types and prone to structural failure.
Environmental Factors and Rain Pipe Problems
Environmental factors can significantly impact the lifespan and performance of rain pipes. Understanding these factors helps predict and prevent issues.
- Extreme Weather: Heavy rainfall can overwhelm the capacity of the rain pipe system, causing leaks or blockages. Freezing temperatures can cause water to expand within the pipes, potentially leading to cracks or bursts.
- Tree Roots: Growing tree roots can penetrate the surrounding soil and damage the pipes. This damage can cause leaks or blockages, affecting the pipe’s efficiency.
- Soil Movement: Ground movement due to frost, earthquakes, or construction activity can displace the rain pipes, leading to misalignment and leaks. The shifting of the surrounding earth can put stress on the pipes and their connections, potentially causing damage.
Symptom Comparison: Leaks vs. Blockages
The following table highlights the differences in symptoms between a leaking and a clogged rain pipe, helping to pinpoint the issue quickly.
| Symptom | Leaking Rain Pipe | Clogged Rain Pipe |
|---|---|---|
| Water Damage | Dampness, discoloration, mold growth on the wall near the pipe | Water pooling above the blockage point, no visible leaks directly from the pipe. |
| Visual Inspection | Visible drips or constant trickle from the pipe or joints | No visible leaks, but water may be backing up or overflowing near the pipe. |
| Sound | Drip, trickle, or constant slow sound of water | No audible sound; pressure buildup might be present. |
| Pressure | Normal or slightly reduced water pressure | Pressure buildup above the blockage may cause a potential bursting of the pipe. |
Assessing the Damage
Unveiling the secrets of a leaky rain pipe requires a meticulous examination of the affected area. A thorough inspection is not just about identifying the problem; it’s about understanding its extent and potential ramifications. A compromised rain pipe can lead to significant water damage if left unchecked, affecting not only the brickwork but also the surrounding structures and potentially causing structural issues.A careful assessment will allow you to formulate a precise and effective repair strategy.
This process will involve a detailed examination of the brickwork, the pipe itself, and the surrounding elements to determine the exact cause of the problem. This proactive approach minimizes further damage and ensures a sustainable solution.
Safe Access and Inspection
Thorough assessment hinges on safe access to the damaged area. Before commencing any work, always prioritize safety. Use appropriate safety equipment, including sturdy ladders, scaffolding, or harnesses, depending on the height and accessibility of the affected section of the wall. Proper support is crucial to prevent falls and injuries. This precaution safeguards both you and your property.
Tools for Effective Inspection
A comprehensive toolkit is essential for a thorough and safe inspection. A list of necessary tools includes:
- Safety glasses: Protect your eyes from debris and flying particles.
- Gloves: Provide protection against rough surfaces and potential irritants.
- Ladder or scaffolding: Essential for accessing higher areas of the wall.
- Flashlight or headlamp: Illuminates dark or confined spaces, providing clear visibility.
- Measuring tape: Accurately measure the extent of the damage.
- Hammer (with soft face): Gently tap the brickwork to detect loose or hollow areas.
- Small pry bar: Carefully dislodge debris or access tight spaces.
- Camera or video recorder: Document the damage for future reference and to aid in identifying the precise location of the leak.
These tools, when used correctly, facilitate a more effective and safe inspection.
Identifying the Leak or Blockage
Locating the precise point of the leak or blockage is critical for an accurate repair. Carefully examine the brickwork for any signs of water stains, discoloration, or dampness. These visual cues can pinpoint the general area of the problem. Employing a water spray bottle to apply water to suspected areas can highlight leak points by revealing water seeping from the affected area.
Use a flashlight to illuminate cracks or crevices that may be concealing the leak.
Potential Causes and Repair Steps
| Potential Cause | Repair Steps |
|---|---|
| Cracked or damaged pipe | Replace the damaged section of the pipe with a new, compatible one. Ensure proper anchoring and secure connections. |
| Blockage in the pipe | Use a specialized tool to clear the blockage. If necessary, consult a professional plumber for assistance. |
| Loose or missing mortar | Re-point the affected area with appropriate mortar, ensuring a strong and watertight seal. |
| Poorly sealed joints | Repair the affected joints using sealant or other water-resistant materials. |
| Damaged flashing or gutter system | Replace the damaged flashing or gutter system to prevent water from entering the wall. |
This table provides a concise overview of common issues and corresponding repair strategies. Understanding the cause allows for a tailored approach to repair, leading to a more effective and lasting solution.
Repairing the Rain Pipe
Unveiling the secrets of a well-functioning rain drainage system, we embark on a journey to restore the integrity of your rain pipe. A properly functioning rain pipe system is crucial for preventing water damage to your property. Addressing leaks and blockages promptly is essential for maintaining the structural integrity of your home and preserving its value.Addressing rain pipe issues is a crucial step in home maintenance.
Ignoring these problems can lead to significant damage over time, ranging from minor water stains to extensive structural problems. This section provides a comprehensive guide to repairing and maintaining your rain pipe system, enabling you to restore its efficiency and prevent future problems.
Fixing a Leaking Rain Pipe
Identifying the exact leak location is paramount. Using a hose or a watering can to pinpoint the leak can help you diagnose the source of the problem. This is essential for effective repair. Once the leak is located, the necessary repair steps can begin.
- Isolate the Water Supply: Turn off the water supply to the affected area to prevent further water damage and ensure safety during the repair process. This crucial step will prevent any further damage and allow for safe work.
- Assess the Damage: Thoroughly inspect the damaged area to determine the extent of the damage. This assessment helps in choosing the correct repair material and method.
- Clean the Area: Remove any debris, dirt, or loose materials around the leak. Clean the affected area meticulously to ensure the repair adheres properly.
- Repair the Leak: Depending on the type of damage, use appropriate repair materials like sealant, mortar, or specialized pipe repair products. This step involves carefully applying the chosen material to the leak site and ensuring it adheres properly.
- Test the Repair: After applying the repair, turn the water supply back on and carefully monitor the pipe for any further leaks. This step ensures the repair has been successful.
Clearing a Blocked Rain Pipe
A blocked rain pipe can lead to water pooling around your home, posing a serious threat to the structure’s integrity. Understanding how to clear a blockage is crucial for maintaining the efficient drainage of rainwater.
- Identify the Blockage: Locate the source of the blockage. This can be achieved through visual inspection or by listening for unusual sounds or water flow patterns. The identification of the blockage’s source is crucial for choosing the right method of clearing it.
- Use a Drain Snake or Auger: If the blockage is relatively small and accessible, a drain snake or auger can be used to clear the obstruction. Use caution to avoid damaging the pipe.
- Use a Plunger or Pipe Cleaning Tools: For blockages located closer to the ground or in accessible areas, use a plunger or specialized pipe cleaning tools. This step requires care to avoid damage to the pipe.
- Consult a Professional: For severe or inaccessible blockages, contact a qualified plumber or drainage specialist. They have the experience and equipment to clear the blockage effectively and safely.
Sealing Gaps and Cracks
Proper sealing of gaps and cracks around the rain pipe is crucial for preventing water infiltration and maintaining the structural integrity of your home.
- Caulk or Sealant: Apply a suitable sealant to fill gaps and cracks around the rain pipe, ensuring a waterproof seal. Choosing the right sealant is important for long-term effectiveness.
- Mortar: Use mortar to fill larger gaps or cracks, particularly around the pipe’s entry points into the wall. This provides a durable and strong seal.
- Specialized Pipe Repair Products: Specialized pipe repair products are available for specific types of pipe damage. These products offer a solution tailored to the unique requirements of the damage.
Comparing Repair Materials
Different materials offer varying levels of effectiveness and durability in rain pipe repairs. Choosing the right material is essential for the long-term health of your home’s structure.
| Repair Material | Pros | Cons |
|---|---|---|
| Mortar | Durable, strong, cost-effective | Can be time-consuming to apply, may not be suitable for all types of cracks |
| Sealant | Easy to apply, versatile, suitable for smaller gaps | Less durable than mortar, may not be suitable for larger gaps |
| Specialized Pipe Repair Products | Often specifically designed for pipe repair, effective for specific types of damage | Can be more expensive than other options, may require specialized tools |
Prevention and Maintenance
A well-maintained rain pipe system is a testament to responsible homeownership. It ensures the longevity of your property and prevents costly repairs down the line. Investing in proactive preventative measures and regular maintenance is far more economical than addressing extensive damage caused by neglected rain pipes. By understanding the crucial elements of prevention, you can safeguard your home from the elements and maintain its structural integrity.Regular inspections and meticulous maintenance are key to preventing future rain pipe problems.
Ignoring these essential steps can lead to costly repairs and potential damage to your property. By understanding the signs of trouble and acting promptly, you can mitigate the impact of water damage and extend the lifespan of your rain pipe system.
Preventative Measures
Proactive measures to prevent future rain pipe problems are essential for maintaining a healthy drainage system. This involves careful planning and execution during the initial installation, and consistent upkeep thereafter. Regular checks and prompt repairs of minor issues can save you from more extensive and costly damage later.
- Proper Installation: Thorough installation is paramount. Ensuring the rain pipe is securely fastened to the wall and properly sloped to direct water away from the building is crucial. This prevents water accumulation and subsequent leaks or damage.
- Material Selection: Choosing appropriate materials for rain pipe construction is vital. Materials like galvanized steel or copper are known for their durability and resistance to corrosion, thus extending the lifespan of the system. Properly treated materials can resist rust and corrosion, preventing premature failure and the need for replacement.
- Regular Inspections: Regular visual inspections are crucial to identify potential problems early. Look for any signs of damage, such as cracks, leaks, or loose connections. Addressing these issues promptly can prevent further damage and costly repairs.
Importance of Regular Inspections
Regular inspections are not just a good practice; they’re a necessity for a well-functioning rain pipe system. Regular checks allow you to catch problems before they escalate into significant issues, saving you time and money in the long run. Identifying minor issues early minimizes the impact on your property and avoids costly repairs.
- Frequency of Inspections: Regular inspections should be performed at least twice a year, ideally after periods of heavy rainfall or freezing temperatures. This allows you to identify any potential problems before they cause extensive damage.
- Identifying Warning Signs: Pay attention to warning signs, such as water stains on the walls, damp patches on the roof, or unusual noises around the rain pipe. These can be indicators of underlying problems that need immediate attention.
Appropriate Materials
Selecting the right materials for rain pipe construction is crucial for longevity and performance. Choosing materials that are resistant to corrosion and environmental factors is a key factor in preventing future problems. Using suitable materials also contributes to the structural integrity of your property.
- Galvanized Steel: Galvanized steel is a common and cost-effective choice. Its zinc coating provides excellent corrosion resistance, extending its lifespan. However, it can be prone to rusting if the coating is damaged.
- Copper: Copper rain pipes are known for their durability and aesthetic appeal. Their natural resistance to corrosion makes them a premium choice, but they can be more expensive than galvanized steel.
- PVC: PVC is a strong, lightweight, and affordable option. It’s resistant to corrosion, making it suitable for various climates. It is often used in modern constructions due to its lightweight and flexible nature.
Routine Maintenance Schedule
A structured maintenance schedule ensures that your rain pipe system remains in optimal condition. This schedule can be tailored to your specific needs and environmental conditions. Consistent maintenance allows you to proactively address issues before they become significant problems.
| Month | Task |
|---|---|
| Spring | Inspect for loose connections, damaged sections, and signs of corrosion. |
| Summer | Clean debris and leaves from gutters and downspouts. |
| Autumn | Inspect for any signs of damage or blockages. |
| Winter | Inspect for ice dams or blockages, ensure proper drainage. |
Warning Signs to Look Out For
Recognizing potential problems early can prevent significant damage and costly repairs. By paying attention to these warning signs, you can take proactive steps to address issues before they escalate. Regular observation and maintenance can avert substantial property damage.
- Water stains on walls or ceilings: Water stains on walls or ceilings indicate potential leaks or water accumulation around the rain pipe system.
- Unusual noises around the pipes: Unusual noises, such as dripping or rattling, could signal loose connections or blockages.
- Visible cracks or damage to the pipes: Any cracks, dents, or corrosion on the pipes should be addressed immediately to prevent leaks and structural damage.
Safety Considerations
Protecting yourself and your property during rain pipe repairs is paramount. A seemingly simple task can quickly become dangerous if proper precautions aren’t taken. From the height of the wall to the potential for hidden water damage, understanding and adhering to safety protocols is crucial for a successful and injury-free repair.
Essential Safety Gear
Ensuring you have the right equipment is the first step in protecting yourself. Safety is not an afterthought but an integral part of the process. The proper tools and attire can significantly reduce the risk of injury and ensure a smooth, efficient repair. Using appropriate personal protective equipment (PPE) is vital for both your physical well-being and the success of the repair.
- Hard Hat: A hard hat protects your head from falling debris or accidental impacts, crucial when working near a brick wall. This simple piece of equipment can prevent serious head injuries.
- Safety Glasses/Goggles: Flying particles or debris are a constant risk. Safety glasses or goggles protect your eyes from potential damage. Protecting your eyes is just as important as protecting your head.
- Work Gloves: Brick and mortar can be abrasive and cause hand injuries. Robust work gloves protect your hands from cuts and abrasions, extending the life of your hands.
- Fall Protection Equipment: Working at heights requires specialized equipment. This includes harnesses, lanyards, and safety lines to prevent falls. The potential for serious injury from falls increases with the height of the wall. Never compromise on fall protection equipment when working at heights.
- Footwear: Sturdy, non-slip footwear is essential for preventing slips and falls, particularly on potentially wet or uneven surfaces. Appropriate footwear will enhance stability and reduce the risk of slips.
Proper Tool Selection
Using the correct tools for the job significantly minimizes risks. Incorrect tools can lead to accidents and damage. Selecting the right tools is a vital part of a successful repair.
- Ladder Safety: Ensure the ladder is securely positioned and stable before climbing. Never overextend the ladder or use it on uneven ground. A faulty ladder can lead to falls, so meticulous ladder setup is essential.
- Power Tools: If using power tools, always ensure they are in good working order and use the correct safety guards. Faulty tools can cause unexpected damage and injuries. Regular maintenance and proper handling of power tools are key.
- Inspection of Tools: Always inspect tools before use. This includes checking for any damage or wear that could compromise safety. Pre-use inspections of tools help prevent accidents.
Water Damage Mitigation
Water damage can lead to structural problems and mold growth. Proper assessment and repair of water leaks are crucial to preventing further damage. Assessing and addressing water damage is a proactive step toward preserving the structural integrity of your property.
- Identifying Leaks: Identifying the source of water leaks is the first step. A thorough inspection of the affected areas will pinpoint the exact location of the leak. Finding the source of the leak is a critical first step in the repair process.
- Controlling Water Flow: If possible, turn off the water supply to the affected area to stop further water damage. Controlling water flow is essential in preventing further damage.
- Removing Standing Water: Standing water should be removed immediately to prevent mold growth. Immediate action is critical to preventing mold and mildew. Prompt removal of standing water is crucial for preventing further issues.
Height Safety Guidelines
Working at heights presents unique safety challenges. Understanding and following guidelines is crucial for preventing falls and other injuries. Following established guidelines for working at heights is critical to ensure safety and minimize the risk of accidents.
| Safety Guideline | Description |
|---|---|
| Secure the Work Area | Ensure a stable and secure work area to prevent slips and falls. Secure footing and stable surfaces are essential to prevent accidents. |
| Use Fall Protection | Use appropriate fall protection equipment, such as harnesses and lanyards. Fall protection equipment is crucial to preventing falls from heights. |
| Proper Ladder Use | Use ladders that are appropriate for the height and secure the base to prevent tipping. Proper ladder setup is vital for safety. |
| Limited Reach | Avoid overreaching or working in awkward positions. Keeping your reach within your capabilities is essential to prevent falls. |
| Weather Considerations | Check the weather forecast before and during the work. Adverse weather conditions can significantly increase the risk of accidents. |
Illustrations and Visual Aids

Unveiling the intricate world of rain pipe systems requires a visual approach. Understanding the components, repair techniques, and potential blockages through detailed illustrations will empower you to confidently tackle any rain pipe issues. Visual aids provide a clear roadmap for safe and effective repairs.Visual representations are crucial for comprehending the complexities of a rain pipe system and the nuances of repair procedures.
They transform abstract concepts into tangible realities, enabling a deeper understanding of the problem and facilitating a more effective resolution.
Typical Rain Pipe System in a Brick Wall
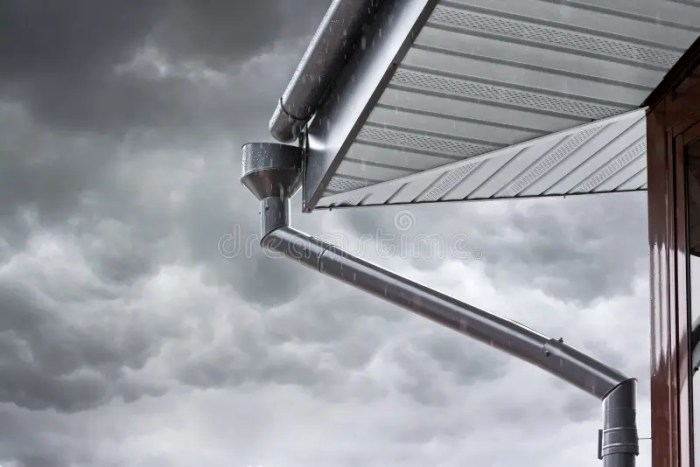
A typical rain pipe system integrated into a brick wall is a meticulously engineered network. It’s a silent guardian against water damage, efficiently channeling rainwater away from the building. The system comprises several key components:
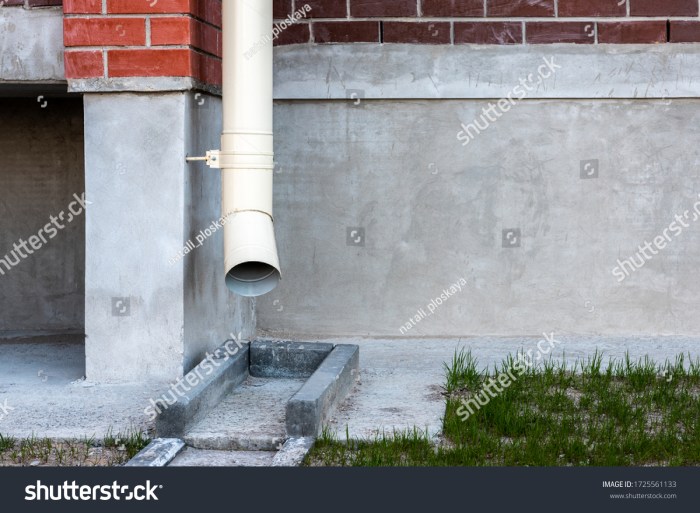
- Downpipes: These vertical pipes, typically made of metal (galvanized steel, copper, or aluminum), are crucial for directing rainwater from the roof to the ground. They are often affixed to the building’s exterior, often with brackets. Variations exist based on material, size, and design to cater to different roof areas and water flow requirements.
- Roof Gutters: These are horizontal channels positioned along the edges of the roof. They collect rainwater flowing off the roof surface and channel it towards the downpipes. Properly sized and maintained gutters prevent water from overflowing and damaging the exterior of the building.
- Connectors: These components ensure a seamless flow of water from the gutters to the downpipes. They are essential for directing water effectively and preventing leaks. Various types of connectors are available, each suited to specific gutter and downpipe designs.
- Wall Brackets: These support the downpipes and maintain their alignment within the brickwork. Appropriate brackets ensure stability and prevent sagging or displacement of the downpipes over time.
Repair Techniques Illustrated, How to fix rain pipe in brick wall
Visualizing repair techniques clarifies the steps involved and facilitates accurate execution. Clear diagrams illustrate the correct methods for addressing different issues.
- Cleaning Blockages: Illustrations depict various methods for clearing blockages, including using specialized tools like drain rods or plumbing snakes. The diagrams show the proper insertion technique and the potential for different types of blockages (leaves, debris, or other materials) to be removed efficiently.
- Securing Loose Fittings: Visual aids demonstrate the proper tightening of loose connections, including the use of appropriate tools and the identification of damaged or worn parts. Detailed illustrations showcase the correct application of clamps, screws, or other fasteners to secure loose connections.
- Replacing Damaged Sections: Visual diagrams depict the step-by-step process of replacing a damaged section of rain pipe. The illustrations guide you through removing the old pipe, preparing the new pipe, and properly securing it in the wall, including the use of appropriate sealant to prevent leaks.
Illustrations of Rain Pipe Blockages
Understanding the types of blockages helps in efficient troubleshooting and repair. Detailed visual representations are essential for identifying the source of the issue.
- Leaf and Debris Blockages: Illustrations show how leaves, twigs, and other debris can accumulate in the rain pipe, restricting water flow. These diagrams highlight the importance of regular cleaning to prevent such blockages.
- Root Intrusions: Illustrations depict how tree roots can penetrate and clog rain pipes, leading to significant water flow issues. These diagrams demonstrate the need for careful assessment and potential excavation to remove the roots.
- Animal Blockages: Illustrations illustrate how animals, such as birds or rodents, can nest or build structures within the rain pipe, obstructing water flow. These diagrams emphasize the importance of preventing animal access and addressing any obstructions promptly.
Replacing a Damaged Section
Detailed illustrations are crucial for guiding the replacement process of a damaged section. The visual representation ensures the replacement is carried out correctly, preventing future leaks.
- Step-by-Step Replacement Process: Detailed diagrams clearly illustrate the process of removing the old section, measuring and cutting the new section, and securing it to the wall. The illustrations show how to seal the connections effectively to prevent leaks and maintain the integrity of the system.
- Tools and Materials: Visual aids showcase the tools and materials needed for the replacement process. The illustrations clearly depict the appropriate use of each tool and material, emphasizing safety and efficiency.
Final Review
So, you’ve navigated the tricky world of leaky rain pipes in brick walls. Hopefully, this guide has given you the tools and knowledge to tackle the problem head-on. Remember, prevention is key – regular maintenance can save you a world of trouble and potential damage down the line. Now, go forth and keep your home dry!
FAQ Corner: How To Fix Rain Pipe In Brick Wall
What are some common signs of a blocked rain pipe?
Water pooling near the pipe, slow draining, or a noticeable decrease in water flow are all signs that the pipe might be blocked. Also, look for unusual water accumulation around the pipe or even dripping from unexpected places.
How do I safely access a rain pipe on a high wall?
Use a sturdy ladder, and always ensure the ladder is positioned correctly and is stable. Never work alone, and always have someone supervise your work. Safety glasses and work gloves are a must!
What kind of sealant is best for sealing gaps around the rain pipe?
Silicone sealant is a popular choice, but depending on the specific material of your rain pipe, other sealants may be more suitable. Check with your local hardware store for recommendations.
What are the potential risks of ignoring a leaking rain pipe?
Ignoring a leak can lead to serious water damage to your home’s structure, foundation, and even electrical systems. This could result in mold growth, structural weakening, and costly repairs.