

How to fill the water tank on an RV is crucial for a comfortable and safe trip. Properly filling your RV’s water tank ensures you have fresh water for drinking, cooking, and hygiene. This guide walks you through the process, covering different methods, safety precautions, troubleshooting, and maintenance.
From understanding the various RV water tank types and capacities to choosing the best filling method for your situation, this comprehensive guide will empower you to fill your RV’s water tank safely and efficiently.
Introduction to RV Water Tanks
Recreational vehicles (RVs) rely on water tanks for various onboard functions, including sanitation, cooking, and personal hygiene. Understanding the different types of tanks and their capacities is crucial for responsible RV ownership and efficient water management. Proper filling procedures are essential to avoid potential damage to the RV’s plumbing system and ensure consistent water supply.RV water tanks are vital components, storing potable water for use within the RV.
Incorrect filling methods can lead to leaks, overflows, and damage to the tank’s seals and fittings, ultimately affecting the safety and functionality of the vehicle. This section will cover the types of tanks, their capacities, the importance of proper filling, and potential consequences of incorrect procedures.
RV Water Tank Types and Capacities
RV water tanks typically include fresh water tanks, grey water tanks, and black water tanks. Fresh water tanks store potable water for drinking, cooking, and hygiene. Grey water tanks collect wastewater from sinks, showers, and other fixtures. Black water tanks collect wastewater from toilets. Capacities vary widely depending on the RV model and size.
Common capacities range from 20 to 100 gallons for fresh water tanks, and smaller capacities for grey and black water tanks.
Importance of Proper Filling Procedures
Properly filling RV water tanks is crucial for the long-term health and safety of the vehicle. Improper filling can lead to water damage, leaks, and potential water contamination. Overfilling can damage seals and cause leaks. Underfilling can result in insufficient water pressure and lead to plumbing issues.
Potential Consequences of Incorrect Filling
Failure to follow proper filling procedures can lead to a variety of issues. Overfilling can cause water to spill, potentially damaging the RV’s exterior or interior. Overfilling can also damage the tank itself, leading to leaks. Incorrect filling can also introduce contaminants into the water supply. Incorrect filling procedures can also cause damage to the RV’s plumbing system, leading to future repair costs and potential inconvenience.
Safe Filling Procedures
Properly filling RV water tanks is essential for avoiding potential problems. Following these steps can help ensure safe and efficient filling:
- Locate the Water Inlet: Carefully identify the RV’s water inlet. This is typically located outside the RV and may be a hose connection or a direct hookup.
- Check the Water Source: Ensure the water source is clean and safe for consumption. This is particularly important when filling from a public water source.
- Connect the Water Source: Securely connect the water supply hose to the RV’s water inlet.
- Turn on the Water Supply: Slowly open the water valve to fill the tank. Monitor the water level to avoid overfilling.
- Check for Leaks: Inspect all connections and fittings for leaks. If a leak is found, stop filling immediately and address the issue before proceeding.
- Turn off the Water Supply: Once the tank is full, close the water valve to stop the flow of water.
- Disconnect the Water Source: Carefully disconnect the water supply hose from the RV’s water inlet.
Methods for Filling the RV Water Tank
Filling an RV water tank is a crucial task for maintaining water supply. Proper and efficient methods ensure a consistent water source for various activities, from showering and cooking to sanitation. Understanding the different methods available, along with their advantages and disadvantages, empowers RV owners to select the most suitable option based on their specific circumstances.
Hose Method
The hose method is a common and often convenient way to fill an RV water tank. It involves connecting a garden hose to the RV’s water inlet, then opening the water valve. This method is particularly useful when water sources are readily available, such as campsites with water hookups or access to a water spigot.
- Step 1: Secure the hose connection. Ensure the hose is securely connected to the RV’s water inlet and the water source.
- Step 2: Open the water valve on the RV. This allows water to flow into the tank.
- Step 3: Monitor the water level. Carefully observe the water level in the tank to avoid overfilling. Some tanks have markings to aid in monitoring the level.
- Step 4: Close the water valve. When the tank is full, close the valve on the RV and disconnect the hose.
- Safety Precautions: Always ensure the hose is properly secured to prevent leaks. Close the water valve on the RV to prevent accidental water flow. Be aware of potential water pressure fluctuations.
Fill Station Method
RV fill stations provide a dedicated and efficient method for refilling water tanks. These stations typically have specialized equipment that facilitates a quick and controlled filling process.
- Step 1: Locate a suitable fill station. Find a fill station that is accessible and conveniently located.
- Step 2: Connect the RV’s water inlet to the station’s equipment. Ensure a tight and secure connection.
- Step 3: Initiate the filling process. Start the filling process by activating the fill station’s controls. The system will regulate water flow to prevent overfilling.
- Step 4: Monitor the water level. Observe the water level in the tank to avoid overfilling. Fill stations often have built-in gauges or level indicators.
- Step 5: Disconnect from the station. After the tank is full, disconnect from the fill station and carefully secure the RV’s water inlet.
- Safety Precautions: Inspect the fill station’s equipment for any signs of damage. Ensure the water source is safe and clean. Always follow the station’s instructions for proper operation.
Bucket Method
The bucket method is a more labor-intensive approach but can be useful in situations where a hose or fill station is unavailable.
- Step 1: Gather buckets. Gather clean and suitable buckets to transfer water.
- Step 2: Fill the buckets. Fill the buckets at the water source.
- Step 3: Pour water into the RV tank. Carefully pour the water into the RV’s water inlet. Be cautious to avoid spilling.
- Step 4: Monitor the water level. Check the water level in the tank to avoid overfilling.
- Safety Precautions: Ensure the buckets are sturdy and can hold the required amount of water. Be careful not to spill water on the ground or onto yourself. Clean the RV’s water inlet thoroughly before filling. If using a water source that isn’t potable, be certain the water is safe for use.
Comparison Table
| Method | Time | Effort | Water Pressure |
|---|---|---|---|
| Hose | Moderate | Low | Variable |
| Fill Station | Low | Low | Controlled |
| Bucket | High | High | Low |
Safety Precautions During Filling
Properly filling your RV’s water tank is essential for maintaining a safe and functional water supply. Neglecting safety precautions can lead to serious issues, ranging from water contamination to potential accidents. Adhering to the following safety measures ensures a smooth and secure filling process.Careful handling of the water source and the RV’s water system are crucial during the filling process.
This includes identifying potential hazards, utilizing appropriate safety equipment, and maintaining a mindful approach to prevent spills and contamination. Understanding these precautions minimizes the risk of unpleasant situations.
Potential Hazards and Risks
Water contamination is a significant risk when filling RV tanks. Improper handling of the water source, such as using a contaminated tap or well, can introduce harmful bacteria, chemicals, or other contaminants into the RV’s water system. This can lead to health issues if the water is not properly treated or purified before consumption. Similarly, accidental spills can lead to water damage to the RV’s interior and potentially harm surrounding surfaces.
Spilled water can also create slippery conditions, posing a fall hazard. Carelessness and inadequate planning can easily lead to such situations.
Proper Water Source Handling
The selection of a clean and safe water source is paramount. If using a municipal water tap, ensure the water is potable and suitable for drinking. Avoid using water from sources with known contamination issues, such as a potentially contaminated well or a water source with an unclear history. When using a water hose, inspect it for leaks and damage.
Always shut off the water supply if you notice any leaks or irregularities. Thorough examination of the source is essential for maintaining safety.
Safety Equipment and Tools
Using appropriate safety equipment and tools can significantly reduce the risk of accidents during water tank filling. A sturdy water hose with a reliable connection is crucial. A hose with a shut-off valve at the end prevents accidental water flow when not needed. A reliable water filter can remove impurities from the water source. This reduces the risk of water contamination.
A bucket or container is recommended to catch any drips or spills that may occur during the process. A sturdy step ladder or stool provides better access for filling the tank, especially in higher positions, avoiding unnecessary strain. This safety equipment will assist in handling the water source safely.
- Water Hose Inspection: Regularly inspect the water hose for any signs of damage, such as cracks, leaks, or kinks. Replace the hose if it shows any signs of damage to prevent water leaks and maintain a safe filling process.
- Proper Shut-off Valves: Ensure all water supply valves (both at the water source and at the RV) are properly closed when not in use. This prevents accidental water flow and potential water damage.
- Spill Containment: Place a suitable container, such as a bucket or tray, beneath the water source and the RV’s water intake point to catch any spills. This will prevent water damage and contamination of the surrounding area.
- Grounding Procedures: If using a submersible pump, ensure proper grounding procedures are followed to prevent electrical hazards. This is crucial to avoid electrocution.
- Personal Protective Equipment (PPE): While not always necessary, wearing gloves can protect hands from potential hazards, such as water splashes, cuts, or exposure to contaminants. Safety glasses or goggles protect the eyes from splashes.
Troubleshooting Common Issues
Filling an RV water tank can sometimes present unexpected challenges. Understanding potential problems and their solutions is crucial for maintaining a smooth and efficient water supply. This section details common issues encountered during RV water tank filling and provides step-by-step troubleshooting procedures.Common problems during RV water tank filling often stem from equipment malfunctions or improper connections. Identifying the root cause is the first step towards effective resolution.
This section will guide you through identifying and addressing such issues, from minor clogs to more significant system failures. It also highlights the importance of regularly checking water pressure and flow rate.
Common Filling Problems and Troubleshooting
A variety of issues can arise during RV water tank filling. These include slow or no water flow, leaks, or unusual noises. Recognizing these problems early can save time and effort.
- Slow or No Water Flow: Slow or no water flow during filling can be attributed to several factors. A partially obstructed hose or a clogged inlet filter are common causes. Additionally, low water pressure at the source or a faulty valve can also contribute. To troubleshoot, first inspect the water supply hose for kinks or obstructions. Clean the inlet filter if applicable.
If these measures do not resolve the issue, check the water pressure at the source. If the source pressure is insufficient, consider connecting to a higher-pressure water source. If the problem persists, consult a qualified RV technician to assess the valve.
- Leaks: Leaks during or after filling can be a significant concern. Leaks may stem from a damaged hose, a faulty connection, or a compromised water tank. Visual inspection is the first step. Check all connections, hoses, and fittings for leaks. If a leak is found, repair the damaged component immediately.
If the leak is internal to the water tank, consult a qualified RV technician.
- Unusual Noises: Unusual noises during filling, such as gurgling or hissing, may indicate a problem with the water supply or the RV’s water system. These noises can stem from air pockets in the lines or faulty valves. If possible, try to pinpoint the location of the noise. If the noise persists, consult a qualified RV technician to assess the issue.
- Faulty Valves: Faulty water valves can lead to inadequate water flow or leaks. Symptoms include inconsistent water pressure or complete blockage. Checking the valve for proper operation is crucial. If the valve exhibits any signs of malfunction, consult a qualified RV technician for repairs.
Checking Water Pressure and Flow Rate
Regularly monitoring water pressure and flow rate during filling is vital for identifying potential problems early. Maintaining appropriate pressure and flow ensures optimal water tank filling and usage.
- Water Pressure: Water pressure should be consistently adequate for efficient filling. Use a pressure gauge to measure the water pressure at the water tank inlet. Normal water pressure for RV filling typically ranges between 20 and 50 PSI. Deviations from this range may indicate a problem with the water source or the RV’s water system. A significant drop in pressure may suggest a blockage in the supply line or a faulty valve.
- Flow Rate: The flow rate is the speed at which water enters the tank. An appropriate flow rate is crucial for quick and efficient filling. Observe the water flow rate during filling. A slow flow rate may indicate a blockage or a low-pressure water source. A rapid flow rate could suggest a potential problem with the valve or a leak in the system.
A flow rate significantly slower than expected warrants investigation.
Water Quality and Treatment


Maintaining proper water quality is crucial for the health and longevity of RV systems and the well-being of occupants. Contaminants in water can lead to various problems, from unpleasant tastes and odors to potentially harmful bacteria and minerals that can damage appliances and plumbing. Ensuring clean, potable water is vital for drinking, cooking, and personal hygiene.Understanding the quality of water entering your RV’s tank is paramount.
This involves recognizing potential contaminants and employing appropriate treatment methods to ensure safe and healthy water use. This section will Artikel the significance of water quality, how to assess water sources for impurities, and the effective procedures for water treatment within an RV environment.
Assessing Water Source Quality
Identifying potential contaminants in a water source is essential for effective treatment. Visual inspection is often the first step. Turbidity, or cloudiness, can indicate sediment or other particulate matter. A noticeable odor can suggest the presence of organic matter or chemicals. Color variations can point to mineral content or other impurities.
Methods for Contaminant Detection
Several methods can be employed to detect specific contaminants in water. A simple visual inspection can reveal obvious impurities. However, for a comprehensive assessment, consider using a water quality testing kit. These kits contain reagents and instructions to test for various contaminants like bacteria, chlorine, and heavy metals. A water testing kit will provide a more thorough and reliable analysis.
Local water authorities or environmental agencies may offer water testing services.
Water Treatment Procedures
Once potential contaminants are identified, appropriate treatment methods can be applied. These methods range from simple filtration to more complex purification processes. A crucial aspect of RV water treatment is the use of filters. Filters remove suspended particles, sediment, and some dissolved contaminants. Water filters are readily available in various forms, including pitcher filters, faucet filters, and RV-specific water filter systems.
Using Water Filters or Purification Tablets
Water filters are essential for removing visible impurities, such as sediment, sand, and rust, which are frequently found in various water sources. Water purification tablets are another viable option, effectively neutralizing harmful bacteria and protozoa. They are typically used in conjunction with filters to provide comprehensive water treatment.Using a combination of filtration and purification tablets is often the most effective approach for ensuring safe and potable water.
Purification tablets offer a powerful way to eliminate potentially harmful microorganisms, while filters address the problem of particulate matter and other visible contaminants. Consider the specific contaminants present in your water source when selecting the appropriate treatment methods.
Maintaining Water Quality
Regular maintenance of your RV’s water system is critical to preserving water quality. Cleaning and maintaining filters is crucial. This helps to prevent the build-up of contaminants and ensure continued effectiveness. Proper storage of water in the RV’s tank can also contribute to water quality. Keeping the tank clean and free of debris helps maintain water quality.
Tank Level Monitoring: How To Fill The Water Tank On An Rv
Accurate monitoring of RV water tank levels is crucial for efficient water usage and preventing potential problems like overflow or running out of water. Proper tank level indicators provide essential information to maintain a healthy water supply during travels and ensure a comfortable stay.Various methods and devices facilitate this monitoring, offering different levels of precision and convenience. Choosing the right method depends on factors like budget, desired level of accuracy, and the overall RV setup.
Understanding how these indicators function and how to interpret the readings is essential for responsible water management.
Types of Tank Level Indicators
Understanding the various types of tank level indicators available is essential for choosing the right one for your RV. Different types offer varying degrees of accuracy and complexity. The choice depends on the specific needs and budget.
- Visual Indicators: These indicators rely on sight to determine the water level. They are typically simple, inexpensive, and easy to install. However, they may not offer the same level of precision as other methods. A common example involves a clear tank with markings indicating the minimum and maximum water levels. This allows a quick visual check of the water level, but it may not be suitable for all situations.
- Float-Type Indicators: These indicators use a float connected to a gauge or a display panel. As the water level changes, the float moves, and the gauge reflects the current level. They offer a relatively accurate reading of the water level. They can be mounted on the tank itself or on the exterior. Float-type indicators are a more reliable option than visual indicators, especially for accurate measurement and avoiding overflow.
- Electronic Sensors: These sensors use electronic components to detect the water level. They typically provide a digital display of the water level and can be integrated with other RV systems. Electronic sensors are known for their high accuracy and reliability. These sensors are also connected to the RV’s electrical system and can provide an automated display of the water level, alerting the user of low water levels or potential overflow.
Using Indicators for Accurate Monitoring, How to fill the water tank on an rv
Correctly interpreting the readings from your chosen indicator is crucial for efficient water usage.
- Regular Checks: Regularly check the water level indicator to ensure the tank is not getting too low or full. This proactive approach helps avoid potential issues.
- Calibration: Ensure that the indicator is properly calibrated to provide accurate readings. If the indicator shows inaccurate readings, it may need recalibration. This often involves adjusting the indicator’s settings to match the tank’s actual capacity.
- Understanding the Scale: Familiarize yourself with the scale on the indicator to understand the different water levels. This ensures that you are aware of the water level in the tank at any given time.
Preventing Overflow and Underfilling
Careful monitoring and proactive measures can prevent both overflow and underfilling. By understanding these common problems, you can avoid issues and maintain a comfortable and safe RV experience.
- Overflow Prevention: When filling the tank, monitor the water level carefully. Stop filling before the maximum level is reached. This prevents spills and potential damage to the RV. Use the indicator to monitor the water level to avoid overflow.
- Underfilling Prevention: Plan your water usage and make note of water consumption patterns. Fill the tank to an appropriate level before starting a trip to ensure adequate water supply. Maintain a regular check to avoid running out of water unexpectedly.
Table of Tank Level Monitoring Devices
The following table Artikels different tank level monitoring devices and their key features.
| Device Type | Features | Pros | Cons |
|---|---|---|---|
| Visual Indicators | Simple, inexpensive, easy to install | Low cost | Less accurate, no alerts |
| Float-Type Indicators | Relatively accurate, visual reading | Good accuracy, visual indication | Potential for float malfunction |
| Electronic Sensors | High accuracy, digital display, alerts | High accuracy, alerts, digital display | Higher cost, potential for electrical issues |
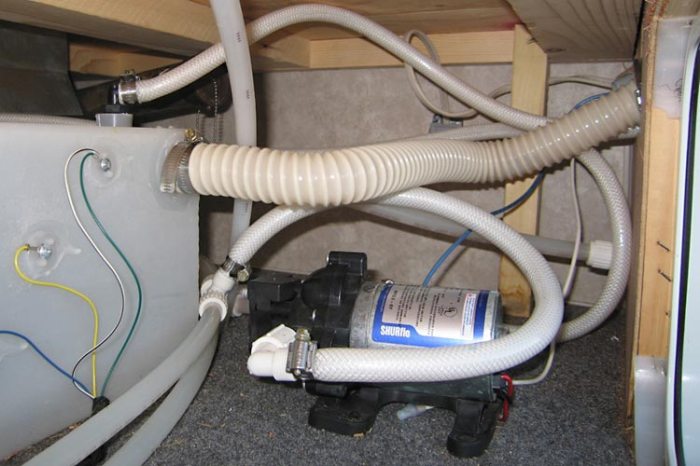
RV Water Tank Maintenance
Proper maintenance of RV water tanks is crucial for ensuring the safety and longevity of your RV’s water system. Regular cleaning and sanitation prevent the growth of bacteria and algae, while leak detection and repair prevent costly water damage. This section will detail the importance of maintaining RV water tanks, including cleaning and sanitizing procedures, leak identification and repair, and the necessary supplies for routine maintenance.
Importance of RV Water Tank Maintenance
Maintaining RV water tanks is essential for several reasons. First, it prevents the growth of harmful bacteria and algae, which can lead to unpleasant tastes and odors in the water, and even health problems. Second, regular maintenance helps to prolong the life of the water system, preventing premature wear and tear on the tank, pipes, and fixtures. Third, proactive maintenance reduces the risk of leaks and water damage, which can be expensive to repair.
Cleaning and Sanitizing Water Tanks
Regular cleaning and sanitizing of RV water tanks are necessary to maintain potable water quality. This process involves removing any accumulated debris, dirt, or mineral deposits and then disinfecting the tank to kill any bacteria or algae. A suitable cleaning solution, such as a mild bleach solution or a commercially available RV tank cleaner, should be used, following the manufacturer’s instructions carefully.
Thorough rinsing is essential to remove all traces of cleaning agents to prevent water contamination.
Identifying and Repairing Leaks or Damage
Regular inspections are vital for early detection of potential water leaks or damage. Inspect the water tank, hoses, and plumbing for any signs of leaks, such as dampness, discoloration, or pooling water. If a leak is found, determine the source of the leak to facilitate repair. Consult a qualified RV technician for complex repairs or those beyond your skill set.
Proper repair methods, such as replacing damaged parts or sealing leaks, are crucial to prevent further water damage and maintain the integrity of the RV’s water system.
Supplies for Routine Water Tank Maintenance
A well-stocked maintenance kit ensures efficient and effective water tank upkeep. The following supplies are recommended for routine maintenance:
- RV-specific cleaning solution (e.g., bleach solution, commercial tank cleaner): These solutions are formulated for use in RV water tanks, helping prevent damage to the tank material and promoting efficient cleaning and disinfection.
- Cleaning brushes and sponges: These tools aid in removing dirt and debris from the tank interior, ensuring a thorough clean.
- Sanitizer (e.g., chlorine bleach): This is essential for disinfecting the tank after cleaning to eliminate harmful bacteria and algae.
- Leak detection tools (e.g., moisture meters, pressure testing equipment): These tools assist in locating leaks and damage, allowing for timely repair.
- Repair materials (e.g., sealant, pipe repair kits): These materials are needed for addressing leaks and damage to the tank or plumbing system.
- Gloves and safety glasses: These are essential for protecting your hands and eyes during the cleaning and repair processes.
Different RV Types and Filling Considerations

Filling an RV water tank involves specific procedures depending on the RV’s type and design. Understanding these differences is crucial for ensuring efficient and safe water tank replenishment. Different RV classes have varying tank sizes, access points, and plumbing configurations, necessitating tailored approaches to filling.
Class A RVs
Class A RVs, often resembling large motorhomes, typically feature large water tanks. These tanks are usually positioned within the chassis or in compartments below the main living area. Access to these tanks may require maneuvering around the interior of the vehicle. Filling procedures often involve using exterior hose connections, and the water hookup typically aligns with standard RV standards.
Class B RVs
Class B RVs, characterized by their compact design, have smaller water tanks compared to Class A RVs. Accessibility to the tanks may be limited due to the smaller footprint. Filling is usually performed through an exterior connection, and the water hookup system generally conforms to standard RV specifications.
Class C RVs
Class C RVs present a middle ground between Class A and Class B RVs in terms of size and tank capacity. Water tank placement often varies, but access is typically more straightforward than in Class A RVs. Exterior hose connections and standard RV water hookups are common.
Tank Sizes and Filling Methods
The size of the water tank directly influences the filling process. Larger tanks require more time to fill, and proper water intake methods need to be selected based on the capacity. A methodical approach to filling is recommended, ensuring that the tank is not overfilled.
Comparison Table
| RV Type | Typical Tank Size (gallons) | Filling Method | Accessibility Considerations |
|---|---|---|---|
| Class A | 100-200+ | Exterior hose connection, potential for interior access | May require maneuvering within the vehicle for tank access |
| Class B | 30-80 | Exterior hose connection | Limited access due to the compact design |
| Class C | 50-150 | Exterior hose connection, potential for interior access | More accessible than Class A, less accessible than Class B |
Water Conservation Tips
Responsible water usage is crucial for both environmental sustainability and personal financial well-being during RV trips. Conserving water minimizes strain on local water resources and reduces the cost associated with refilling your RV’s water tanks. Proper planning and mindful practices can significantly impact your water footprint.
Strategies for Efficient Water Use
Efficient water usage encompasses a wide range of practices, from careful planning to the implementation of specific techniques. These strategies allow for a more sustainable and economical approach to water use while RVing.
- Pre-Trip Planning and Water Budgeting: Before embarking on your RV journey, assess the length of your trip and the potential water sources available. Estimate your daily water needs based on the number of occupants, planned activities, and the expected weather conditions. This pre-trip planning will allow for better management of water usage during the trip. For example, if you anticipate spending several days in a location with limited water access, adjust your plans to minimize water consumption, such as choosing locations with water hookups or carrying a larger supply of water.
- Efficient Showering and Handwashing: Reduce shower time and use low-flow showerheads. Implement water-saving techniques like taking shorter showers, using a bucket for handwashing, and ensuring faucets are properly shut off. Employing low-flow showerheads can drastically reduce water consumption. For instance, a low-flow showerhead can save several gallons of water per shower.
- Minimizing Water Use in the Kitchen: Use a water-efficient dishwasher and only run it when full. Choose water-saving appliances for the kitchen and use them accordingly. For example, using a water-efficient dishwasher will minimize water consumption, while handwashing dishes when necessary can save water and electricity.
- Water-Wise Sanitation Practices: Utilize water-efficient toilets and dispose of waste responsibly. Ensure the toilet is properly maintained to prevent leaks and ensure proper functioning. For instance, regular checks on toilet systems will prevent leaks, saving water and money.
Eco-Friendly Water Practices
Implementing eco-friendly water practices contributes to a more sustainable approach to RVing. These practices are essential for minimizing the environmental impact of water use.
- Utilizing Greywater Systems: If your RV is equipped with a greywater system, use it to water plants or other non-potable applications. This recycling process reduces the amount of water used for non-potable activities. Greywater systems effectively reuse wastewater for landscaping or other non-potable purposes.
- Choosing Water-Efficient Appliances: Select water-efficient appliances, including showerheads, faucets, and toilets. Installing water-efficient appliances significantly reduces water usage. Modern models are engineered to conserve water without sacrificing performance.
- Rainwater Collection: If possible, collect rainwater for non-potable uses, such as watering plants or cleaning. Collecting rainwater offers a sustainable way to reduce water consumption. Many RVs have designated areas for collecting rainwater, reducing reliance on municipal water.
- Responsible Water Waste Disposal: Avoid dumping wastewater into waterways or natural areas. Follow local regulations and dispose of wastewater properly. Proper disposal methods minimize environmental contamination and promote responsible water management.
Water Conservation During Specific Activities
Conserving water is crucial during various RV activities. Different activities have specific requirements and methods for conserving water.
- Camping Activities: Plan outdoor activities that minimize water use. For instance, consider using water-saving techniques while washing dishes, showering, or doing laundry.
- Boating and Water Sports: When participating in boating or water sports, prioritize responsible water usage. This means avoiding excessive water use for activities like rinsing or cleaning equipment.
- Maintenance Tasks: Maintain water-efficient practices during RV maintenance tasks. For instance, perform maintenance on water-related systems to prevent leaks.
Outcome Summary
Mastering the art of filling your RV water tank is a vital skill for any RV enthusiast. By following the steps Artikeld in this guide, you’ll not only ensure a smooth and worry-free trip but also maintain the longevity and optimal performance of your RV water system. Proper maintenance, including cleaning and sanitizing your water tank, is essential for preserving water quality and preventing issues down the line.
Remember to prioritize safety and use the correct equipment throughout the process.
Top FAQs
How do I know if my RV water tank is full?
Many RVs have visible tank level indicators, such as gauges or float-type indicators. Refer to your RV’s owner’s manual for specific instructions on interpreting these indicators.
What kind of hose should I use for filling the RV water tank?
Use a clean, potable-water-rated hose specifically designed for RV water filling. Ensure it’s properly connected to your RV’s water intake.
What if there’s a leak while filling my RV water tank?
Immediately stop filling the tank and identify the source of the leak. If possible, shut off the water supply and contact a qualified RV technician for repair.
What if the water pressure is too low during filling?
Check the water source connection and ensure there are no blockages in the supply line. A low water pressure could be due to a restriction in the supply line or a malfunction in the RV’s water system. Consult the RV’s owner’s manual for troubleshooting.