

How to cut aluminum gutters effectively is crucial for DIY gutter installations. Understanding the different types of aluminum gutters, the essential tools, and precise measuring techniques is paramount for a successful project. This guide delves into the various methods for cutting aluminum gutters, from using shears to snips and saws, highlighting safety precautions and troubleshooting common mistakes.
Proper gutter installation prevents water damage to your home. Knowing how to cut aluminum gutters accurately ensures a seamless and watertight system, extending the lifespan of your gutters and protecting your property from costly repairs.
Introduction to Aluminum Gutter Cutting
Properly cutting aluminum gutters is a crucial skill for any DIY homeowner undertaking gutter replacement or repair projects. Accurate cuts ensure water drainage and prevent damage to the home’s exterior. A thorough understanding of the different types of aluminum gutters, the necessary tools, and the associated safety precautions is essential for a successful and safe project.Aluminum gutters come in various profiles and thicknesses, each designed for specific applications.
The selection of the appropriate gutter type is critical for efficient water management and structural integrity. Common characteristics include the gutter’s width, depth, and material gauge, influencing the gutter’s load-bearing capacity and overall durability. Knowing these factors allows for appropriate selection based on roofline characteristics and anticipated water flow.
Types of Aluminum Gutters
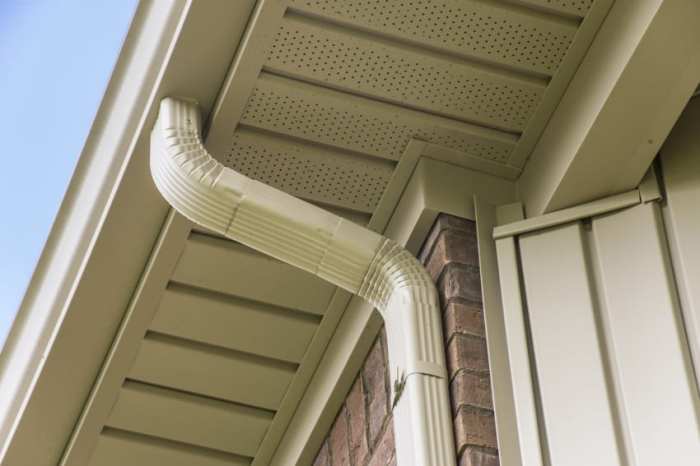
Aluminum gutters are categorized by their profile and material gauge. Standard types include K-style, half-round, and box gutters. K-style gutters are commonly used for their ability to handle significant water volumes. Half-round gutters are favored for their aesthetic appeal and are well-suited for homes with a traditional architectural style. Box gutters offer a robust structure and are often preferred for homes with steep roofs.
The material gauge, or thickness, affects the gutter’s durability and ability to withstand potential stress. A higher gauge indicates greater strength.
Tools for Cutting Aluminum Gutters
Several tools are essential for accurately and safely cutting aluminum gutters. These tools vary in functionality and should be selected based on the specific requirements of the project. Proper safety measures are paramount when using any cutting tool.
- Utility Knife: A utility knife, equipped with a sharp blade, is suitable for making initial cuts or trimming excess material. Safety precautions include using a non-slip surface and ensuring the blade is sharp to minimize the risk of slippage or accidental cuts. Utility knives are generally affordable.
- Metal Snips: Metal snips are designed for precise cuts in aluminum gutters. Their functionality depends on the specific type of snips used, and their maneuverability. These tools can be expensive depending on the quality and type of metal snips chosen. Eye protection and proper hand placement are essential safety precautions.
- Aluminum Shears: Aluminum shears are specialized tools designed for cutting aluminum. These shears are capable of making clean, precise cuts, reducing the likelihood of damage to the gutter. These tools are generally moderately priced.
- Jig Saw: A jig saw is useful for making intricate cuts or curves in aluminum gutters. Accuracy is paramount when using a jig saw. Safety measures include wearing appropriate eye protection and ensuring the blade is correctly positioned and secure. The cost of a jig saw can vary depending on the type and brand.
Tools for Aluminum Gutter Cutting: A Summary
| Tool | Purpose | Safety Precautions | Cost Estimate (USD) |
|---|---|---|---|
| Utility Knife | Initial cuts, trimming | Sharp blade, non-slip surface | $10-$25 |
| Metal Snips | Precise cuts in aluminum | Eye protection, proper hand placement | $20-$75 |
| Aluminum Shears | Clean, precise cuts in aluminum | Eye protection, proper grip | $30-$100 |
| Jig Saw | Intricate cuts, curves | Eye protection, secure blade | $25-$150 |
Essential Tools and Safety Precautions
Properly cutting aluminum gutters requires the appropriate tools and adherence to stringent safety protocols. Neglecting these elements can lead to significant risks, ranging from minor injuries to serious accidents. Careful selection of cutting tools and meticulous safety measures are paramount to ensure a safe and efficient cutting process.
Types of Shears and Snips
Aluminum gutters, with their relatively soft yet durable nature, are well-suited for various cutting tools. The selection of the appropriate tool depends on the desired cut precision, the amount of material to be cut, and the user’s experience level. Different shears and snips offer distinct advantages and disadvantages.
- Aviation Snips: These specialized snips, often featuring a robust design and sharp blades, are ideal for intricate cuts and precise trimming. Their strength and durability make them suitable for heavier-duty applications. However, their cost can be a factor, and their use might not be necessary for simple gutter cuts.
- Heavy-Duty Snips: These snips are specifically designed for thicker materials and more substantial cuts. They excel at handling heavier-gauge aluminum, but may lack the precision of aviation snips.
- Utility Snips: These are versatile tools capable of handling a wide array of cutting tasks, including aluminum gutters. They are generally more affordable than specialized snips, but might not provide the same level of precision for complex cuts. Their durability can vary based on the manufacturer.
Safety Equipment
Prioritizing safety is crucial when working with aluminum gutters. Proper protective gear minimizes the risk of injuries.
- Gloves: Wear heavy-duty work gloves to protect hands from sharp edges and potential nicks or cuts. Leather or reinforced nitrile gloves are suitable choices.
- Eye Protection: Safety glasses or goggles are essential to shield the eyes from flying debris, metal shavings, or other particles generated during the cutting process. This is particularly important for more aggressive cutting methods.
- Work Attire: Wear sturdy work clothes and shoes to minimize the risk of cuts or abrasions. Avoid loose clothing that might get caught in the tools.
Importance of Ventilation
The cutting of aluminum gutters often generates metal dust and fumes. Proper ventilation is essential to mitigate the inhalation of these potentially harmful substances.
- Open windows and doors, if possible, to allow air circulation and facilitate the dispersion of airborne particles. If working indoors, consider using a local exhaust ventilation system (LEV) to remove dust and fumes directly at the source. This method significantly reduces the risk of inhalation.
- Work in a well-ventilated area. If outdoor work, choose a location with good air flow. If working in a confined space, a portable exhaust fan can be used to improve airflow and dispersion.
Cutting Tool Comparison Table
The following table summarizes different cutting tools, their characteristics, safety considerations, and maintenance requirements.
| Cutting Tool | Description | Safety Tips | Maintenance |
|---|---|---|---|
| Aviation Snips | Precision-designed snips for intricate cuts on aluminum. | Ensure proper grip and eye protection. Use in well-ventilated areas. | Regularly check blade sharpness and alignment. Store in a safe location. |
| Heavy-Duty Snips | Robust snips for thicker aluminum. | Wear gloves, safety glasses, and sturdy footwear. Avoid rapid cutting motions. | Sharpen blades as needed. Store in a dry, cool environment. |
| Utility Snips | Versatile snips suitable for various cutting tasks. | Be cautious about blade strength for thick materials. Maintain a secure grip. | Check blade condition frequently. Store properly after use. |
| Heavy-Duty Shears | Shears designed for stronger cutting action. | Ensure secure footing and a stable work surface. Use with caution on intricate bends. | Check blade alignment and lubrication. Keep blades clean and oiled. |
Measuring and Marking Techniques
Accurate measurement and precise marking are fundamental to achieving a seamless and durable aluminum gutter installation. Inaccurate measurements can lead to costly rework, compromised water drainage, and a compromised aesthetic appeal. Careful attention to detail during these stages is crucial for a successful project.Thorough measurement and marking procedures are essential for ensuring the proper length and placement of aluminum gutter sections.
This meticulous process guarantees a watertight system, preventing leaks and ensuring the longevity of the gutter installation. Properly marking the cut lines allows for clean, precise cuts, minimizing material waste and maximizing the efficiency of the installation process.
Measuring the Required Length
Accurate measurement of aluminum gutter sections is critical for a successful installation. A consistent approach is vital to ensure proper fit and avoid costly errors. Employing appropriate tools and adhering to standardized procedures is critical.
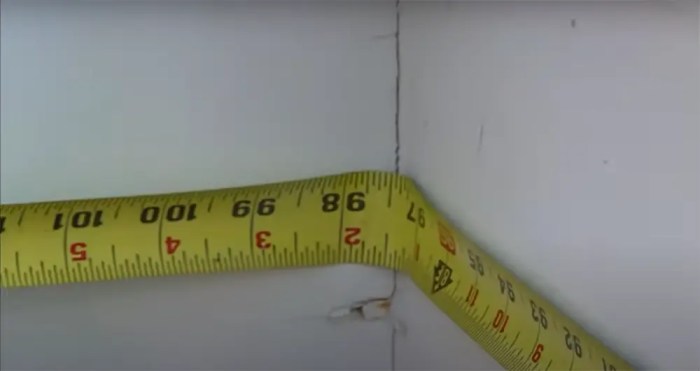
- Use a measuring tape or a retractable steel tape to determine the exact length of each gutter section. Ensure the tape is placed straight along the length of the run to obtain an accurate measurement.
- When measuring curved sections, carefully measure along the outer curve, ensuring the measurement accurately reflects the actual length required for that segment.
- Take multiple measurements, especially for longer runs, to verify accuracy. This minimizes potential errors caused by inaccurate readings.
Marking Methods for Precise Cuts
Several methods can be used for marking the cut lines on the aluminum gutter sections. The choice of method depends on the complexity of the cut and the desired level of precision.
- A chalk line is an effective tool for marking straight lines. This method is particularly suitable for simple linear cuts. A taut chalk line is drawn along the marked length.
- A permanent marker, such as a fine-tip marker or a specialized aluminum marker, can be used for marking precise cut lines. This method is suitable for various situations, including marking curved lines or more complex shapes.
- A template, a pre-cut pattern, or a carefully drawn diagram can be used for complex cuts. This approach provides a reference point for the precise location of cuts. Templates offer accuracy for repetitive cuts.
Significance of Accurate Measurements
Precise measurements are paramount for achieving a seamless and watertight gutter installation. Inaccurate measurements lead to improper fitting, potential leaks, and an aesthetically unappealing result.
Accurate measurements directly translate to a watertight and durable gutter system, ensuring the effective drainage of rainwater.
Measuring Tools and Techniques
The following table illustrates various measuring tools, techniques, accuracy tips, and potential errors to avoid when cutting aluminum gutters.
| Measuring Tool | Technique | Accuracy Tips | Potential Errors to Avoid |
|---|---|---|---|
| Measuring Tape | Measure along the gutter run, ensuring a straight line. | Double-check measurements, especially for long sections. | Incorrect placement of the tape, inaccurate reading of the tape. |
| Chalk Line | Stretch the line taut and mark the cut line. | Ensure the line is parallel to the desired cut. | Dragging the line, uneven pressure when marking. |
| Permanent Marker | Mark the cut line directly on the aluminum. | Use a fine-tip marker for precision. | Uneven pressure when marking, smudging the mark. |
| Template | Trace the template onto the gutter section. | Ensure the template is properly aligned. | Incorrect alignment of the template, improper tracing. |
Cutting Aluminum Gutters with Shears
Precisely cutting aluminum gutters with shears demands meticulous technique and attention to detail. Improper handling can lead to material damage, compromising the gutter’s structural integrity and aesthetic appeal. The following sections Artikel the procedure for using shears, emphasizing consistent pressure and preventing damage.
Procedure for Using Shears
Effective gutter cutting with shears necessitates a methodical approach. Begin by securely positioning the gutter section on a stable surface. This prevents slippage and ensures a clean cut. The next step involves carefully aligning the cutting edge of the shears with the marked line on the gutter. Subsequent steps involve controlled and even pressure application during the cutting motion.
Importance of Consistent Pressure and Steady Cutting
Maintaining consistent pressure throughout the cutting process is paramount. Uneven pressure can lead to an uneven or jagged cut, compromising the integrity of the gutter and potentially jeopardizing its water channeling ability. Furthermore, a steady cutting motion, avoiding jerky movements, is crucial for a clean and precise cut. Jerky movements can cause the shears to slip, potentially damaging the gutter material.
This controlled pressure and motion contribute to a clean and durable cut.
Preventing Damage to Gutter Material
Several factors influence preventing gutter material damage during cutting. Firstly, sharp, well-maintained shears are essential. Blunt shears can exert excessive force, leading to undesirable deformation of the gutter material. Secondly, maintaining a steady cutting motion is critical. Jerky movements and inconsistent pressure can create uneven cuts and stress points within the aluminum.
Lastly, the surface upon which the gutter rests should be stable. An unstable surface can lead to slippage and damage during the cutting process.
Cutting Process Steps
| Step | Tools Used | Precautions | Potential Challenges |
|---|---|---|---|
| 1. Preparation | Gutters, shears, measuring tape, marking pen | Ensure a stable work surface. Inspect shears for sharpness. Verify the marking accuracy. | Work surface instability, dull shears, imprecise markings. |
| 2. Alignment | Shears | Align the shears precisely along the marked line. Avoid misalignment. | Misalignment of the cutting edge with the marked line. |
| 3. Cutting | Shears | Apply consistent pressure throughout the cut. Maintain a steady cutting motion. Avoid jerky movements. | Uneven pressure, jerky motions, inadequate blade sharpness. |
| 4. Inspection | Shears, eye | Inspect the cut for any irregularities or damage. Check for clean and straight lines. | Jagged or uneven cuts, material deformation. |
Cutting Aluminum Gutters with Snips

Snips, a type of hand-cutting tool, offer a viable alternative to shears for cutting aluminum gutters, particularly for smaller-scale projects or when precision cuts are required. Their portability and maneuverability make them suitable for intricate work and tight spaces. However, the suitability of snips for larger gutter sections and the potential impact on cut quality need careful consideration.Employing snips for aluminum gutter cutting necessitates a precise approach, with techniques varying based on the gutter’s size and material thickness.
This section details the proper use of snips, highlighting advantages and disadvantages relative to shears, and emphasizes the methods for achieving clean and accurate cuts.
Snip Cutting Techniques for Aluminum Gutters
Proper technique is crucial for achieving clean cuts with snips. Begin by securely holding the gutter in a stable position, ensuring it does not move during the cutting process. Positioning the snips at the desired cut point, apply firm, even pressure. Avoid jerking or applying excessive force, as this can lead to uneven cuts or damage to the gutter material.
For intricate bends or curves, carefully adjust the snips to maintain consistent pressure and avoid slippage. This approach ensures the cut edges are smooth and free of burrs or imperfections. This is particularly important for gutters requiring seamless transitions or connections.
Advantages and Disadvantages of Using Snips, How to cut aluminum gutters
Snips, while effective for specific applications, have distinct advantages and disadvantages compared to shears. Their smaller size and portability make them ideal for tight spaces and intricate cuts. They are often less expensive than shears, making them a more economical choice for smaller projects. However, snips may not be as effective for larger gutter sections or for cuts requiring greater force.
Their design also often limits the cutting capacity compared to shears.
Achieving Clean and Precise Cuts with Snips
Precise cutting with snips requires meticulous attention to detail. Sharp snips are crucial for clean cuts. Regular maintenance and sharpening are essential for optimal performance. Maintaining a steady hand and applying even pressure is paramount to avoid damaging the gutter material. Carefully aligning the snips along the cutting line before applying pressure ensures a clean and accurate cut.
This process, coupled with the correct application of force, helps to minimize the risk of warping or tearing the aluminum.
Comparison of Snips and Shears
| Feature | Snips | Shears | Applications | Strengths | Weaknesses |
|---|---|---|---|---|---|
| Size | Smaller, portable | Larger, less portable | Tight spaces, intricate cuts | Precise cuts, maneuverable | Limited cutting capacity |
| Cost | Generally lower | Generally higher | Larger sections, greater force required | High cutting capacity, powerful | Less precise, less maneuverable |
| Cutting Capacity | Lower | Higher | Straight cuts | Suitable for various gutter types | Not ideal for intricate shapes |
| Maneuverability | Higher | Lower | Curves and bends | Efficient for detailed cuts | May not be suitable for large sections |
Cutting Aluminum Gutters with a Saw
Employing a saw for aluminum gutter cutting necessitates careful consideration of the tool’s type and application. Selecting the right saw, coupled with precise cutting techniques, ensures a clean, straight, and durable cut, critical for the gutter’s longevity and proper water drainage. Safety precautions are paramount when working with power tools, particularly saws, to prevent injury and maintain a safe workspace.
Saw Selection for Aluminum Gutters
Choosing the appropriate saw type is crucial for efficient and accurate gutter cutting. Hand saws, specifically, are effective for smaller projects or sections. Reciprocating saws, on the other hand, are well-suited for longer or more complex cuts, offering greater precision and speed. Power saws, while providing the highest speed and efficiency, should be used with caution and expertise.
A handsaw, with its precision, is often the preferred choice for achieving a clean, straight cut.
Cutting Techniques with a Saw
Precise and controlled cutting procedures are fundamental to achieving a straight and accurate cut. This involves proper support of the gutter material to avoid bending or warping during the cutting process. A stable work surface is critical, allowing for secure placement and minimizing the risk of accidents. Using a straightedge or marking gauge for accurate alignment and transferring marks is essential.
Sharp saw blades are crucial for clean cuts. Dull blades will cause excessive pressure and potentially damage the gutter material.
Safety Precautions and Support
Maintaining a safe working environment is paramount when using saws for gutter cutting. Ensuring proper support for the aluminum gutter is crucial to prevent material distortion or breakage. A sturdy workbench or stable surface is essential. Use of safety glasses and gloves is highly recommended to protect against flying debris and potential cuts. Always check the saw’s blade for sharpness before use.
A dull blade can cause slippage and potential accidents. Avoid using excessive force.
Cutting with a Handsaw
- Marking: Accurately mark the cutting line on the gutter using a straightedge and marking gauge. This ensures precision and prevents errors in the cut.
- Support: Place the gutter on a stable surface, such as a workbench, and firmly hold it with one hand to prevent it from shifting. A helper may be needed for longer lengths of gutter.
- Cutting: Position the saw blade along the marked line, applying even pressure. Avoid jerking the saw, which can lead to an uneven cut. Maintain a steady sawing motion, cutting through the aluminum in a controlled manner.
- Finishing: Once the cut is complete, inspect the edge for any irregularities. If needed, use a file or sandpaper to smooth out any rough edges.
Cutting with a Reciprocating Saw
- Marking: Precisely mark the cutting line on the gutter using a straightedge and marking gauge.
- Support: Securely fasten the gutter to a sturdy work surface to prevent shifting or bending during the cutting process.
- Cutting: Position the saw blade along the marked line, using controlled forward and backward strokes. Avoid excessive pressure or rapid movements. Maintain a steady pace for an accurate cut.
- Finishing: After the cut, inspect the edge for any imperfections. If necessary, use a file or sandpaper to smooth out any irregularities and achieve a clean finish.
Table of Saw Types for Aluminum Gutter Cutting
| Saw Type | Steps in the Process | Safety Measures | Tips for Clean Cuts |
|---|---|---|---|
| Handsaw | Marking, Support, Cutting, Finishing | Wear safety glasses, gloves; ensure secure support; use sharp blade | Steady pressure, controlled sawing motion; avoid jerking the saw |
| Reciprocating Saw | Marking, Support, Cutting, Finishing | Wear safety glasses, gloves; secure work surface; check blade sharpness | Controlled strokes, avoid excessive pressure; inspect the cut for precision |
| Power Saw (e.g., Circular Saw) | Marking, Support, Cutting, Finishing | Use appropriate safety gear; secure work surface; ensure proper blade for aluminum | Slow and controlled cuts; maintain consistent pressure; use appropriate blade for aluminum |
| Utility Saw (e.g., Hacksaw) | Marking, Support, Cutting, Finishing | Wear safety glasses, gloves; secure work surface; use appropriate blade | Steady cuts, avoid excessive pressure; inspect cut for precision; use appropriate blade for aluminum |
Finishing and Preparation for Installation: How To Cut Aluminum Gutters

Proper finishing of cut edges is crucial for the longevity and aesthetic appeal of aluminum gutters. This step ensures a smooth, seamless installation, minimizing the risk of leaks and water damage. Thorough preparation protects the aluminum’s surface and allows for a strong, durable connection between sections.
Edge Preparation Techniques
Effective preparation of cut edges involves meticulous cleaning and deburring to ensure a professional installation. This process enhances the gutter’s structural integrity and aesthetic appeal. The removal of burrs and sharp edges significantly reduces the risk of damage during installation and over time.
Cleaning the Cut Edges
Prior to any finishing, the cut edges must be thoroughly cleaned. This step removes any debris, dust, or contaminants that may interfere with the bonding process or compromise the aluminum’s surface. Use a clean cloth or brush, and a mild detergent solution (or soap and water) for cleaning. Rinse thoroughly to remove all traces of cleaning solution.
This meticulous preparation is critical for achieving a high-quality installation.
Deburring the Cut Edges
Deburring is essential to eliminate sharp edges and burrs that can cause material damage and potential leaks. Sharp edges can damage the sealant, making the joint vulnerable to water penetration. Deburring smooths the edges, ensuring a secure and seamless installation. Employ appropriate tools for this crucial step, like files or specialized deburring tools. A smooth, even edge minimizes the risk of water damage.
Finishing Methods for Cut Edges
Various methods exist for achieving a professional finish on cut edges. Selection depends on the desired level of smoothness and the specific project requirements. A proper selection of methods ensures a secure and aesthetically pleasing installation.
| Finishing Method | Description | Pros | Application Tips |
|---|---|---|---|
| Filing | Using a file to smooth and refine the cut edge. | Effective for removing burrs and creating a clean edge. Provides precise control over the final shape. | Select a file appropriate for the aluminum’s thickness. Work in short, controlled strokes to avoid damage. |
| Sandpapering | Using progressively finer grit sandpaper to create a smooth and polished edge. | Provides a smooth, polished finish. Sandpaper is readily available and relatively inexpensive. | Start with a coarser grit and progressively move to finer grits for a superior finish. Use a sanding block for even pressure and control. |
| Specialized Deburring Tools | Employing specialized tools designed to remove burrs and create a clean edge. | Fast and efficient for removing burrs. Often offer greater precision than files or sandpaper. | Choose the appropriate tool based on the aluminum thickness. Follow manufacturer instructions carefully for optimal use. |
| Chemical Etching | Using a chemical etchant to remove sharp edges and create a smooth surface. | Provides a very smooth finish, suitable for critical applications. | Always use appropriate safety precautions when handling chemicals. Follow manufacturer instructions meticulously for optimal results. |
Troubleshooting and Common Mistakes
Proper gutter installation is critical for effective rainwater management. Inadequate cutting techniques can lead to leaks, water damage, and premature gutter failure. Understanding common mistakes and their solutions is essential for achieving a durable and functional system.Careful attention to detail during the cutting process is paramount. Mistakes, if not addressed promptly, can result in significant downstream issues.
Preventive measures and prompt corrective actions are crucial for maintaining the integrity and longevity of the gutter system.
Identifying Common Cutting Errors
Improper cutting techniques are a frequent source of issues in aluminum gutter installation. A meticulous approach to measurement and execution is vital. Recognizing the potential pitfalls allows for proactive solutions and avoids costly repairs.
Uneven or Jagged Cuts
Uneven or jagged cuts are often indicative of improper use of cutting tools or insufficient blade sharpness. These imperfections can compromise the structural integrity of the gutter, potentially leading to leaks or water pooling. The resulting unevenness may also hinder proper installation, creating difficulties during the fastening and joining processes.
Incorrect Measurements and Marking
Inaccurate measurements or imprecise marking can lead to misaligned cuts. This can result in gutters that don’t fit correctly, which can then compromise water runoff and potentially lead to water damage.
Tool Malfunction or Damage
Blunt or damaged cutting tools can cause uneven cuts. A dull blade, for example, requires greater force to cut through the aluminum, potentially leading to an inconsistent and uneven cut. This can also result in a greater risk of user injury.
Table of Common Mistakes, Causes, Solutions, and Preventative Measures
| Common Mistake | Cause | Solution | Preventative Measure |
|---|---|---|---|
| Uneven or Jagged Cuts | Dull or damaged cutting tools, improper cutting technique, inconsistent pressure application. | Sharpen or replace cutting tools. Ensure consistent pressure and technique throughout the cut. Use a straight edge and/or a guide for accuracy. | Regularly maintain and sharpen cutting tools. Follow a consistent and precise cutting technique. Use a guide to ensure straight cuts. |
| Incorrect Measurements and Marking | Inaccurate measurements, improper marking techniques, misalignment of measuring tools. | Double-check measurements. Use a measuring tape and ensure the marks are clear and accurate. Employ a straight edge to verify alignment. | Double-check measurements before cutting. Use a straight edge to verify accuracy. Employ a marking tool that provides precise markings. |
| Tool Malfunction or Damage | Blunt blades, damaged cutting tools, improper tool usage. | Sharpen or replace dull blades. Inspect tools for damage and repair or replace as necessary. Use tools appropriately. | Regularly inspect tools for wear and tear. Store tools properly to prevent damage. Follow proper tool usage guidelines. |
| Insufficient Support for Aluminum Gutters | Attempting to cut a section of gutter that is unsupported. | Ensure the section of gutter being cut is adequately supported to prevent warping or bending during the cutting process. Use clamps or other appropriate support devices to prevent warping. | Support the section of aluminum gutter being cut with clamps or other appropriate support devices during the cutting process. |
Last Recap
In conclusion, mastering the art of cutting aluminum gutters empowers homeowners with the ability to install a durable and functional gutter system. By understanding the various tools, techniques, and safety precautions, you can confidently tackle this DIY project. This comprehensive guide equips you with the knowledge to achieve precise cuts and a seamless gutter installation.
Quick FAQs
What are the common mistakes when cutting aluminum gutters?
Common mistakes include using improper tools for the job, not measuring accurately, and not taking necessary safety precautions. These can result in uneven or jagged cuts, compromising the integrity of the gutter system.
What types of shears are best for cutting aluminum gutters?
For aluminum gutters, aviation snips or tin snips are generally recommended. These tools are specifically designed for metal cutting and offer better precision than other types of shears.
How can I prevent damaging the gutter material while cutting?
Use the appropriate cutting tools for the job. Apply consistent pressure and maintain a steady cutting motion. Avoid excessive force, which can cause the gutter material to bend or distort. Always use proper support and alignment when using a saw.
What safety equipment should I wear when cutting aluminum gutters?
Safety glasses or goggles are essential to protect your eyes from flying debris. Wear work gloves to protect your hands from cuts and abrasions. Use sturdy work attire to prevent cuts and injuries. Proper ventilation is also important to prevent inhalation of harmful fumes.